
Loyalty - Setup in Loyalty
To be able to start using the Loyalty program within Selligent, an integration needs to be set up in Loyalty.
Note: In-depth documentation on the Loyalty module and all of its capabilities can be found here.
Prerequisites
Before accessing Loyalty, please make sure the following prerequisites are done in Selligent:
- You need to have the proper permission to access Loyalty. Depending on the type of login you are using, this permission is defined as following:
- Using Zeta Login, the permission to access this application is set in Zeta Login
- Using the Selligent login- the permission is set in the Admin Configuration section of Selligent by Zeta.
-
Also, an API Service Account needs to exist that is able to trigger the correct API call.
The Selligent setup is explained here.
Launch Loyalty
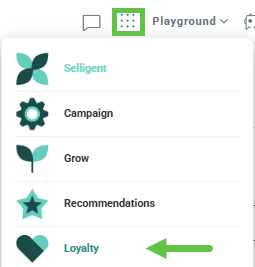
1. Launch the Loyalty module.
2. You'll need to log in with your Loyalty credentials.
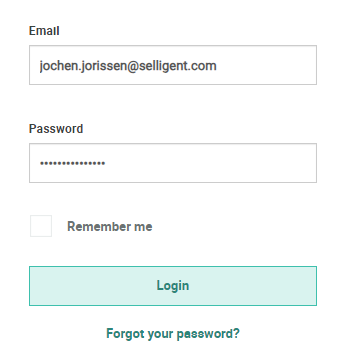
Note: If you don't have Loyalty credentials yet, please get in touch with your Zeta contact.
Add a Loyalty connector
Once you are logged in to Loyalty, you need to add a Selligent connector.
Details on what a connector is are available in the Getting started with connectors article.
Details on the Selligent connector specifically are available in the article: Connection Profile Configuration - Selligent.
Note: This connector only needs to be configured once per profile, and can be used for all action triggers and scheduled jobs. For different Selligent Business units, different connector setups are required (one connection profile contains a link to only one single Business unit).
Create a Loyalty triggered action
Once a connector exists for the integration between Loyalty and Selligent, an action trigger can be created to map Loyalty with Selligent fields, and to be able to trigger the transactional Selligent API.
Details on triggered actions in Loyalty are available in the article: Getting started with triggered actions.
Detailed steps on how to create a triggered action for Selligent are available in the article: Triggered Action Type - Send Message via Selligent
Note: The usage of the action that triggers the Selligent transactional API call is explained here.
Using the Loyalty triggered action (event-based)
To start using the Loyalty triggered action :
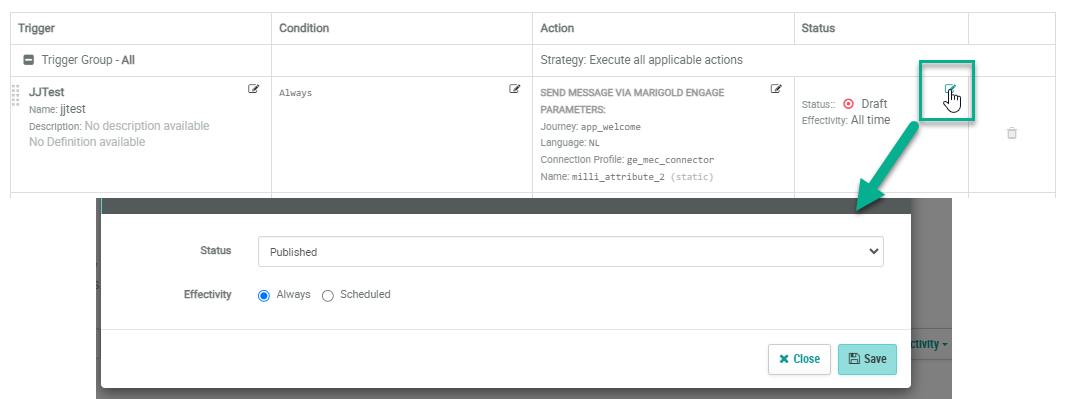
- Publish the Triggered action : Update the status from Draft to Published.
- The effectivity is by default set to Always.
- Click Save.
Note: More info on status and effectivity can be found here.
Examples of triggered actions (event-based triggers) are sending messages when new members join, when they earn rewards, etc.
Loyalty scheduled job (date-based)
Scheduled jobs are a great way for marketers to pre-schedule and execute actions that don't trigger a change in the system, such as sending birthday messages, notifications of expiring offers, etc.
Note: Triggered Actions and Scheduled Jobs differ in how and when they run:
Triggered Actions are event-based — they start automatically and immediately when a specific activity occurs in the program.
Scheduled Jobs are time-based — they run only at a predefined date and time, regardless of other activities.
Basic information on scheduled jobs is available in the article: Getting started with scheduled jobs.
Currently, only the action types Grant Anniversary and Send Expiry Notifier allow Selligent by Zeta to send messages.
Detailed steps for these 2 action types are available in the following articles:
Examples of setting up Scheduled Jobs in Loyalty: 
Creating Grant Anniversary Scheduled Jobs
Creating Send Expiry Notifier Scheduled Jobs
Ready for action
After setting up the Loyalty triggered action(s) and/or scheduled job(s), you can start using the Loyalty program in Selligent by Zeta.
 Related Topics