
Setting up the Google Customer Match Integration
Important: From April 1 2026, the Google Customer Match via the Google Ads API is being phased out.
Existing adopters may continue using it as long as they make at least one request within a 180-day period. If no requests are made for 180 days, access to the Google Ads API will be revoked, and those adopters will be required to switch to the Google Data Manager API.
When configuring the Channel Endpoint in Selligent, users can select which API type to use. 
As the Google Ads API currently handles all requests for existing Google Customer Match integrations in Selligent, for those the API still remains as is to avoid any disruptions.
However, the drop-down above is a temporary option, that will be removed in the future when all configurations are updated to the Google Data Manager API usage.
Clients are therefore strongly encouraged to update their configurations to the Google Data Manager API as soon as possible. The deprecated Google Ads API will no longer receive updates from Google, and although no final shutdown date has been announced yet, it will eventually be fully discontinued.
Introduction
Configure the plugin
Google authentication setup
1. Contact Selligent Support to request access to the Google Authentication web application. Support will provide a username and password.
Note: More info on the Support team and portal can be found here.
2. Navigate to https://googleauth.slgnt.eu (if you're in the EU) or https://googleauth.slgnt.us (if you're in the US), and log in with the provided username and password.
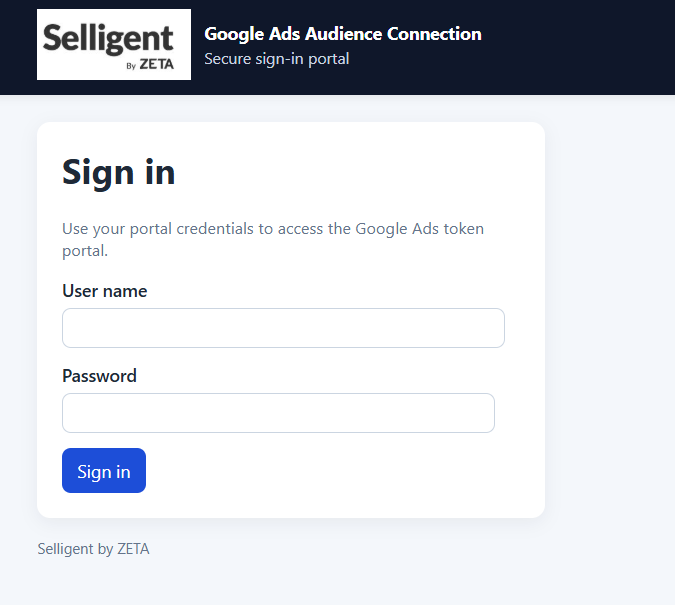
3. Click Sign in with Google.
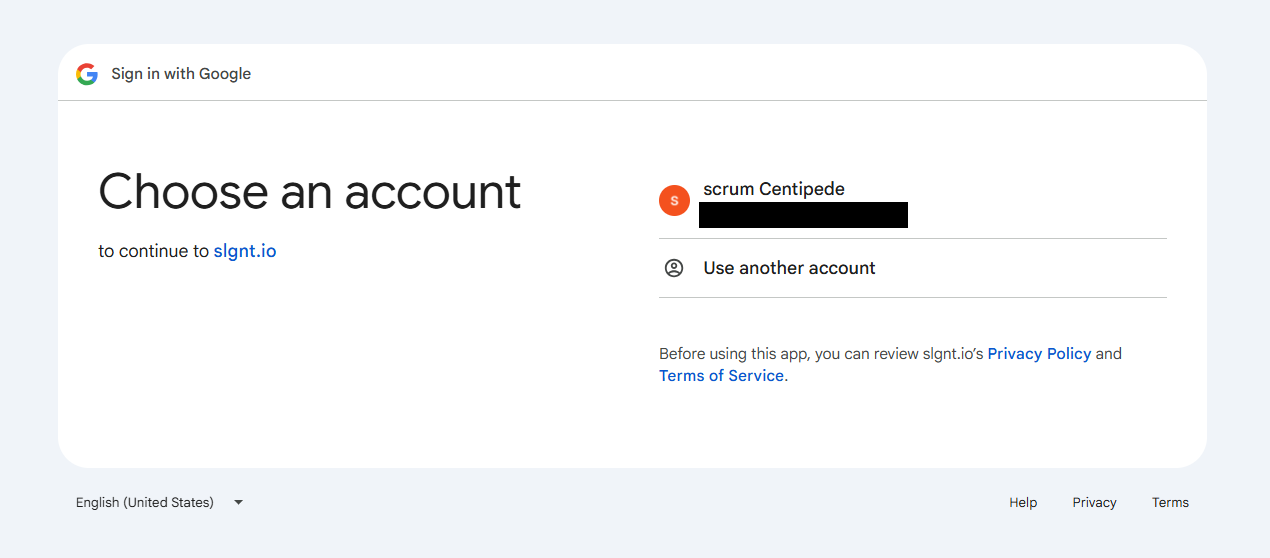
4. Sign in with your Google account.
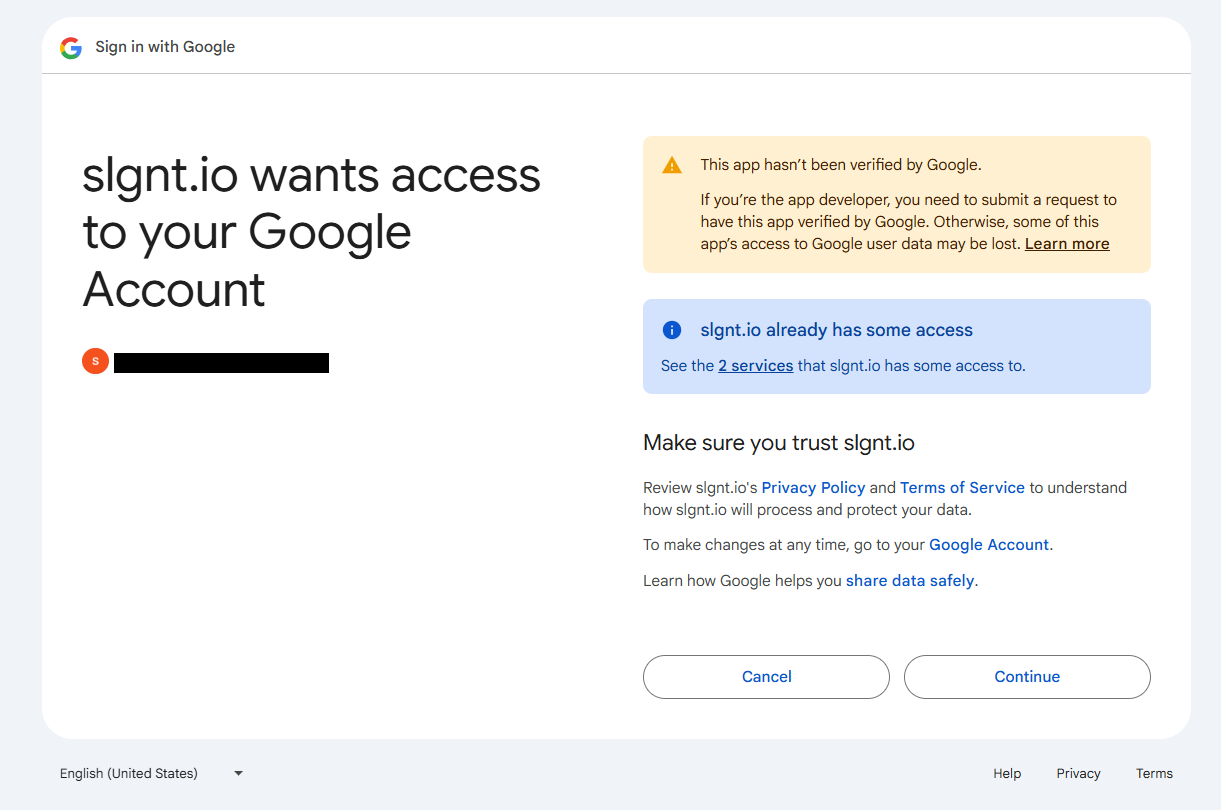
5. Click Continue.
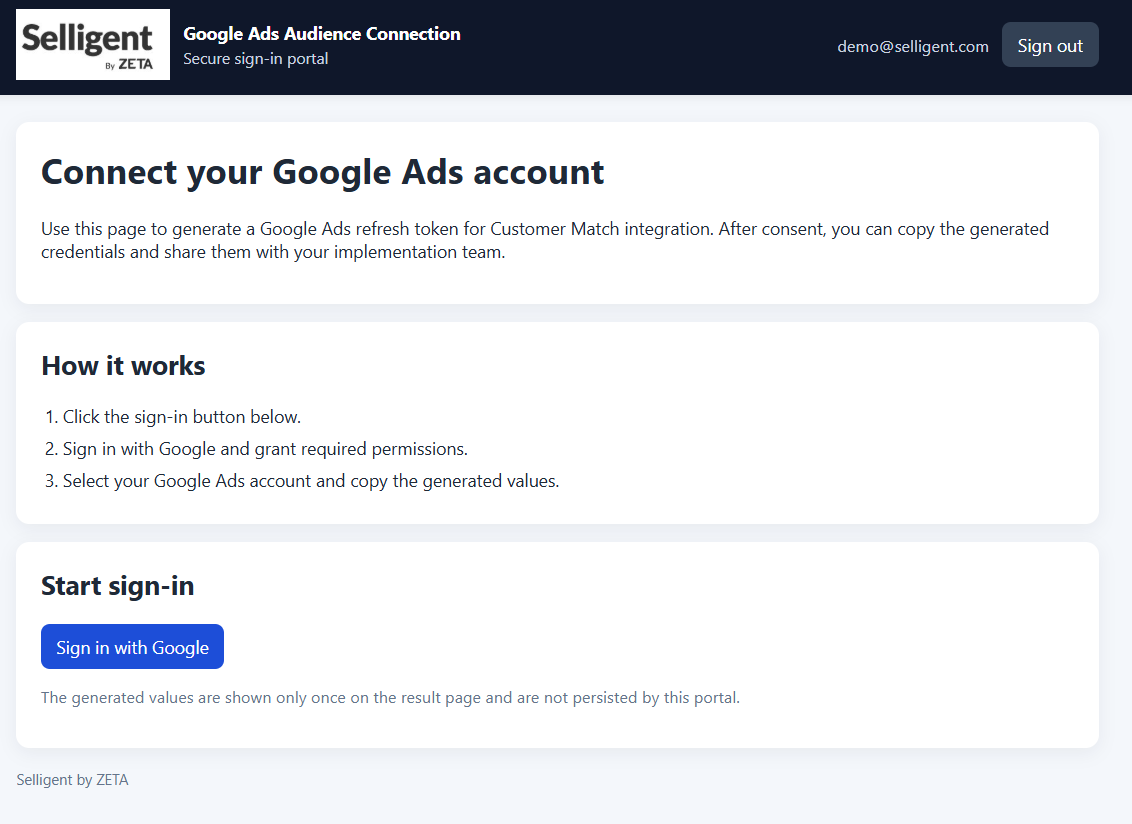
6. Select the Google Ads Customer ID connected to your account. Then click Connect.
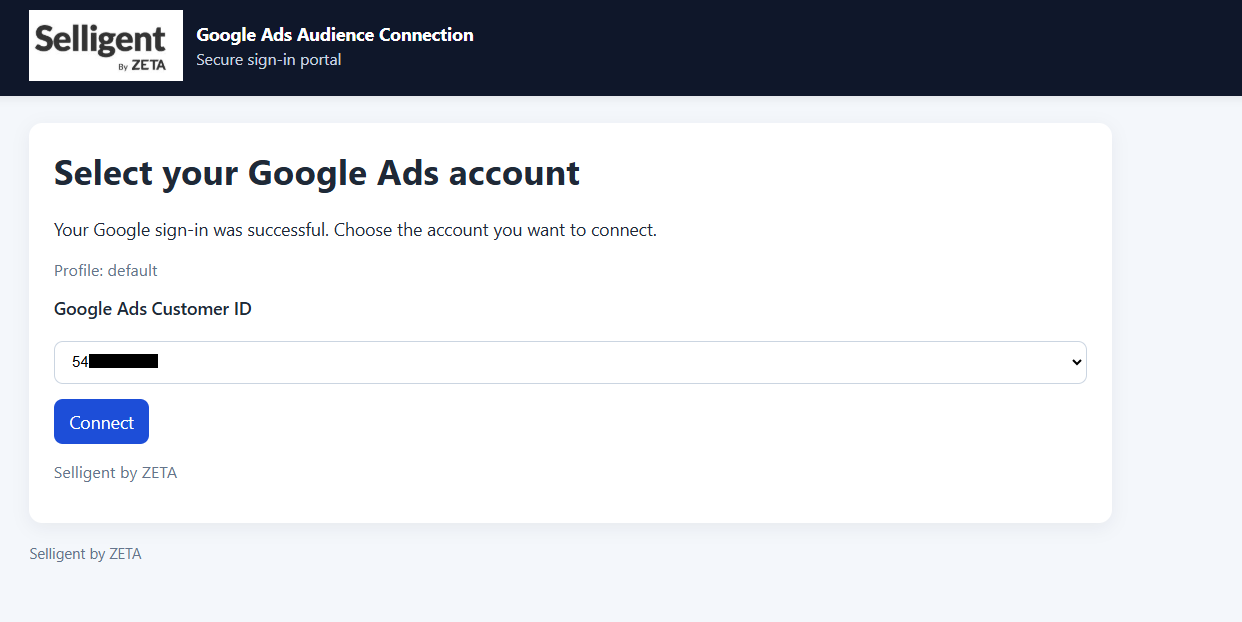
Important: Make sure your Google account has access to at least one Google Ads account.
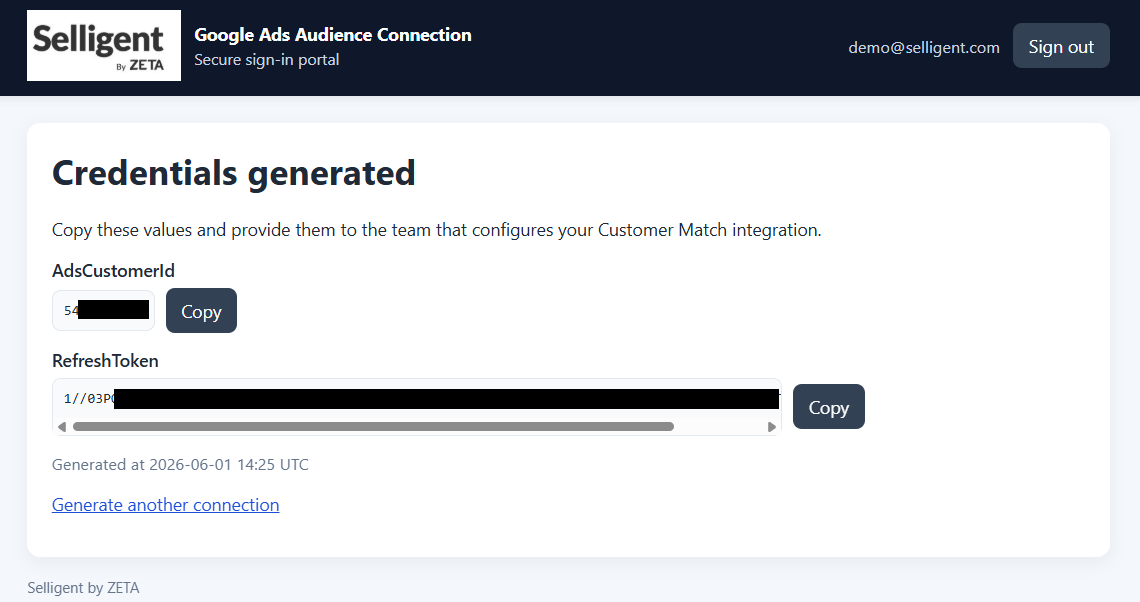
7. Copy the AdsCustomerID and RefreshToken and save them in a secure location.
Create a Social Channel Endpoint in Selligent
Create a new Social Channel endpoint for the Google Ads audience plugin in Admin Configuration > Global > Channel Endpoints. Fill out the following fields:
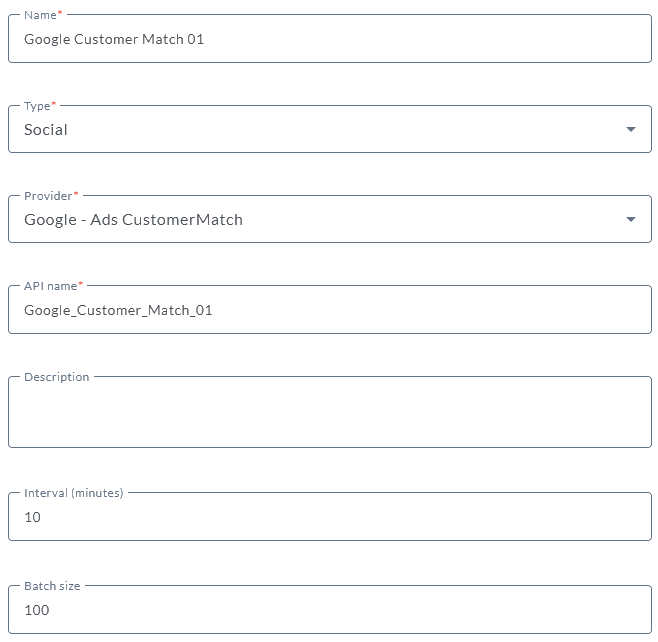
- Name * — Enter a channel endpoint name. Make sure to choose an easy recognizable name.
- Type * — Select Social as type.
- Provider * — Select Google Ads CustomerMatch.
- Api name * — The API-name attributed to the end point and used by the API.
- Description — You can enter a description for this endpoint.
- Interval — Throughput interval, expressed in minutes. (minimum is 1 minute, default is 10 minutes)
- Batch size — Throughput batch size. The default batch size is set to 100 records. A maximum of 33000 records can be processed by Google Ads. It is recommended to set the batch size to maximum 25000 records per minute to avoid memory issues. Note however, the more fields are being synchronized per record, the smaller the batch size should be set.
Note: Interval and Batch size are settings applied to records sent from Selligent to the plugin. However, the processing speed depends on the settings defined in the plugin and can be different for each plugin. The rate limits of the plugin are defined through 3 distinct parameters: Concurrency, MessagesPerrequest and RequestsPerSecond/Minute.
Note: It is important to have the latest version of the interface plugin on your environment (the previous version of the plugin only allows 10 records per defined interval).
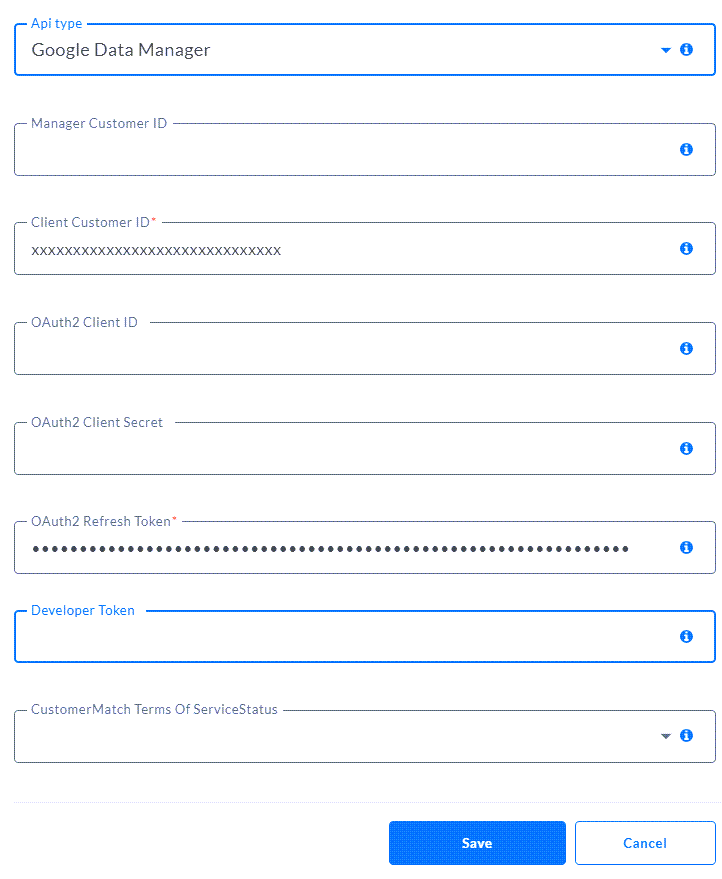
- API type — Select between the Google Ads and Google Data Manager API.
Important: It's strongly advised to using the Google Data Manager API, as the Google Ads API is being phased out.
For now, the Google Ads API is still available to support existing configurations. After an inactivity of 180 days, access to the Google Ads API will be revoked, and it's mandatory to switch to the Google Data Manager API.
Therefor, the API type drop-down with the two options shown in the user interface, is a temporary option that will be removed in the future. - Manager Customer ID — Your Google Manager Customer ID. (Only required for the Google Ads API.)
- Client Customer ID * — Your Google User/Client Customer ID. Enter the AdsCustomerId value you copied from the Google Authentication application.
- OAuth2 Client ID — The app credentials ClientID. (Only for backward compatibility of existing Google Customer Match endpoints with manual project credentials. This was the old method being used.)
- OAuth2 Client Secret — The app credentials ClientSecret. (Only for backward compatibility of existing Google Customer Match endpoints with manual project credentials. This was the old method being used.)
- OAuth2 Refresh Token * — Enter the RefreshToken value you copied from the Google Authentication application.
- Developer Token — The developer token (app review required by google). (Only for backward compatibility of existing Google Customer Match endpoints with manual project credentials. This was the old method being used.)
- CustomerMatch Terms Of ServiceStatus * — Select Accepted here, to legally confirm giving consent to use the data for ads. (* This is required for the Google Data Manager API).
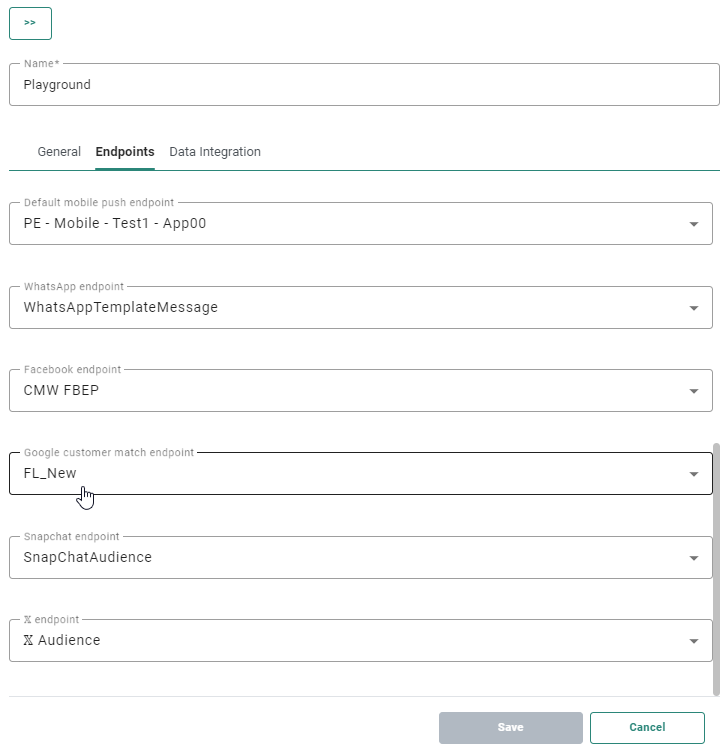
Connecting your Google instance to your Business unit
As you can create multiple instances of the Google Ads Customer Match plugin, you’ll need to define within the Admin Configuration which Google Ads Customer Match you want to use within your Business unit.
1. In the Admin Configuration, click on the Business units tab and edit the one you want to configure.

2. Select the tab Endpoints, add the desired Google Customer Match endpoints, choose the default one and click Save.
Use the Google Customer Match Component in a Custom Journey
When using the Google Customer Match Component in a journey and selecting the above instance, the list of fields used for mapping can be added manually by selecting those within the drop-down list:
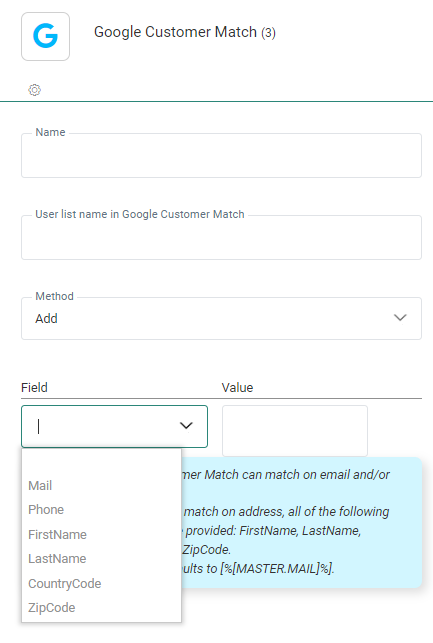
Note: All properties of the Google Customer Match Component are explained here.
Interesting links
- Google Data Manager API — https://developers.google.com/data-manager/api
- Google Data Manager API - Customer Match — https://developers.google.com/data-manager/api/devguides/audiences/google-ads/customer-match
- Google Ads API — https://developers.google.com/google-ads/api/docs/start
- Google Ads API - Customer Match — https://developers.google.com/google-ads/api/docs/remarketing/audience-segments/customer-match/get-started
- Google Ads Portal — https://ads.google.com/
- Google Ads Manager Account — https://ads.google.com/aw/accountaccess/managers
- Google Ads Credentials (Cloud console) — https://console.cloud.google.com/apis/credentials
- Google RSS Link (to know when new version arrives) — http://feeds.feedburner.com/blogspot/hecyUu
