This use case expands the clothing retailer example in use case 2, with conversational replies to build interactions with replies and actions.
Use RCS conversational messaging to create interactive, multi-step customer experiences within a single campaign. With conversation flows, you can guide recipients through personalized journeys using rich cards with reply buttons and URL redirects.
In this example, a retail brand sends an introductory welcome message featuring multiple product categories such as clothing, kitchen appliances, and winter linens. When a recipient selects a category, the conversation branches into more targeted responses, helping guide them to relevant products or landing pages based on their interests.
The conversation flow in the left panel makes it easy to design, manage, and visualize each interaction path while keeping the customer journey simple and focused on a clear campaign objective.
Before you begin
Regardless of message type, make sure:
- RCS is enabled for your account
- An RCS-enabled Sender Profile is configured
Refer to RCS Key Terms and Definitions for specifications and best practices of each RCS component.
Create a rich RCS campaign with conversational replies
The campaign creation process is the same as described in Use Case 1, with Step 3 outlining how to create the RCS message. In this section, we will focus specifically on the RCS content creation step, detailing how to build rich card with conversational replies.
You can also watch this video:
Step 1: Open your campaign
-
Go to your campaign and open the Content tab.
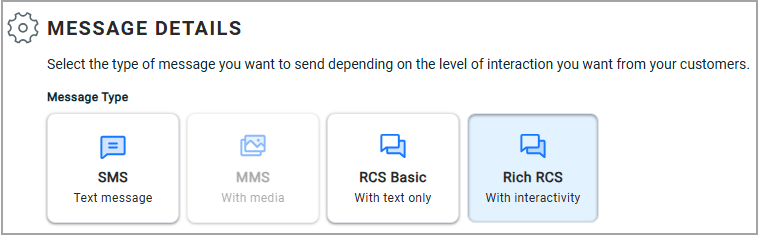
-
In the content type options, select Rich RCS.
Step 2: Create your rich message
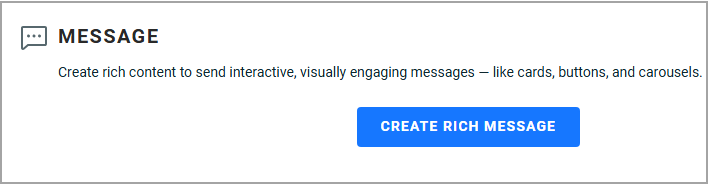
In the Message section, click Create Rich Message. A message creation window opens. As you build your content, a live preview appears on the right side.
Step 3: Build your rich card
-
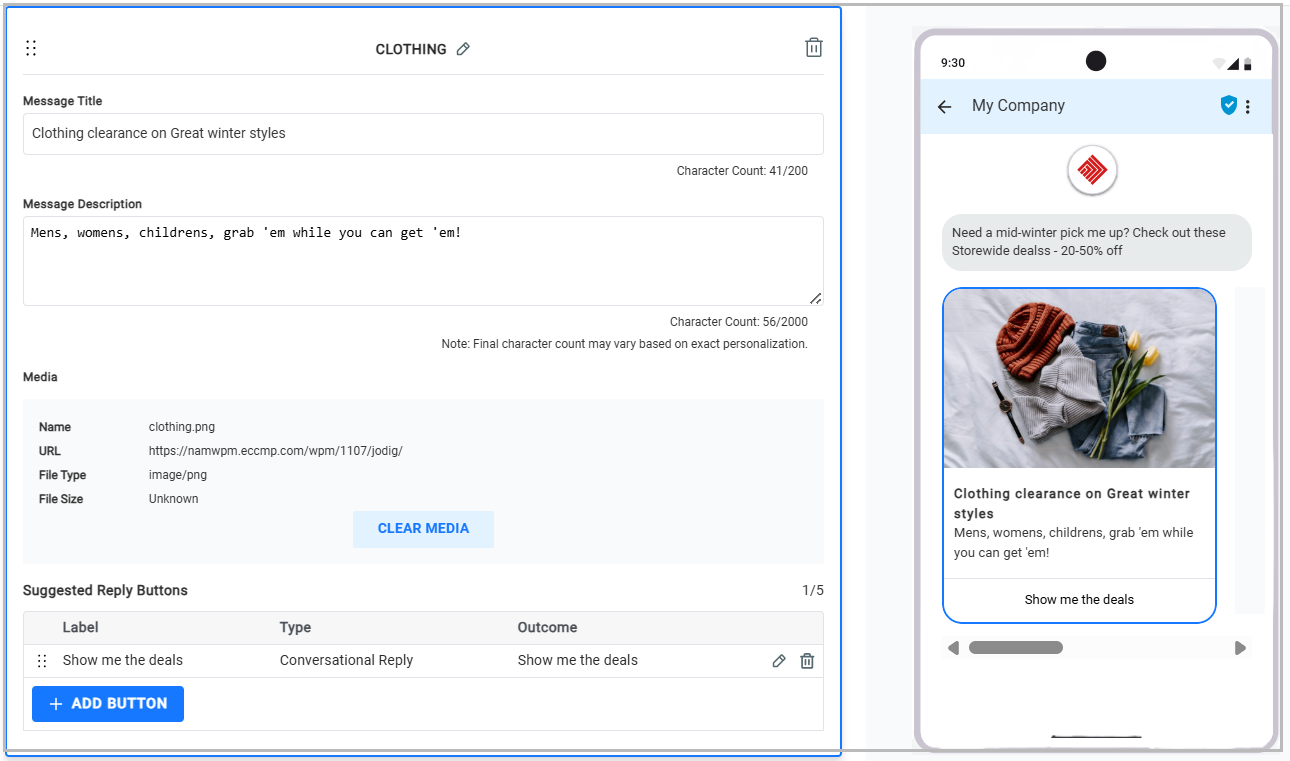
Enter a name for your rich card, by editing the default name Rich card 1 at the top of the card. In this example, it is Clothing.
-
Enter the welcome message for your campaign, in the First Message field. This is an opening pitch which is always displayed at the top of your rich cards.
-
For your first rich card, enter the following:
- Title:Clothing clearance on Great winter styles
Specifications
Specification Details Maximum length
200 characters
Other characters Emojis and some special characters are allowed and may count as multiple characters Best practices
- Keep titles short and action-oriented.
- Clearly explain the purpose of the message
- Description: Mens, womens, childrens, grab 'em while you can get 'em!
Specifications
Specification Details Maximum length
2000 characters
Other characters Emojis and some special characters are allowed and may count as multiple characters Best practices
- Use short paragraphs or concise sentences
- Focus on value and clarity
- Avoid repeating the title text
- Title:Clothing clearance on Great winter styles
Step 4: Add media to your card
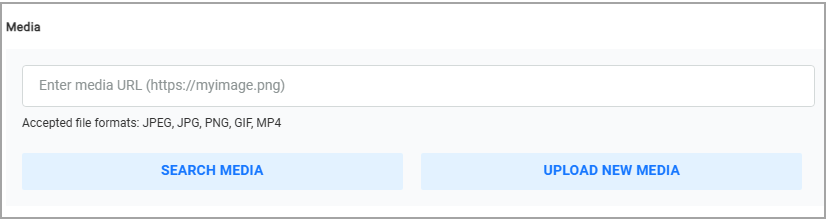
You can include media to your card, in JPEG, JPG, PNG, GIF or MP4 formats. You can either attach the media that has already been hosted in Cheetah Digital or upload new media to use.
-
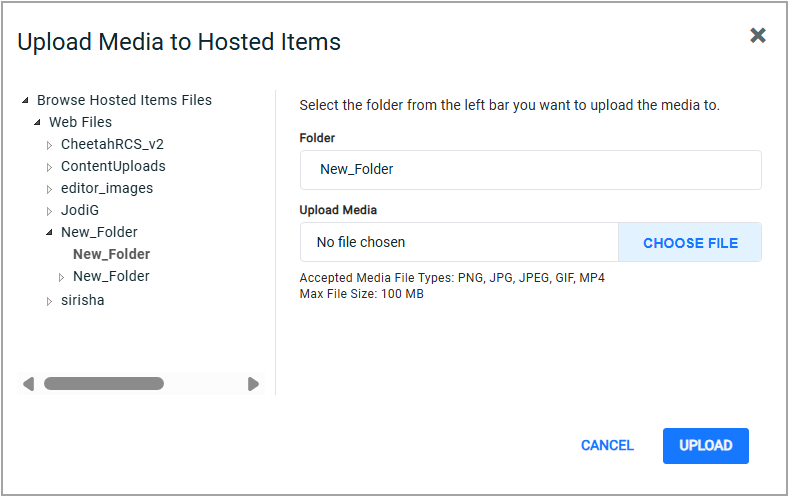
In the Media section, click Upload New Media. A pop-up window appears to enable you to upload media.
-
Click Choose File.
-
In the displayed file browser window, select the media you want to upload.
-
Expand the Browse Hosted Items Files, in the left panel and select the folder you want save the media to.
-
Click Upload. A success message is displayed after your media is uploaded to Cheetah Digital. The media is attached to your card.
If your media is already in the Cheetah Digital's hosted items, you can use Search Media button to select the media to use in the card.
Specifications
Specification Details Supported formats
JPG, JPEG, PNG, GIF
Media height 168 dp (medium) - dp (density-independent pixels) helps ensure media displays consistently across screen sizes URL requirements
Image URLs must be publicly accessible or uploaded to Cheetah Digital
File names The file names can't contain any spaces, dashes, or special characters (except _underscores).
The file names and their storage folder names will be saved and displayed only as lower case, even if they contain upper case when uploaded.
Also, the file extensions should be in lowercase.
The lower case names will be rendered in the URL of the hosted items.
Best practices
- If your image doesn’t match the required specifications, the message carrier partners will automatically center and crop it.
- Use high-resolution images optimized for mobile viewing
- Avoid placing critical text near image edges, as some devices may crop images differently
- Use visuals that clearly support the message goal
Step 5: Add a conversational reply button to the card
-
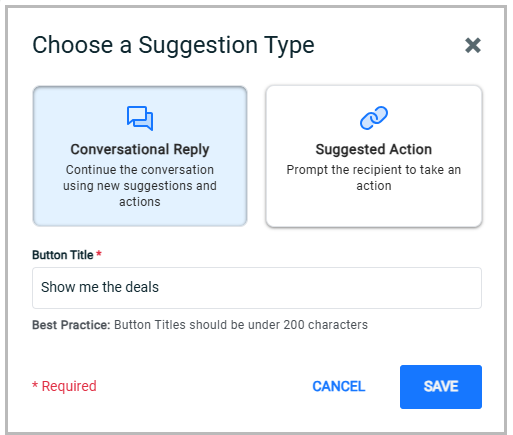
In the Suggested Reply Buttons section, click + Add Button. A pop-up window appears asking you to choose a suggestion type.
-
Select Conversational Reply.
-
Enter the button title.
- Button Title: Show me the deals
-
Click Save. The button is now added to the card.
-
Click Save again at the top right of the editor to save the rich card.
Adding a Conversational Reply to the card, adds a new blank rich card to the conversation, which can be further built to continue the conversation.
Refer to RCS Message Types and Best Practices for specifications and best practices.
Step 6: Add your second rich card
-
Click + Add Rich Card, at the bottom of your existing rich card.
-
Enter the content for the second card:
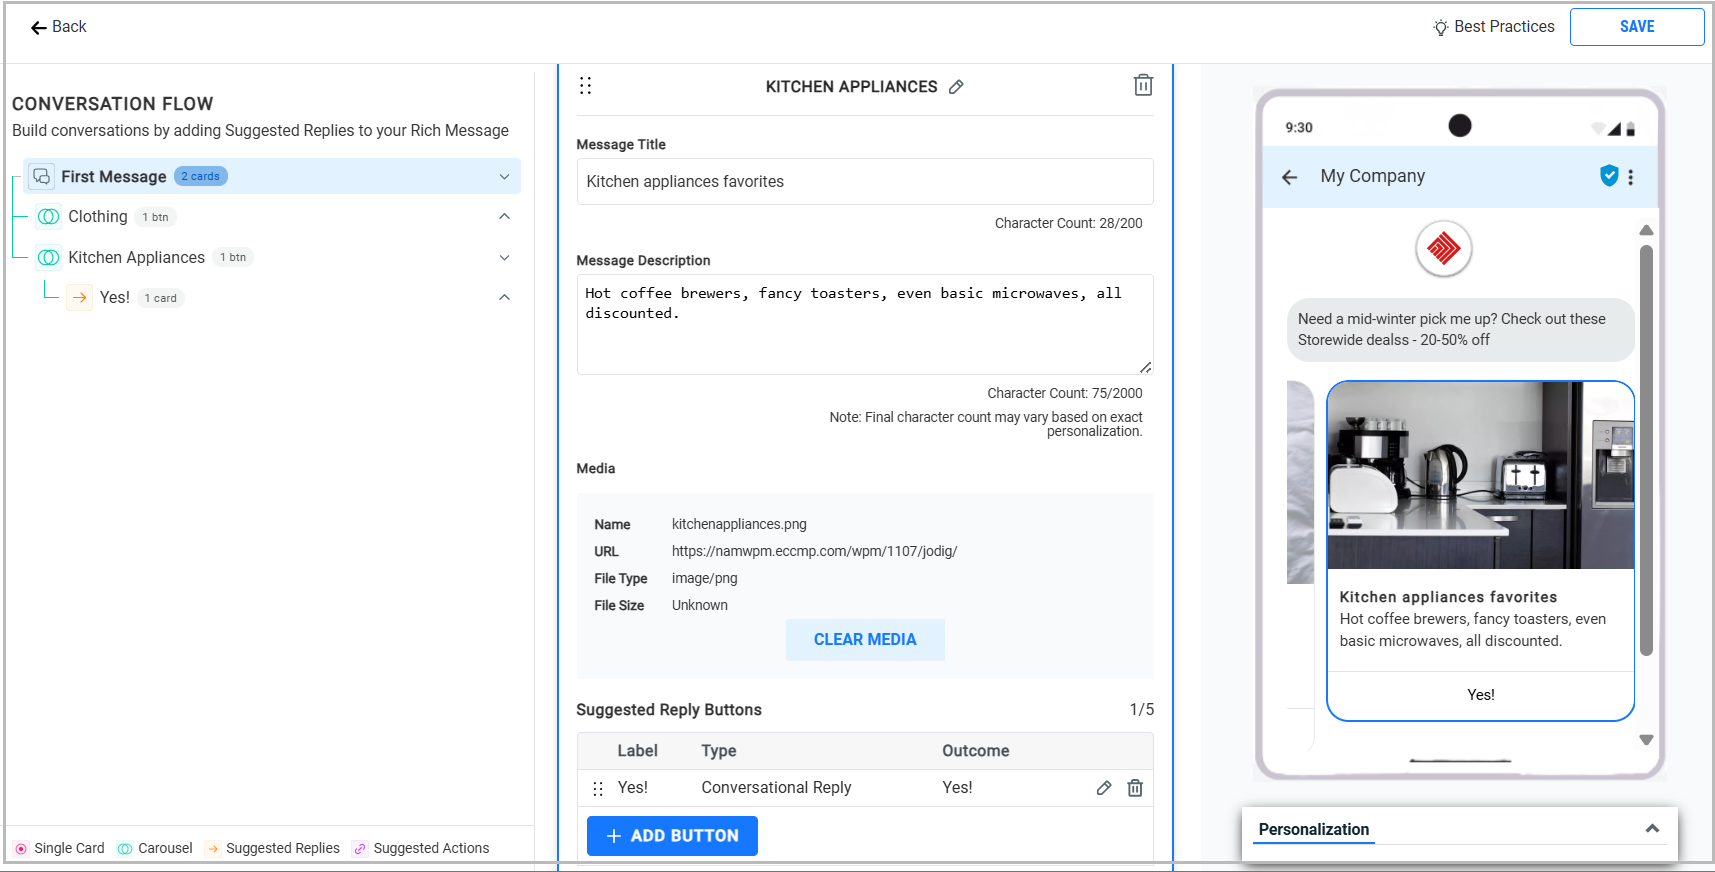
- Name of the card: Kitchen Appliances
- Title: Kitchen appliances favorites
- Description: Hot coffee brewers, fancy toasters, even basic microwaves, all discounted.
- Media: Add your media URL. Refer Step 4: Add media to your card.
-
Then add a Conversational Reply button by clicking +Add Button:
-
Button Title: Yes!
-
-
Click Save.
-
Click Save again at the top right of the editor to save the rich card.
Step 7: Add your third rich card
-
Click + Add Rich Card, at the bottom of your existing rich card.
-
Enter the content for the second card:
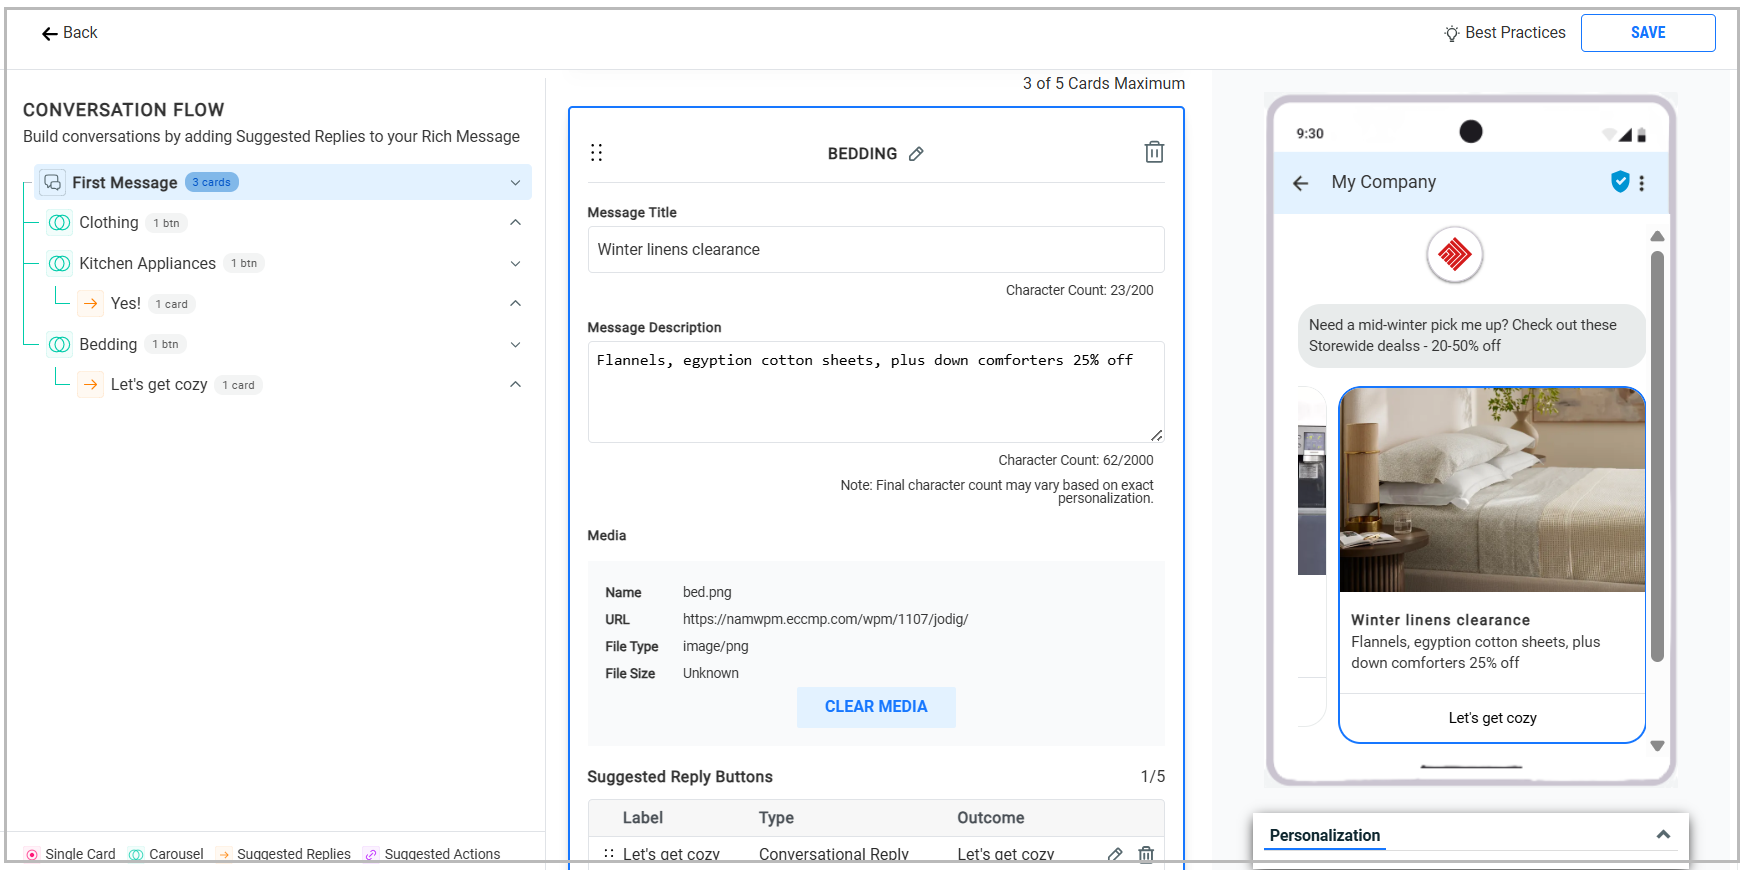
- Name of the card: Bedding
- Title: Winter linens clearance
- Description: Flannels, egyption cotton sheets, plus down comforters 25% off
- Media: Add your media URL. Refer Step 4: Add media to your card.
-
Then add a Conversational Reply button by clicking +Add Button:
- Button Title: Let's get cozy
-
Click Save.
-
Click Save again at the top right of the editor to save the rich card.
The message now has the first level of conversation as shown in the Conversation flow.
Note: You can only include a maximum of 5 rich cards to a conversation. Refer to RCS Message Types and Best Practices for specifications and best practices.
Step 8: Add your next level of conversation
From here, we can build the next level of the conversation.
For example, if a recipient selects the clothing sale option, create a follow-up message to learn whether they are interested in men’s or women’s products. This helps guide recipients through a more targeted journey and directs them to content that matches their interests.
We then use URL redirects to send recipients directly to the relevant pages on the website when they select either the men’s or women’s option.
-
The Conversation flow panel on the left shows the rich cards and the reply options.
-
Click on Show me the deals in the conversation flow, to open the associated rich card to build the conversation further.
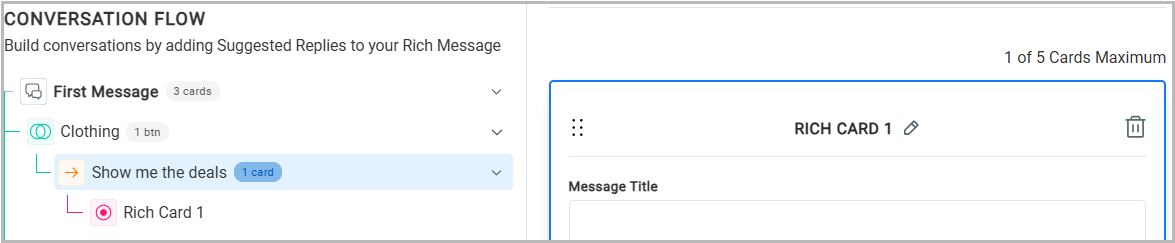
-
Optionally, enter the message text to acknowledge the user's previous reply and lead them to the next set of options, in the Reply Follow Up Message field.
-
Enter the content for the rich card:
- Name of the card: Clothing Sales
- Title: What are you interested in?
-
In the Suggested Reply Button section, click + Add Button. A pop-up window appears asking you to choose a suggestion type.
-
Select Suggested Action.
-
Enter the following:
- Button Title: Mens
- Action Type: URL Redirect
- URL: paste your web site URL
-
Click Save. The button is now attached to the carousel card.
-
Repeat the above steps to add a second button, Womens and provide the corresponding URL .
-
Click Save at the top right of the editor to save the rich card.
The Conversation flow on the left panel is updated as you build your conversation.
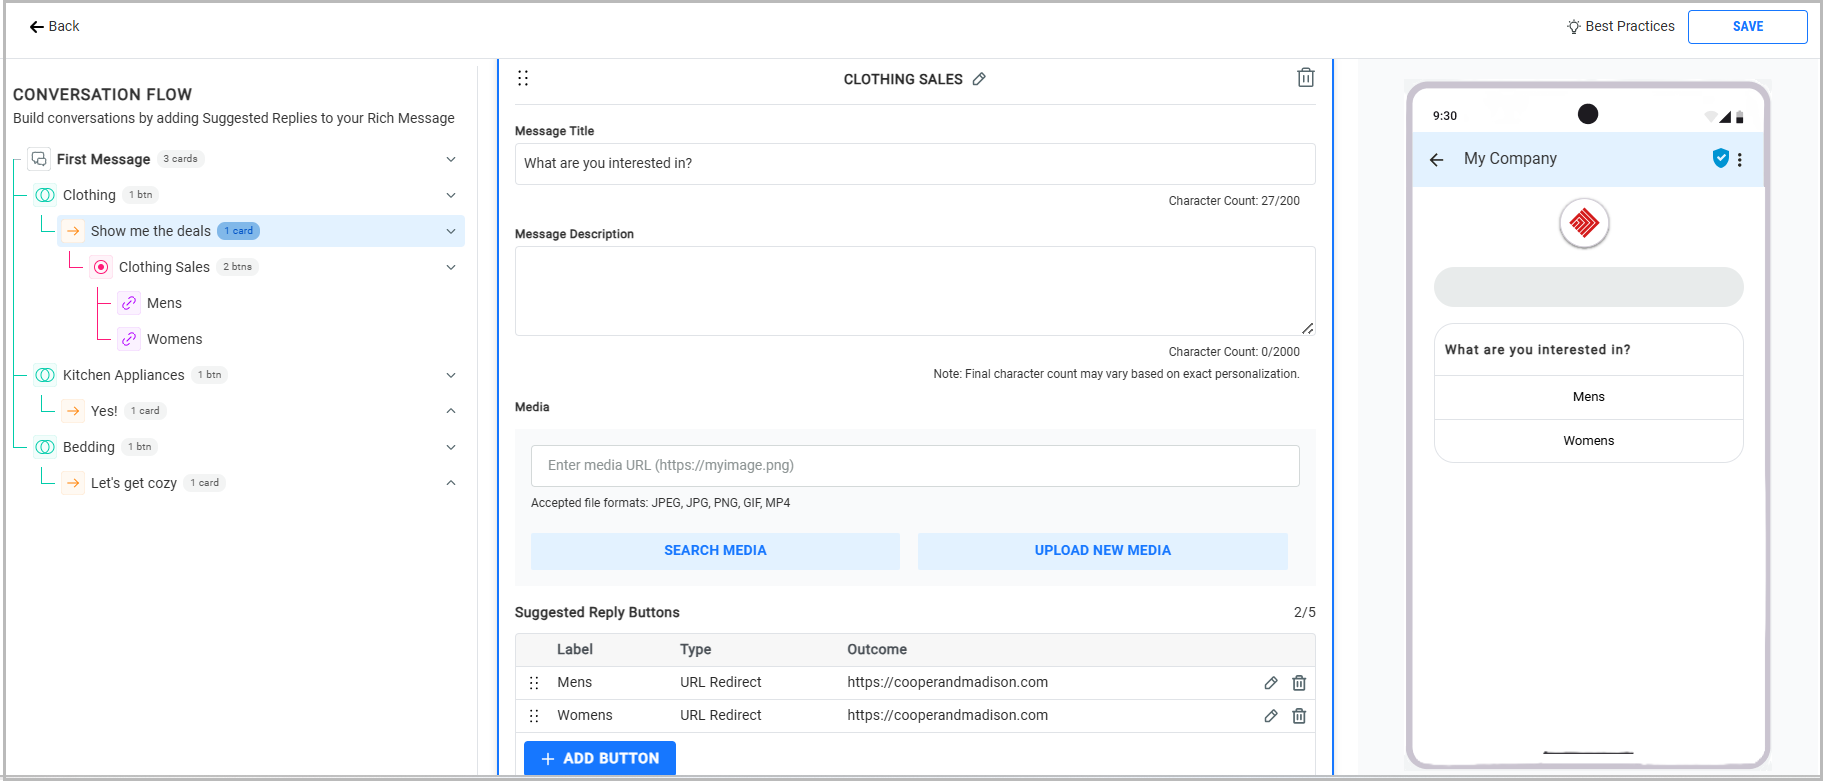
Refer to RCS Message Types and Best Practices for best practices.
Step 9: Add your next level of conversation to the second option
Build your conversation for the Kitchen appliance option. You can have it simple with text and URL redirects to various options, or have a much complex option with further conversational reply.
-
Click on Yes in the conversation flow, to open the associated rich card to build the conversation further.
-
Enter the content for the rich card:
- Name of the card: Counter Appliance Sales
- Description: We've got sales across our most popular items!
-
Add the required suggested reply buttons in the Suggested Reply Button section by clicking + Add Button.
-
Click Save at the top right of the editor to save the rich card.
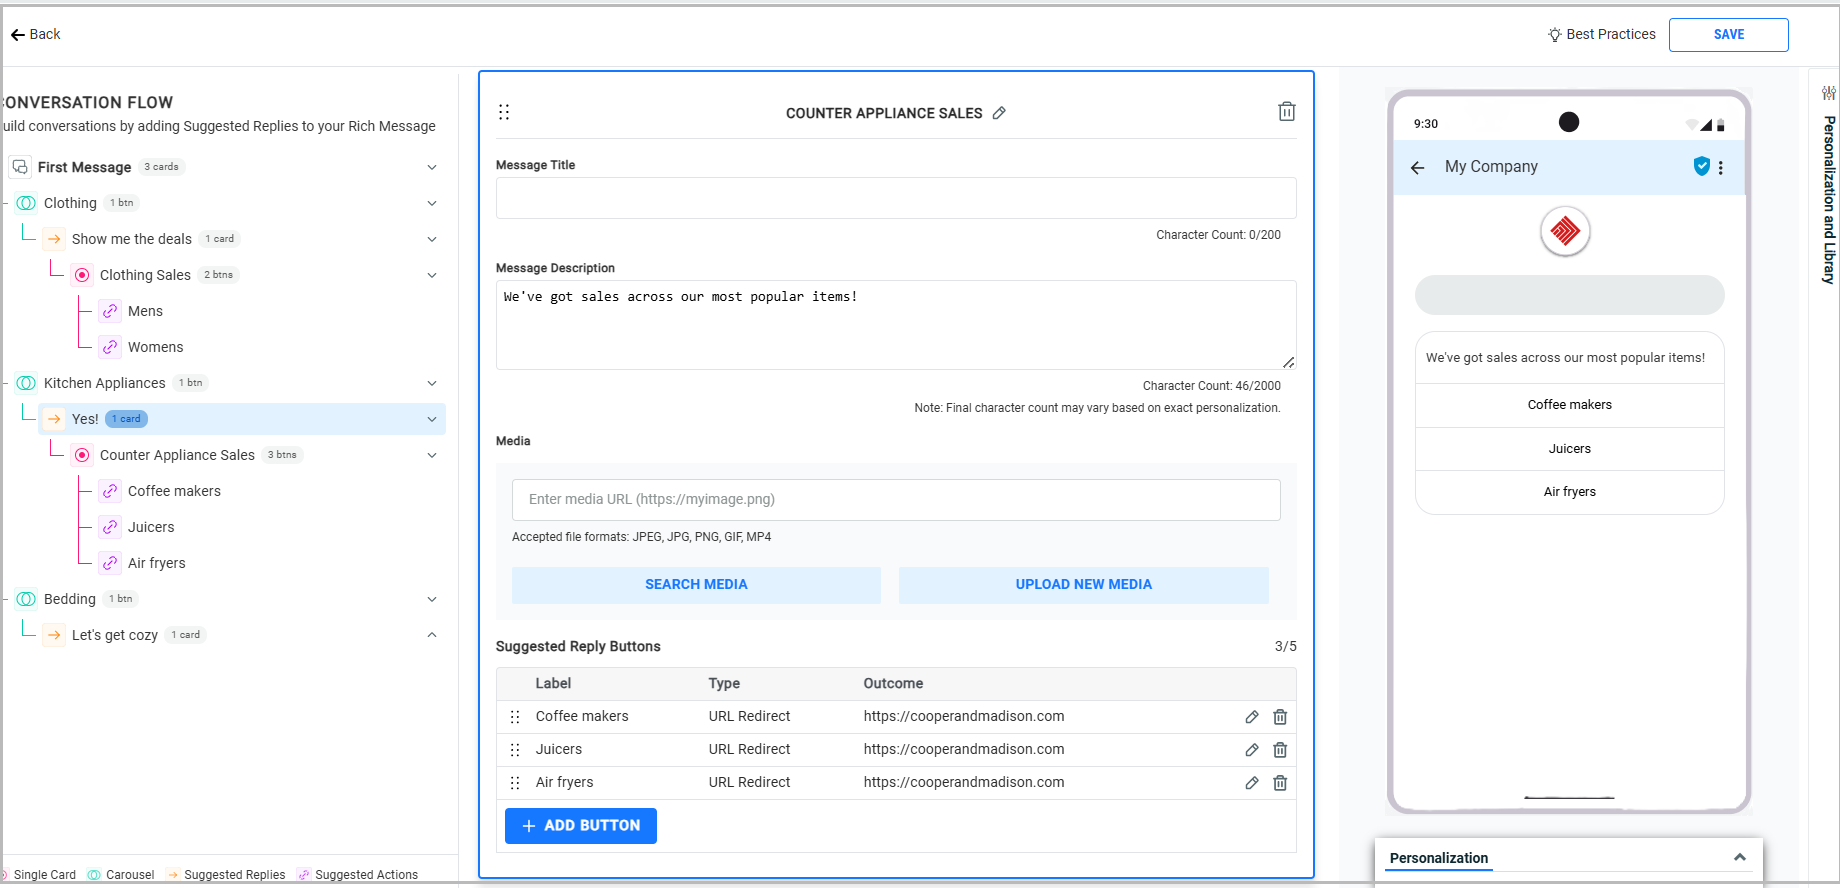
The Conversation flow on the left panel is updated with the options added.
Step 10: Add your next level of conversation to the third option
Build your conversation for the Bedding option. In this example, we will add a rich card for each option presented to the user.
-
Click on Let's get cozy in the conversation flow, to open the associated rich card to build the conversation further.
-
Enter the content for the rich card:
- Name of the card: Linens Winter Sale
- Media: Add your media URL.
-
Add a Suggested reply button with an URL redirect to the website.
-
Click Add Rich Card to add further rich cards for other options you want to provide the user.
-
Click Save at the top right of the editor to save the rich cards.
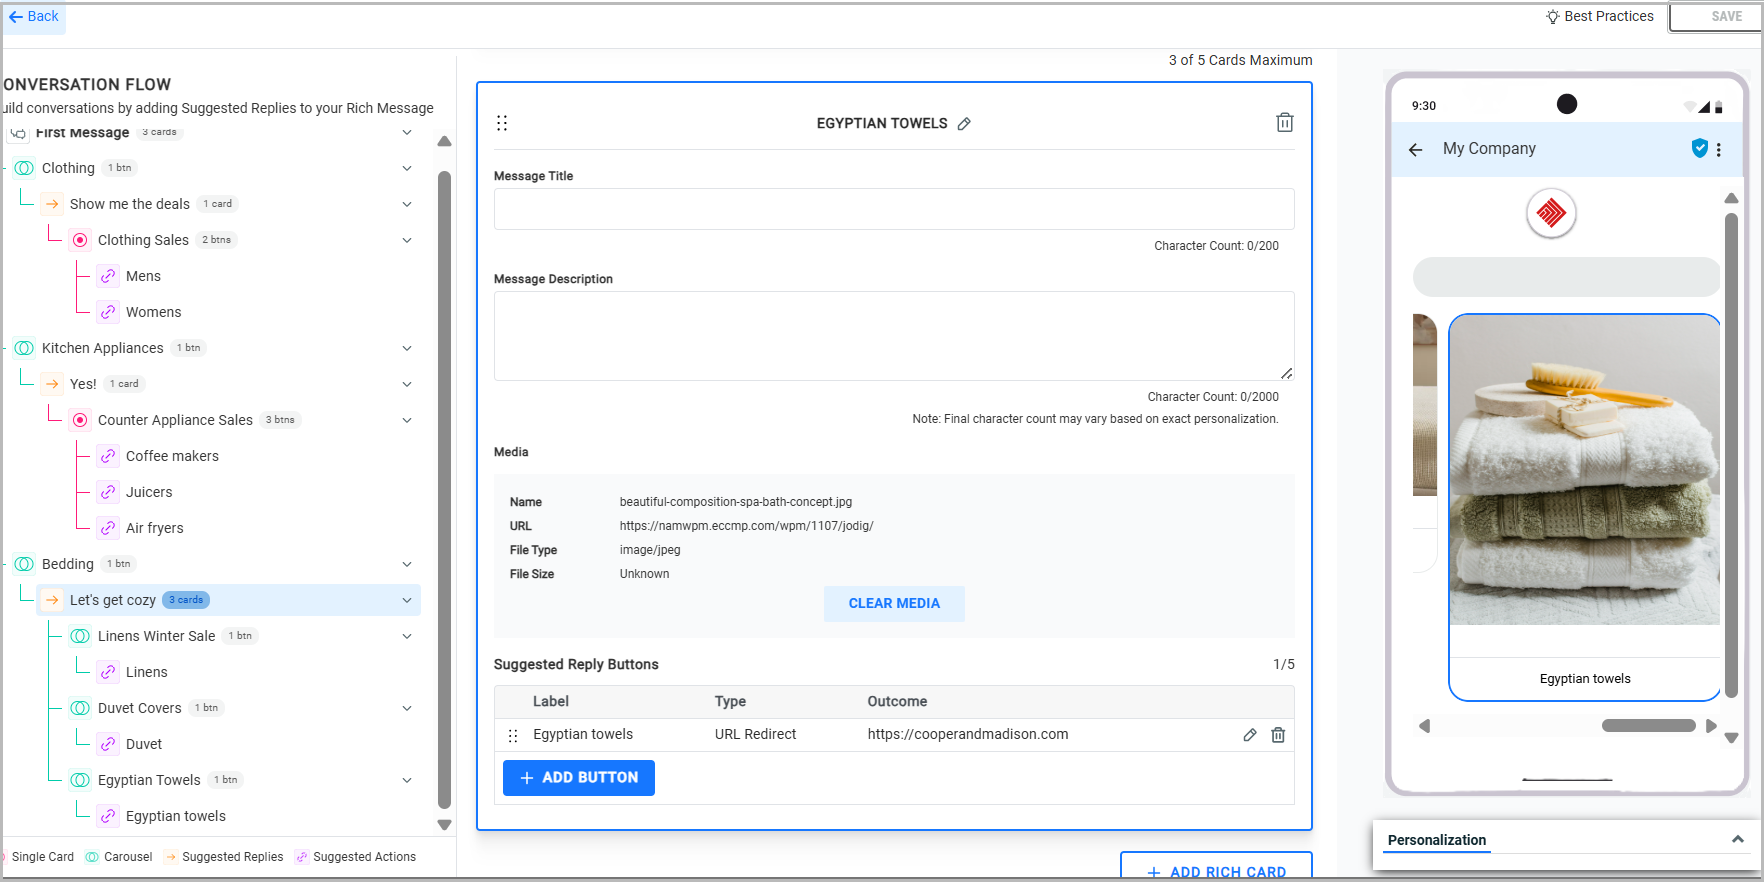
The conversation flow in the left panel displays each interaction path, including the options presented to recipients and the responses sent based on their selections.
Step 11: Add Reply Chips
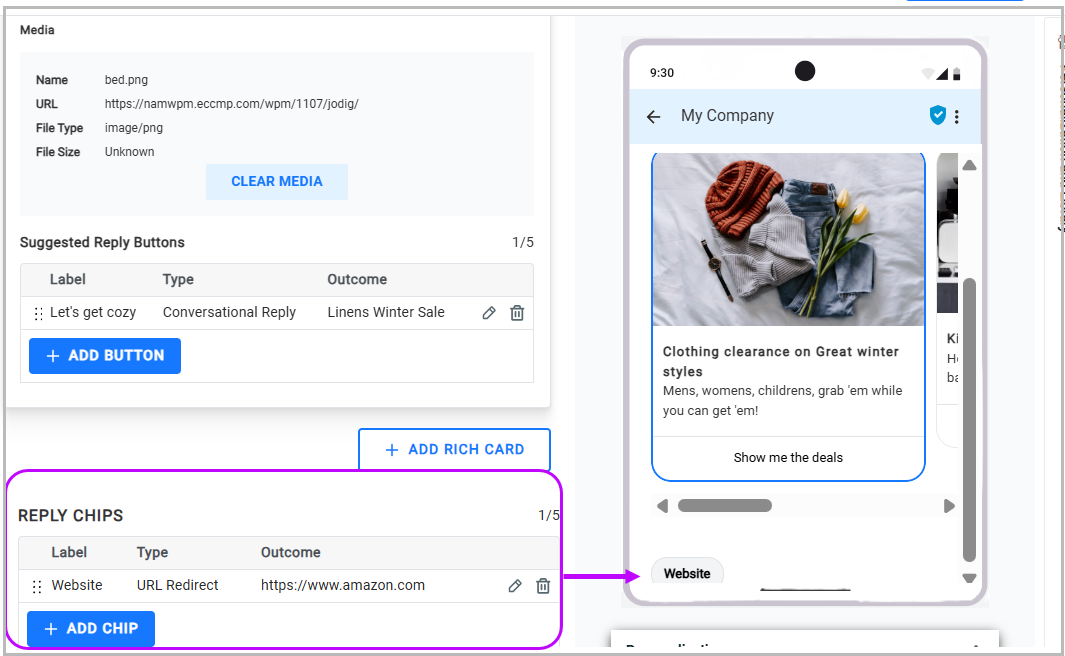
You can also add reply chips to your RCS message to display common information across your rich cards. The chips are similar to your reply buttons in the card, but they are appear outside the card and shown commonly below all the rich cards in the carousel.
-
In the Reply Chips section, click + Add Chip. A pop-up window appears asking you to choose a suggestion type.
-
Select Suggested Action.
-
Enter the following:
- Chip Title: Website
- Action Type: URL Redirect
- URL: paste your deals page URL
-
Click Save. The chip is now attached to the RCS message.
Step 12: Review the preview and conversation flow
As you add cards and buttons:
- the preview panel updates to show how the carousel will appear to users
- the Conversation Flow panel on the left side of the screen, updates to show how users can interact with the campaign
Explore the feature gallery here to understand how the content appears in Android and iOS devices.
Review the card carefully to confirm:
- titles are clear
- descriptions are concise
- each button links to the correct page
Step 13: Save the rich message
When your card is complete, click Apply and Close.
This saves the Rich RCS message and returns you to the Content tab of the Campaign.
Step 14: Add SMS fallback content
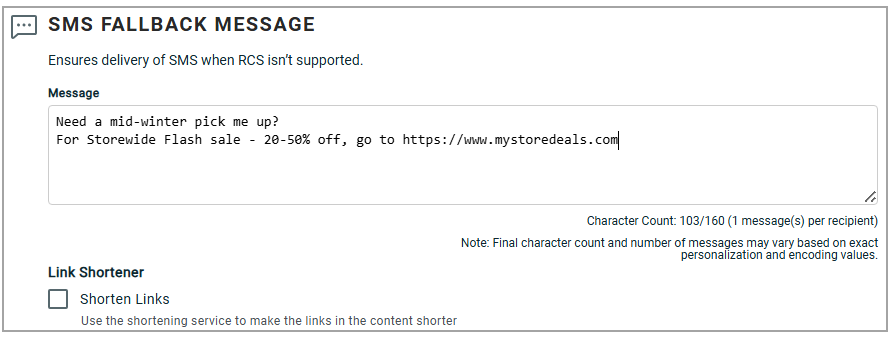
In the SMS Fallback Message field, enter fallback text for users who are unable to receive RCS messages.
Best practices
Keep the user experience simple and direct:
- use short, descriptive card titles
- keep descriptions focused on the benefit of clicking
- make button text action-oriented
- use destination pages that match the card topic exactly
- always include SMS fallback text
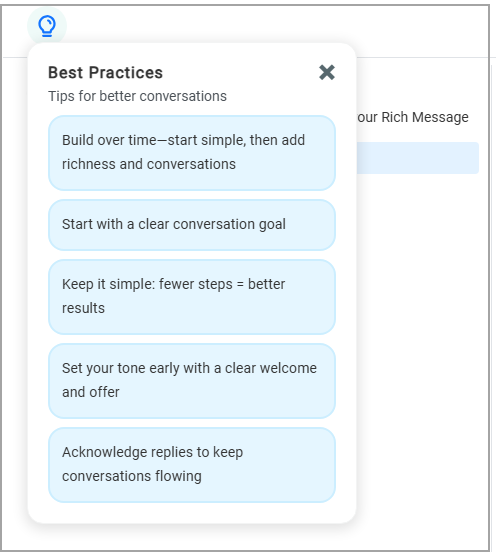
Click on the Best Practices icon at the top of the Conversation flow to see context specific best practices.
It is recommended that you use the proofing functionality and send a test message to yourself before sending your campaign. Always send proofs to both iOS and Android devices, as the same message can display differently in these devices. Review the appearance and content on each device, and adjust your message where necessary to ensure the best possible experience for recipients.
Refer to RCS Key Terms and Definitions for specifications and best practices of each RCS component.