Working with SMS Personalization Fields
Using data pulled from your marketing database, you can personalize your message content. For example, instead of a generic greeting of "Dear Customer," you could replace "Customer" with the recipient's actual first name.
Access
The available Personalization Fields are configured within your account setup, and are based on the Mailing's Data Source and Client Node. Personalization Fields are always defined at the Client level.
Usage
This section describes how to add Personalization Fields to your Mailing content.
Note: For more information on creating and managing Personalization Fields, see Getting Started with Settings.
To insert a Personalization Field into a Mailing:
-
In the Preview, position your cursor where you want to place the Personalization Field
-
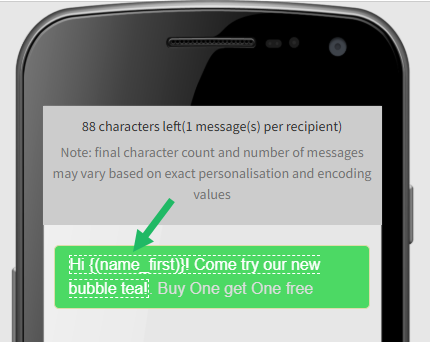
From the Personalization Tags drop-down menu, select the desired field. The system inserts a Merge Symbol at the current cursor position. A Merge Symbol is a textual representation of the Personalization Field, such as {(name_first)}, for example.
-
From the Menu Bar at the top of the screen, select Save Changes.
Preview Personalization Fields
Note: The ability to preview Personalization Fields is an optional feature that must be enabled within your account. Speak to your Zeta team for more information on enabling this feature.
After you add Personalization Fields to your Mailing content, you can preview those fields by entering test values, to validate that the fields are displaying correctly. To preview a Personalization Field:
-
Add a Personalization Field (or Fields) to the Mailing as described above.
-
From the Menu Bar at the top of the screen, select Preview Mode. The system displays a rendering of how your message will appear to your recipients.

-
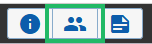
All the available Personalization Fields are listed in the Preview Personalization panel along the left-hand side of the screen. This panel might be closed by default. To open the panel, click the Preview Personalization icon in the lower-left corner of the screen.
-
Optionally, to make the Merge Symbols easier to find within the Mailing content, check Highlight Fields (this check box is displayed at the very bottom of the Preview Personalization panel). All the Merge Symbols in the Mailing content are highlighted in red.
-
Within the Preview Personalization panel, enter a test value for a Personalization Field. Repeat this step as needed for other Personalization Fields.
-
Click Apply Personalizations (this button is displayed at the very bottom of the Preview Personalization panel). Within the rendering of your Mailing content, the system replaces the Merge Symbols with your test values.
-
When finished, select Back to Editor in the Menu Bar.