Working with Filter Logic
A Filter consists of one or more selection criteria, or rules, that define the records you're looking for. Cheetah Digital provides several different options and methods for defining these criteria.
Note: For tips and suggestions on how to build the most efficient Filter possible, see Filter Best Practices.
Types of Filter Components
Filters are built by adding one or more fields or activities, and then assigning a mathematical operator (such as "equals to" or "greater than") to each one. A simple Filter might consist of only one or two components; more complex Filters can consist of many components, organized into groups, and linked with logical operators (see "Logical Operators" below for more details).
You add Filter components by dragging them from the Dynamic Pane on the right-side of the screen, and dropping them into the Workspace. The Dynamic Pane is separated into the following sections:
-
Expression Toolbox: This section contains Fields and Joins.
-
Fields: Fields are the database columns in the source table that you selected when you created the Filter. All active fields can be used in the Filter.
-
Existing Joins: All of the existing joins associated with the source table are listed, allowing you to add a field from a joined table as a selection criteria.
-
Property Joins: A property join is a join that does not already exist within the database. This feature is used to enable filtering on fields in other tables that are not already joined.
-
Activities & Items: This section contains events that are recorded in the database which can be used in your Filter. These events can be system-generated, such as File Import or Sent a Campaign, or they can be user-generated, such as Link Clicks or Share to Social, or even another Filter.
Note: If you're building a Filter off a Load and Send table, some of the options listed above are removed from the Dynamic Pane because those options aren't supported in Load and Send Filters. You can't use joined fields, or any of the Activities & Items in your Filter logic.
Fields
Fields are probably the most common component when building a Filter. Generally speaking, when you use a field as a component in your Filter, you first select the field, then select a mathematical operator. Lastly, you then either select or enter a value, or you select another field against which to compare. These two different methods are each described below.
Field Logic: Values
The Expression Toolbox displays every active field in the Filter's source table. Next to each field name is an icon representing the field's Data Type. The Data Type controls the possible operators and values that you can use when you add this field to your Filter.
Note: If the selected field has been defined with Field Restrictions, then the Filter screen will present you will a drop-down menu of valid values from which to pick. If the field was not defined with Field Restrictions, then you will have to type in the desired value (or values) to use in the Filter. See Tables for more information on Field Restrictions.
To build a component using a Field and a specified value (or values):
-
If necessary, click Expression Toolbox in the Dynamic Pane (this section is selected by default).
-
If necessary, click on Fields to expand it.
-
Drag the desired field from the Expression Toolbox, and drop it into the Workspace.
-
Select a mathematical operator from the drop-down menu. The mathematical operators available for selection vary depending on the Data Type of this field. For example, Date / Time fields have several unique operators related to date math.
-
From the drop-down menu, select value.
-
Select or enter a value. As mentioned above, some fields have a pre-defined set of valid values, so you can simply select the value you want from a drop-down menu. Other fields will present you with a text box, where you can enter a value. Also, depending on the mathematical operator you selected, you may need to provide additional information, as described in the samples below.
-
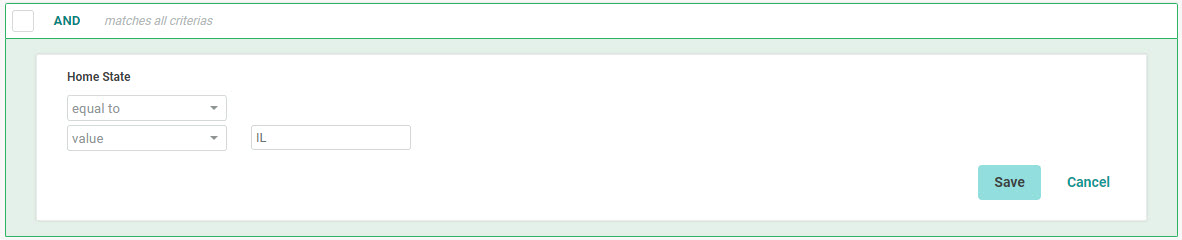
Equal to: Enter or select the full value to which the field must be equal.
In this example, the user is looking for all records where the State field is equal to "IL." This field does not have Field Restrictions defined, so the user has to enter the desired value in the text field.
-
-
Not equal to: Enter or select the full value to which the field must NOT be equal. Please note that this mathematical operator is not supported by the Quick Calculate feature.
In this example, the user is looking for all records where the name prefix is NOT equal to "Dr." The Prefix field contains pre-defined values, so the user has to pick one of these values from the drop-down menu.

-
More than: Enter or select the value to which the field must be greater than.
In this example, the user is looking for all records where the Score value is more than "8" (that is, 9 or higher).

-
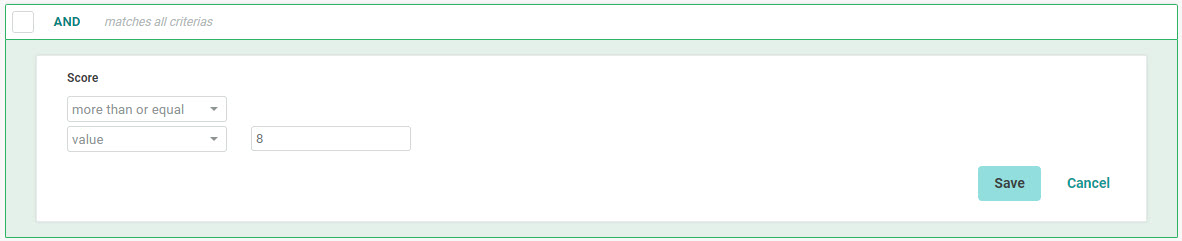
More than or equal: Enter or select the value to which the field must be greater than, or equal.
In this example, the user is looking for all records where the Score value is more than, or equal to, "8" (that is, 8 or higher).
-
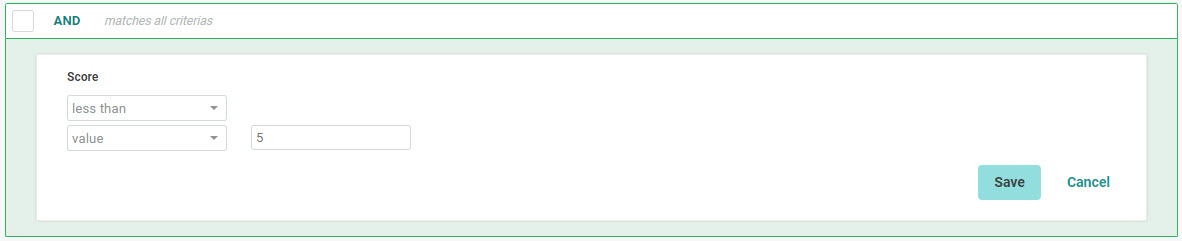
Less than: Enter or select the value to which the field must be less than.
In this example, the user is looking for all records where the Score value is less than "5" (that is, 4 or smaller).
-
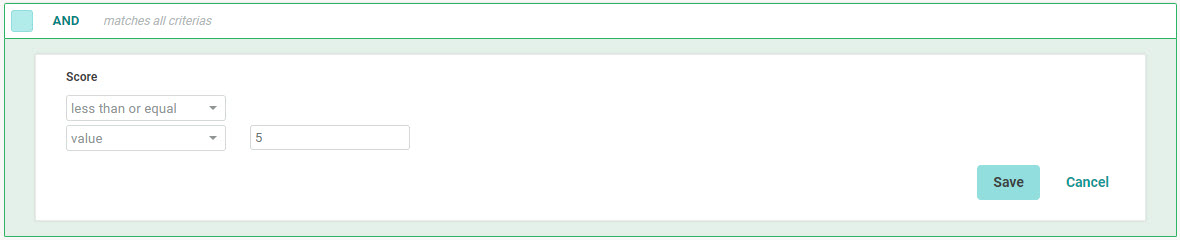
Less than or equal: Enter or select the value to which the field must be less than, or equal.
In this example, the user is looking for all records where the Score value is less than, or equal to, "5" (that is, 5 or less).
-
Is not null: No additional parameters are necessary.
In this example, the user is looking for all records where the First Name field is populated.

-
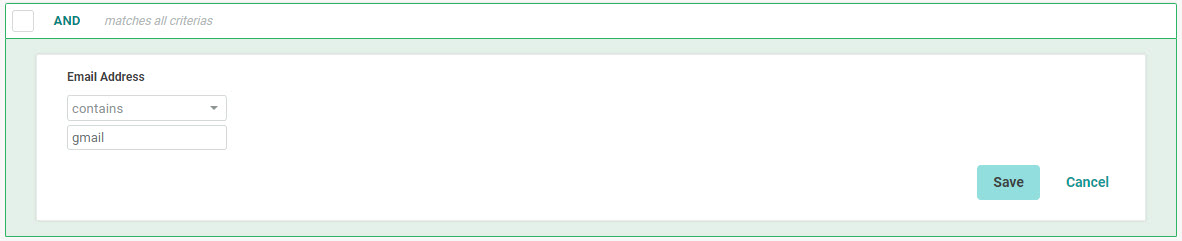
Contains: Enter a value which must be contained anywhere within this field.
In this example, the user is looking for all records where the email address contains the text string "gmail" anywhere within the Email Address field.
-
Starts with: Enter a value with which this field must start.
In this example, the user is looking for all records where the Phone field starts with "847." This Filter would return, for example, "847-123-4567," but NOT "123-847-1234.'

-
Starts with - Wild card: The Starts with operator also supports the use of an underscore ("_") as a wild card character, which allows you to target a specific value in a specific position.
In this example, the user is looking for all records where the third position in an Account Number field is a "5." You would enter a value of two underscores (representing the first two positions), and then a "5."

-
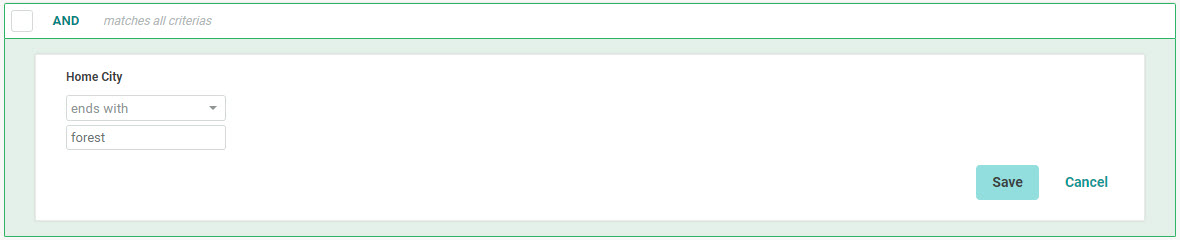
Ends with: Enter a value with which this field must end.
In this example, the user is looking for all records where the Home City name ends with "forest." This Filter would return, for example, a city named "Lake Forest," but NOT a city named "Forest Park."
-
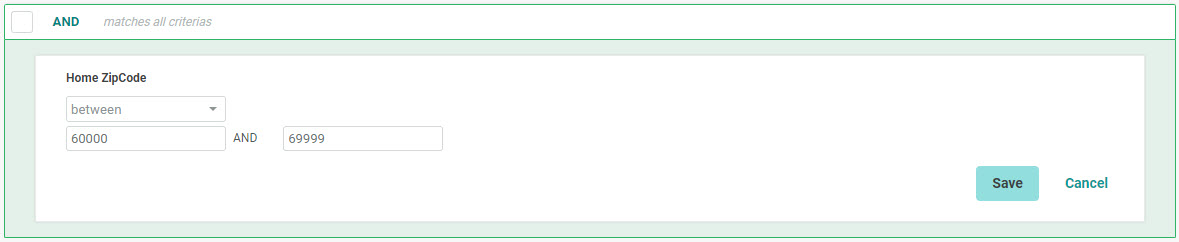
Between: Enter a start and an end value for the desired range.
In this example, the user is looking for all records where the Home ZIP Code is between "60000" and "69999."
 If you're using the Between operator with dates, it's important to understand that the platform will always reference midnight of the selected date. In this example, the user wants to select records with a date between August 1 and August 31.
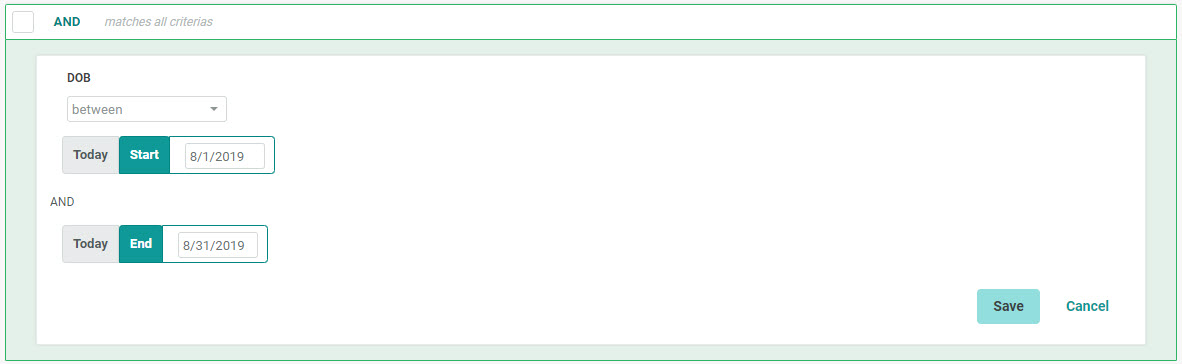
With these settings, the Filter will select records with a date / timestamp of:
-
2019/08/01 00:00:00 to
-
2019/08/31 00:00:00
This Filter configuration would not select any records from August 31, because the Filter "ends" at midnight on August 31. If your intent is to include records with timestamps anytime throughout the day on August 31, you would actually want to set the End Date as September 1.

.
-
In: Enter a set of desired values, separated by commas.
In this example, the user is looking for all records where the State is one of three possible values: either "NY," "NJ," or "MA."

-
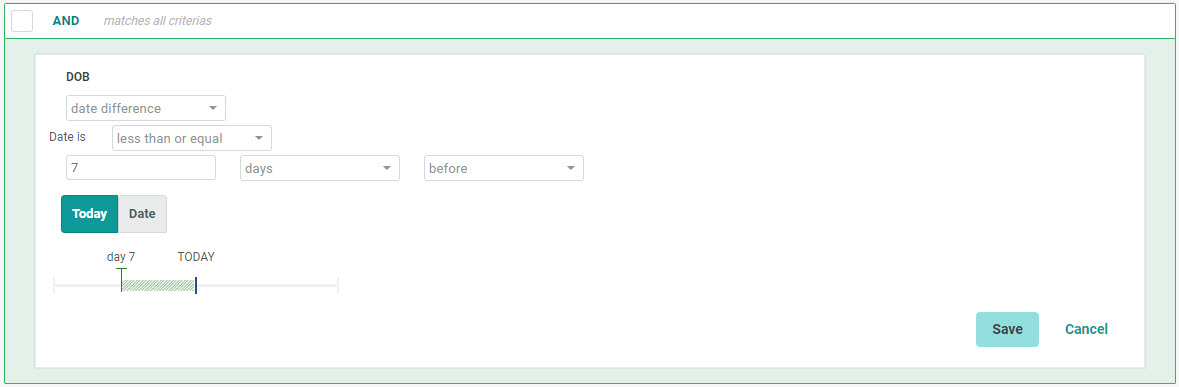
Date difference: Enter the parameters for how to calculate a dynamic date range.
In this example, the user is looking for all records where the Date of Birth is within the past 7 days.
-
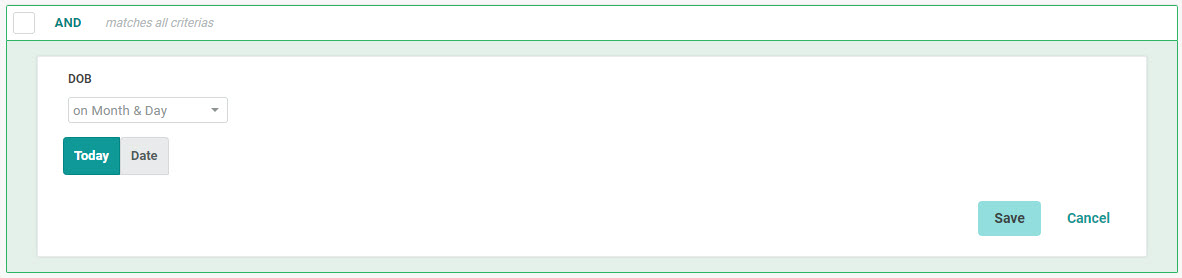
On month & day: Enter a specific date. Please note that this mathematical operator is not supported by the Quick Calculate feature.
In this example, the user is looking for all records where the Date of Birth is today.
-
In month: Select the month in which the value in this Date field must be included. Please note that this mathematical operator is not supported by the Quick Calculate feature.
In this example, the user is looking for all records where the Date of Birth is in the month of January.

-
When finished, click save to add this field to your Filter. Or, click cancel to remove this field.
Field Logic: Comparison
The Expression Toolbox displays every active field in the Filter's source table. Next to each field name is an icon representing the field's Data Type. The Data Type controls the possible operators and values that you can use when you add this field to your Filter.
To build a component using a Field and a comparison to another Field:
-
If necessary, click Expression Toolbox in the Dynamic Pane (this section is selected by default).
-
If necessary, click on Fields to expand it.
-
Drag the desired Field from the Expression Toolbox, and drop it into the Workspace.
Note: Only the following Data Types are supported if you intend to compare one Field against another Field -- String, Integer, Money / Decimal, Date / Time, Big Integer, and Long String. If you select a Field with another Data Type (Email, for example), then the application will not allow you to select a comparison Field.
-
Select a mathematical operator from the drop-down menu. The mathematical operators available for selection vary depending on the Data Type of this field. For example, Date / Time fields have several unique operators related to date math.
Note: Only the following operators are supported if you intend to compare one Field against another Field -- equal to, not equal to, more than, more than or equal to, less than, and less than or equal to. If you select another operator (such as "is not null" for example), then the application will not allow you to select a comparison Field.
-
From the drop-down menu, select field.
-
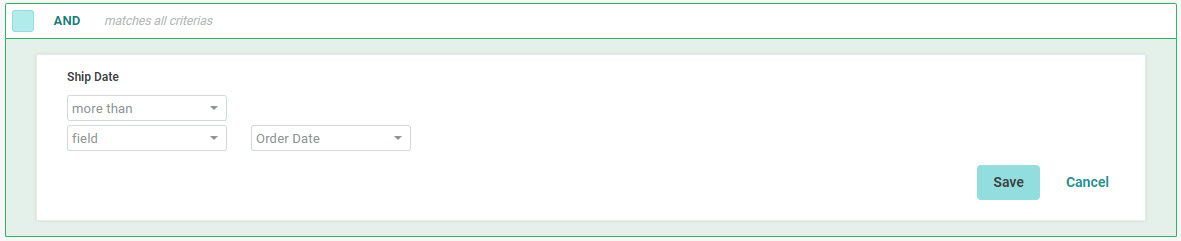
From the drop-down menu, select the Field against which you want to compare. This menu is populated with all of the Fields in the source table that have the same Data Type as the Field you selected in step 3. For example, you can only compare a Date / Time field against another Date / Time field, or an Integer field against another Integer field.
In this example, the user is looking for all records where the Ship Date is equal to or greater than the Order Date.
-
When finished, click save to add this field to your Filter. Or, click cancel to remove this field.
Existing Joins
When your marketing database was initially configured, it was designed with various joins between the tables. For example, you might have a Customer table that joins to an Order table, which joins to an Order Item table, which joins to a Product table.
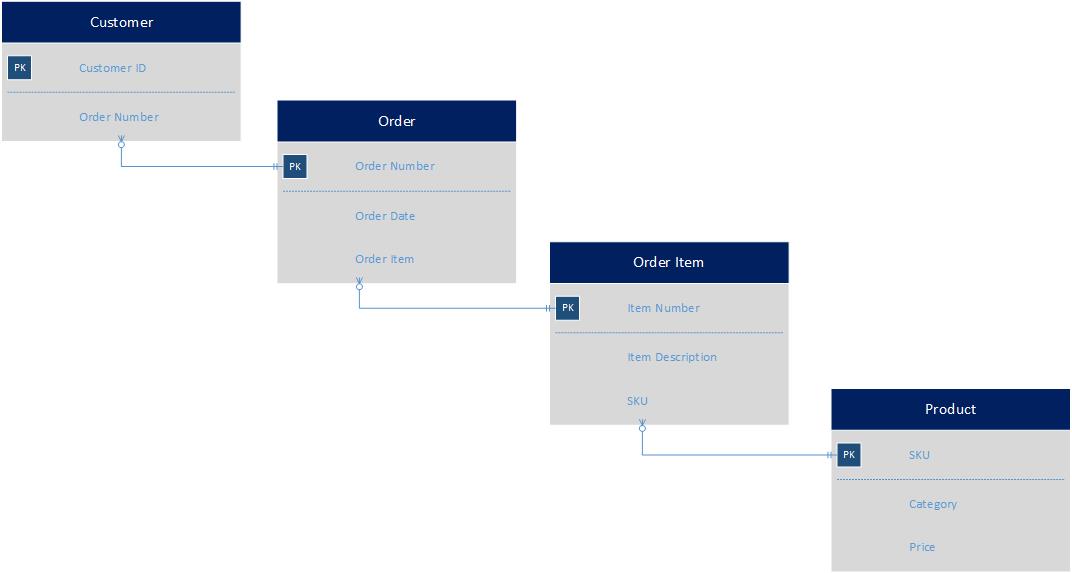
When building a Filter, you can use these existing joins (sometimes called "system joins") to pull in fields that aren't in your source table. For example, if your Filter is built using the Customer table, you could utilize the existing join to the Order table to create a rule that says, Select every consumer who placed an order in the past six months.
To add a field from a joined table to your Filter:
-
If necessary, click Expression Toolbox in the Dynamic Pane (this section is selected by default).
-
If necessary, click on Joins to expand it. Beneath Joins, the system displays a list of all the tables to which this Filter's source table is joined.
-
Drag the desired joined table from the Expression Toolbox, and drop it into the Workspace. The system adds the joined table to the Filter, and displays it with its own header bar.
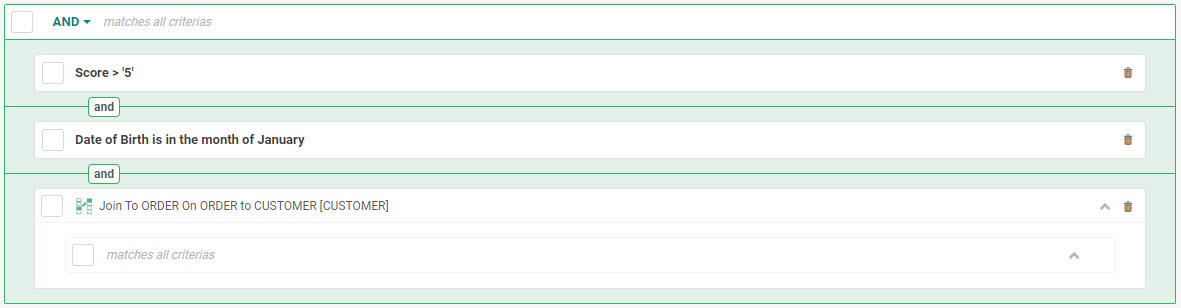
In this example, the user has added a joined table named ORDER to their existing Filter, which already included two other rules.
-
At the bottom of the Expression Toolbox, the system adds a new section with the name of the joined table, followed by a list of all of the fields within this joined table. Drag the desired field, and drop it onto the header bar for the joined table in the Workspace.
Note: When adding a joined field, you must drop the field onto the header bar for the joined parent table within the Workspace; you can't simply drop the joined field anywhere. Conversely, you can't drop fields from the source table onto the header bar for a joined table. Generally speaking, when you add fields to a Filter, you must drop them onto the correct header bar.
In this example, the user is adding a joined field named "Order Date" to his Filter. Please note that the joined field must be dropped onto the blue header bar for the parent table (ORDER).
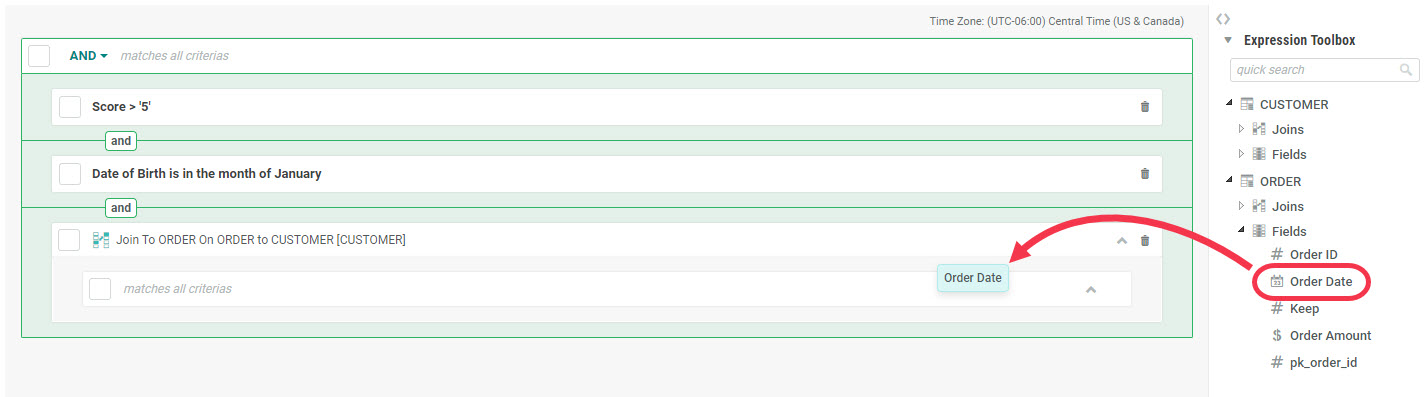
The new field appears beneath the parent table.
-
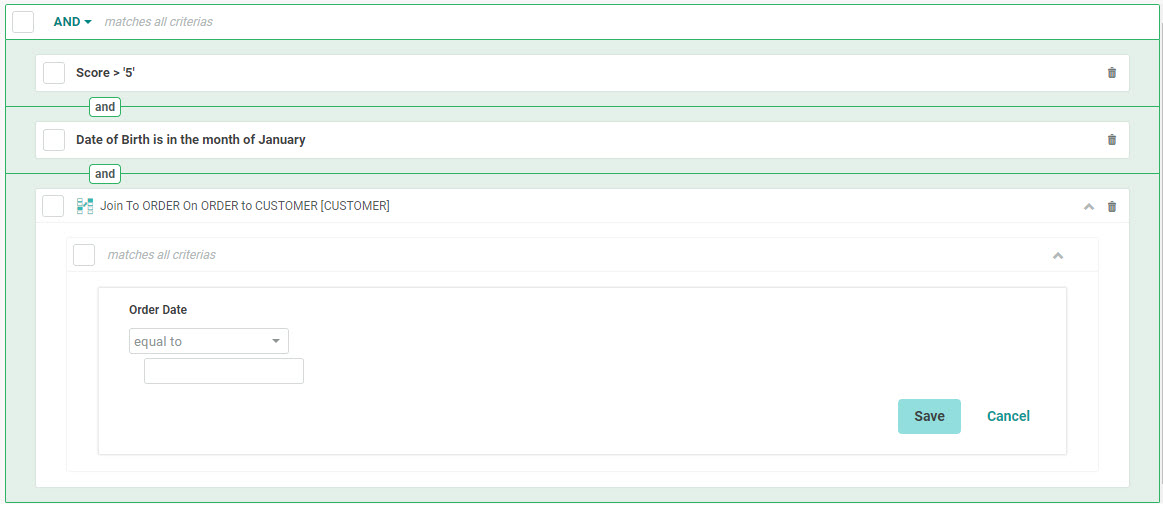
From this point, configuring the Filter logic for the joined field works exactly the same as described above for working with a field on the source table. See the "Fields" section for more information on how to work with fields.
Property Joins
If you need to create a Filter using a field that's not in the source table, and that's not already joined to the source table, you must use the Property Joins feature. This feature allows you to create a join "on the fly" to another table, but only if both tables share the same field (for example, both fields have an Email Address field). When comparing the two joined tables, the system performs a byte-for-byte match on the selected join field in each table. For example, if you set up the join on an Email Address field, the system would look for an exact match on the Email Address value in the source table against the Email Address value in the joined table.
Note: Property Joins are supported by the Quick Calculate feature, but this functionality must be enabled in your account; please speak with your Client Services Representative for details. Also, you can't use Property Joins if you're building a Filter off a Load and Send table.
To create a Property Join:
-
If necessary, click Expression Toolbox in the Dynamic Pane (this section is selected by default).
-
If necessary, click on Joins to expand it. Beneath Joins, the system displays a list of all the tables to which this Filter's source table is joined.
-
Drag Property Joins from the Expression Toolbox, and drop it into the Workspace. The Create a Property-to-Property Join dialog box is displayed.
-
From the Join Field drop-down menu, select the field on the source table to which you'll be joining the other table.
-
From the Join Type drop-down menu, select the join method -- either In or Not In. If you select In, then the Filter will return all records where there's a match between the two tables on the joined field. If you select Not in, then the Filter will return all records where there's NOT a match between the two tables.
-
From the Table to Join drop-down menu, select the table to which you're creating the Property Join.
-
From the Field to Join drop-down menu, select the field on the joined table that you're using to create the Property Join. This field should contain the same information as what you selected for Join Field above.
-
Click add join. The system adds the newly joined table to the Filter, and displays it with its own header bar.
-
At the bottom of the Expression Toolbox, the system adds a new section with the name of the joined table, followed by a list of all of the fields within this joined table. Drag the desired field, and drop it onto the header bar for the joined table in the Workspace.
Note: When adding a joined field, you must drop the field onto the header bar for the joined parent table within the Workspace; you can't simply drop the joined field anywhere. Conversely, you can't drop fields from the source table onto the header bar for a joined table. Generally speaking, when you add fields to a Filter, you must drop them onto the correct header bar.
-
From this point, configuring the Filter logic for fields within the Property Join works exactly the same as described above for working with a field on the source table. See the Fields section for more information on how to work with fields.
Aggregations
When you add a System Join to a Filter, the platform allows you to perform a mathematical operation, such as a sum or a count, on a field in the joined table.
Note: Aggregate Counts are not supported by the Quick Calculate feature. Also, you can't use Aggregations if you're building a Filter off a Load and Send table.
To define an aggregate count:
-
Add a System Join to your Filter as described above.
-
Click the check mark next to the header bar for the System Join.
-
In the Tool Ribbon, click Expression > Aggregate > Toggle. The system expands the Join's header bar.
-
From the Select a Function drop-down menu, select the desired mathematical operation -- Sum, Count, Average, Minimum, or Maximum.
-
Select a mathematical operator from the drop-down menu.
-
From the Select a Field drop-down menu, select the desired field on the joined table.
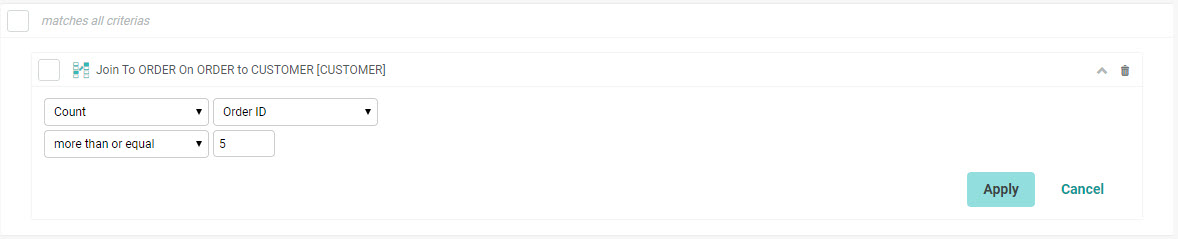
As an example, let's say you want to send a "Thank You" message to all your best customers who have made at least five purchases.
In this example, the user has added a Join to the ORDER Table. After toggling on the Aggregate feature, the user defines the Filter logic as customers who have at least five Order ID fields.
-
Enter a value.
-
When finished, click apply. Or, click cancel to remove this Filter criteria.
Top & Sort
The platform allows you to sort the records in your Filter result set, then select a specified quantity of records off the "top" of that sorted result set. This feature is useful if you want to create a Filter of a specific size, or if you want to pick the top records based on a certain field, such as a Score, or Purchase Amount, for example.
Note: The Top & Sort function is not supported by the Quick Calculate feature. Also, you can't use the Top & Sort feature if you're building a Filter off a Load and Send table.
To define a sort order and to select a specified quantity of records:
-
Click the check mark next to the desired header bar (NOT next to an individual condition) to select it. You can check the top-level header bar; or, if you've added a System Join or a Property Join to the Filter, you can click the header bar for the Join.
-
In the Tool Ribbon, click Expression > Top & Sort > Toggle. The system expands the header bar.
-
In the Top field, enter the desired record quantity that you want this Filter to select.
-
Optionally, from the Order by drop-down menu, select the field by which you want to sort, and select the sort order (either "Ascending" or "Descending"). If you don't specify a field on which to sort, the system will default to sorting the records by Primary Key ID (pk_id), which is essentially sorting the records by the date they were added to the database. By not selecting a sort order, you can create a close equivalent to a random selection.
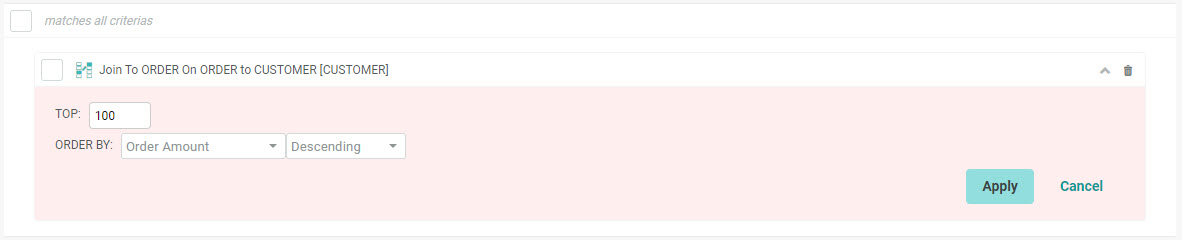
As an example, let's say you want to target your biggest buyers by finding the top 100 orders based on Order Amount.
In this example, the user has added a Join to the ORDER Table. After toggling on Top & Sort, the user enters "100" in the Top field, then selects Order Amount as the field on which to sort, and Descending as the sort order.
-
When finished, click apply. Or, click cancel to remove this Filter criteria.
Activities and Items
Activities are events that are recorded in the database and that can be used in your Filters. These activities include both system-generated events (such as a File Import) and user-generated events (such as "Link Clicks").
The list of available activities is displayed within the Expression Toolbox in the Activities & Items section.
Note: You can't use Activities and Items if you're building a Filter off a Load and Send table.
To add an activity to your Filter:
-
In the Dynamic Pane, click Activities and Items. The system displays a list of all the available activities.
-
Drag the desired activity from the Dynamic Pane, and drop it into the Workspace.
-
A Build Criteria dialog box is displayed. This dialog box displays the options specific to the type of activity that you selected. For most activity types, you can build multiple criteria options, each of which will be displayed as a tab within the dialog box. For more details on the criteria options available for each activity type, see the Help topic Filter Options for an Activity.
-
Optionally, enter a name for this activity Filter criteria in the Filter Name field at the bottom of the dialog box.
-
Click save criteria. The system adds the Activity criteria to the Filter.
-
From this point, configuring the Filter logic for an activity works the same as described above for working with a field on the source table. For example, you can join the activity criteria to other criteria using logical operators, add the activity criteria to a group, etc.
Working with Components
This section describes how to manage the different components that you've added to your Filter.
Logical Operators
If your Filter has only one rule, then the system simply finds all the records that match that rule.
In this example, the user is simply looking for all recipients from Illinois.

As soon as you add a second rule, then you need to define the logical relationship between the rules -- either AND (meaning, the record must match all criteria) or OR ( meaning, the record must match at least one of the criteria). In most cases, an OR operator is more inclusive, and will result in more records being selected.
By default, the platform uses an AND operator. To switch to using OR instead, click the AND operator, and select OR from the drop-down menu.
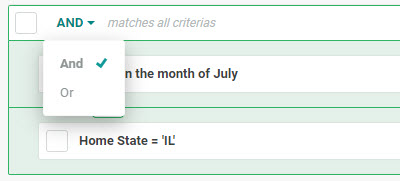
In this example, the user is looking for "state is Illinois and birthday is in July." The user connects the two rules using an AND operator, meaning the record must match both criteria in order to be selected by the Filter.

In this example, the user is looking for "consumers from Illinois, or who have a birthday in July.'"

If your Filter is looking for multiple values within the same field, you can create two rules and join with an OR logical operator similar to the above example ("State = CA" OR "State = NY"). Another option is define a single rule that uses the "in" mathematical operator. The "in" operator is used to create a set of valid values within a field. The system will look for records with any of these values in this field. In the below example, the user has selected the State field, and used the "in" operator to list all of the desired values. The system will select records where the State value is "CA" or where the State value is "NY."

If your Filter utilizes a joined table, the system adds a separate header bar for this table. All fields that you add from this joined table will appear beneath this header bar. If you add multiple joined fields from the same table, you can define a logical operator that applies to these joined fields, independently from the rest of the Filter logic.
In this example, the user is using an AND operator for the fields on the Filter source table. The Order Amount and Order Date fields are joined fields stored in the ORDER table, and are joined using an OR operator.

Group Components
Filter rules can be grouped together to create more complex logical structures using combinations of AND and OR operators. To group two or more rules together:
-
Click the check marks next to each rule.
-
Click Expression > Group. The system will indent the selected rules, and put them inside their own box with their own header bar. You can now set a logical operator within that group, as well as across groups.
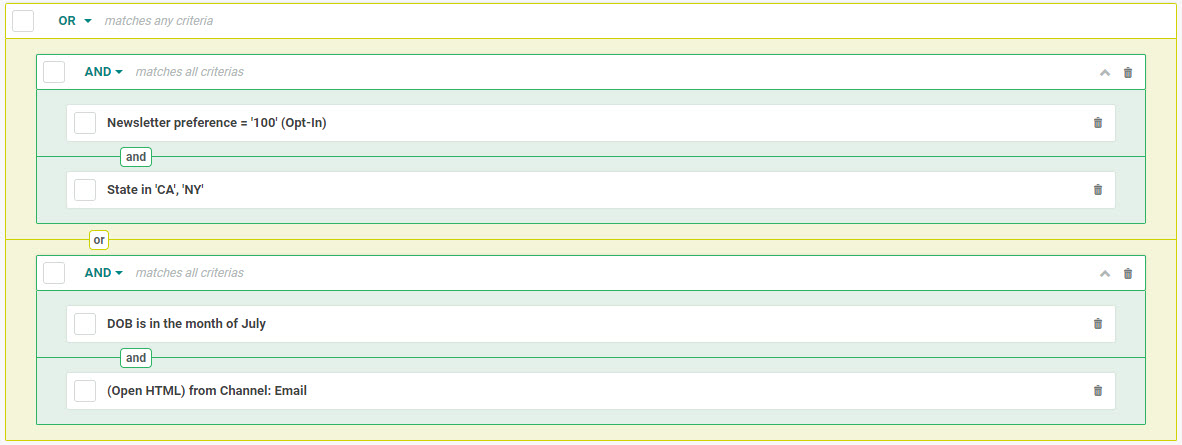
In this example, the user has constructed two groups, each containing two rules joined with AND. The two groups are then joined by an OR operator.
To pull a rule (or rules) out of an existing group:
-
Check the check mark next to the rule.
-
Click Expression > Ungroup in the Tool Ribbon. To eliminate a group completely, check all of the rules in the group, then click Expression > Ungroup in the Tool Ribbon.
Include / Exclude
By default, a Filter will include all of the records that match the criteria and business rules defined within each component of the Filter. In some cases, though, you might want to exclude records that match a Filter component. The system allows you to toggle the component's definition from include to exclude. For example, let's say you want to select all individuals except those who live in California. You could define the Filter by listing out the other 49 states that you want included. However, it might be simpler to define the Filter as exclude California.
Note: The exclude command is not supported by the Quick Calculate feature.
To toggle a component from include to exclude:
-
Click the check mark next to each desired component.
-
In the Tool Ribbon, click Expression > Toggle. The system changes the logic to exclude for each selected component. The component is highlighted in red, with a label excluded.
Reorder Components
Filters always execute from the top down, meaning the rule that appears at the top of your Workspace will run first, followed by the next rule, and so on. Filter components can be rearranged into a different sequence in order to change the sequence in which the Filter executes. In most cases, you want the Filter component that's most likely to eliminate the most records to run first, in order to improve the Filter's efficiency. For example, if you had a Filter consisting of "find all females in Illinois," your Filter would contain two components ("Gender = Female" and "State = IL"). You would want the State component to run first, as this rule will eliminate more records than the Gender component will.
To re-order the sequence of Filter components:
-
Edit Filter Logic > Re-Order. The system toggles on Re-order Mode. A small "handle" icon is displayed to the left of each Filter component.
-
Click on a component, and drag it either up or down to move it to a new location. Repeat this step as needed to rearrange other Filter components.
-
When you're finished, click Edit Filter Logic > Re-Order again to toggle off Re-order Mode.
Remove Components
To remove a component from your Filter:
-
Click the trash can icon to the right of the Filter component that you need to delete. The Filter component is grayed-out to indicate that it's been marked for deletion.
-
In the Tool Ribbon, click Save.
-
The selected component is removed from the screen.
Note: Prior to saving, you can always restore a removed Filter component by clicking the restore icon to the right of the Filter component.