RCS Links and Actions for Buttons and Chips
Personalizing RCS with buttons, chips and links
RCS messages can be interactive. Instead of sending a message your recipients only read, you can add tappable elements that help them take the next step.
- Buttons — Appear inside the message and prompt the recipient to take immediate action. Buttons are specific to each message, so each rich card in a carousel can have its own buttons. Buttons are recommended for primary actions tied to a specific rich card. There are 7 possible action types to choose from: URL, Reply, Dial number, Add to Calendar, URL in webview, Share Location, View Location.
- Chips — Appear at the bottom of the message as suggestions for next steps to keep the conversation moving. Chips are recommended for quick next steps and disappear after interaction. They are shared across all rich cards in a carousel. There are 7 possible action types to choose from: URL, Reply, Dial number, Add to Calendar, URL in webview, Share Location, View Location.
- Hyperlinks — Clickable, tracked links you can place in the message title, body, or fallback text. There are 3 types of links to choose from: Redirect to existing journey, Define in journey and External URL.
Examples: A few examples of using a button or a chip.
1. A Go to website button or chip in the card, will navigate the recipient away from the RCS message and to the website.
2. When the recipient taps the “Enroll me!” reply button (or chip), that text is automatically added to the RCS conversation and sent back as their reply: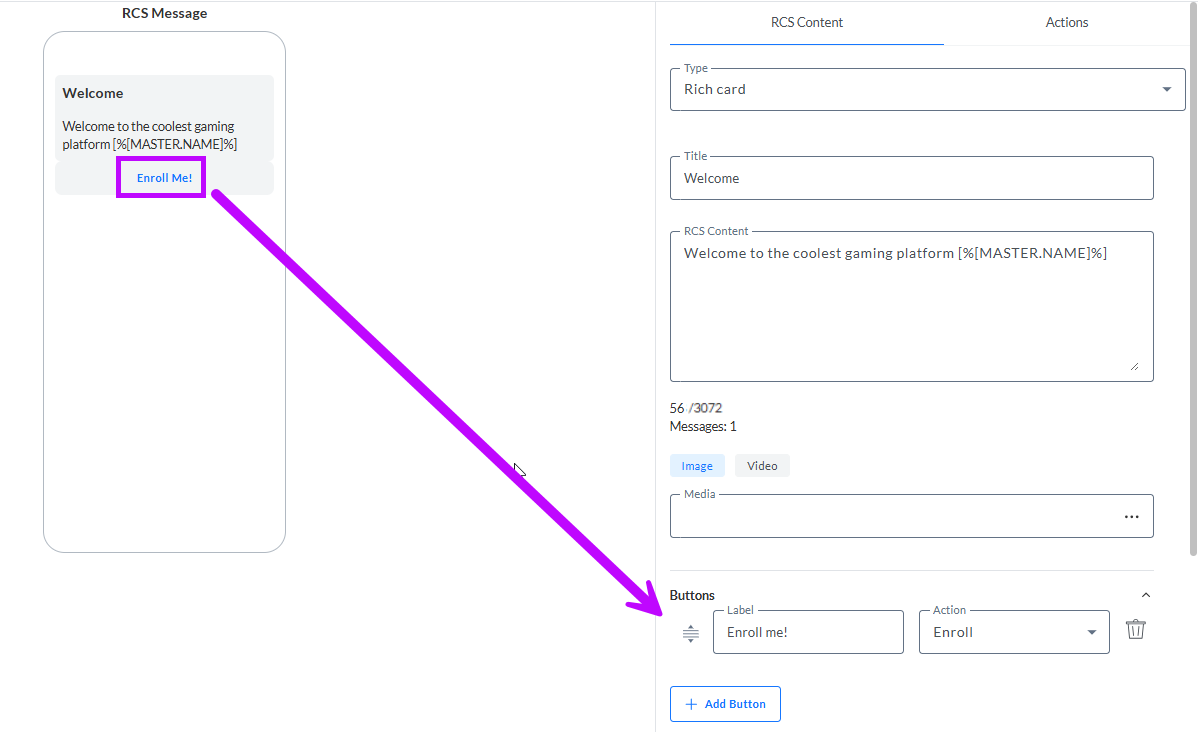
The button is configured as a Reply type, with “Enroll-me!” set as the reply value. This means that whenever a recipient clicks it, the system receives exactly that value.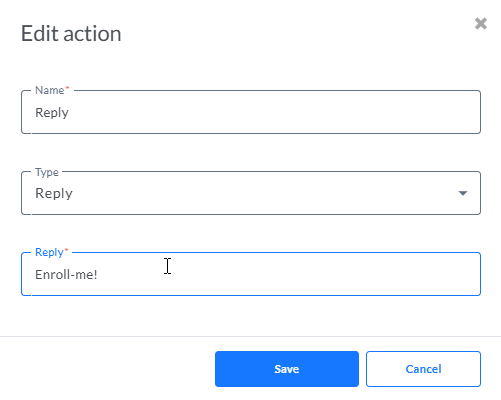
You can then use this reply Enroll-me! as a keyword for the inbound event: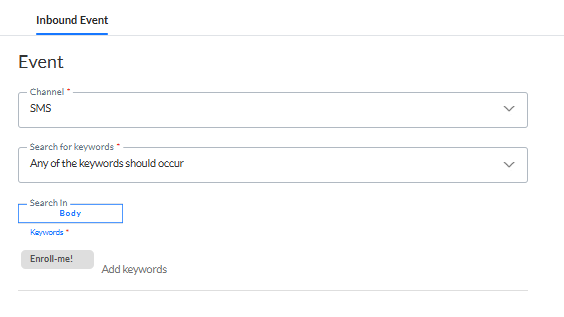
When the inbound event detects this reply, it triggers the follow-up journey associated with it.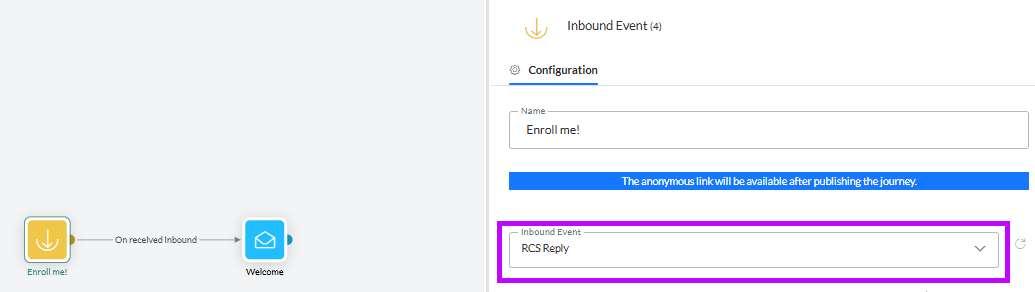
Creating Actions and Links
When you add buttons and chips to an RCS message, you assign an action to each one. If the action already exists, select it from the drop-down. If it does not exist yet, create it.
You can create a new action directly from a button or chip, or from the Actions tab.
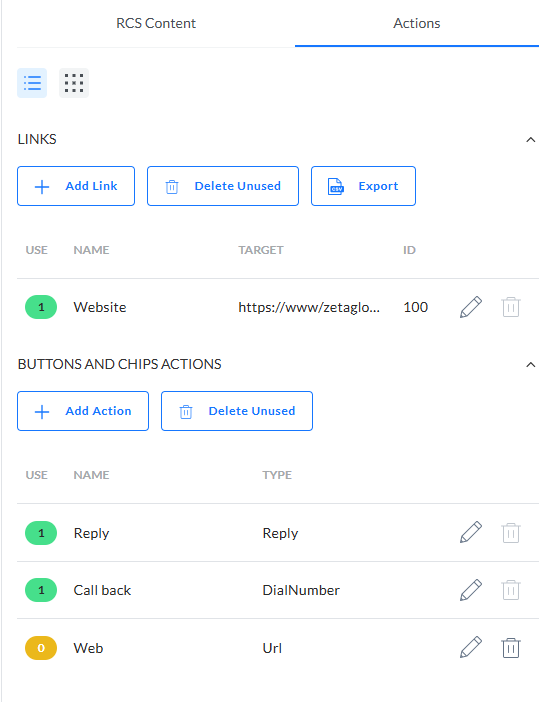
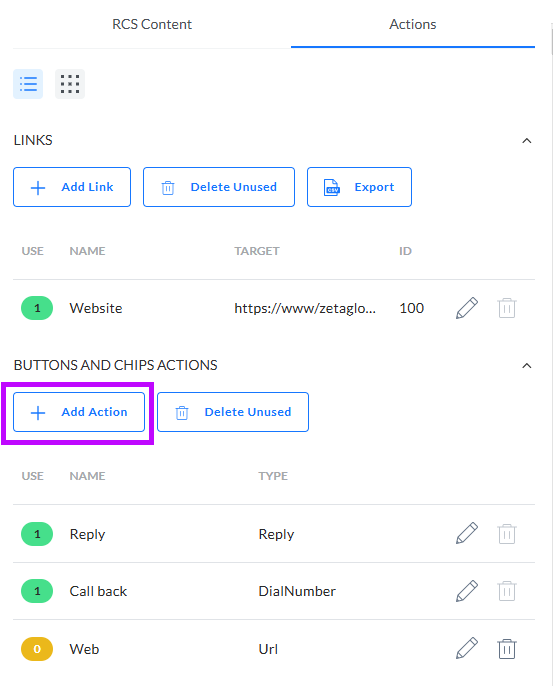
The Actions tab is divided into two sections:
- Links at the top
- Button and Chip Actions at the bottom
Links
A link sends the contact to a destination. For example:
- an external URL
- a redirect defined in a Journey
- a redirect to another Journey
You can use links in two ways:
- as short links directly in the message text, and/or
- by attaching a link to a button or chip (via a URL-type action)
Actions
An action triggers something immediately when the contact taps a button or chip.
Actions don’t appear as clickable links in the message text—they can only be used on buttons and chips.
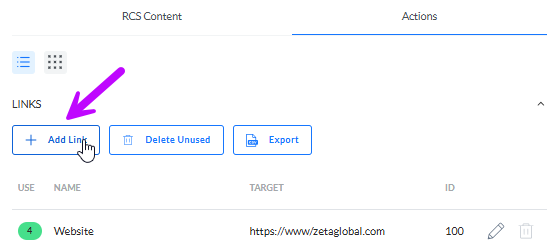
Create a link
1. On the Actions tab, click Add link.
2. In the dialog, fill out the required properties such as name and destination.
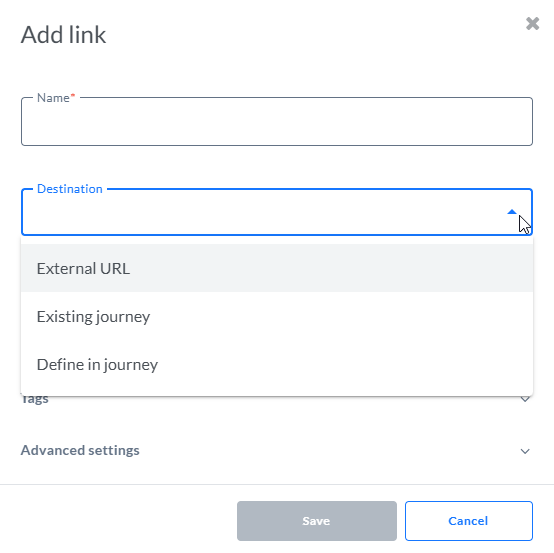
You can create the following link types:
- External URL — Redirects the recipient to a specific external web page URL (https://).
- Existing journey — Redirects the recipient to an existing journey.
- Define in journey — Defines the link in the journey itself, after an onclick event.
Details on how to create and configure a link are available in the article 'links In content'.
Note: From the Actions overview, you can
- delete unused links
- export all configured links as a CSV file.
- switch between list view and thumbnails view
Create an action
1. On the Actions tab, click Add Action:
2. In the dialog, enter a name for the action. This name appears in the actions overview as well as in the list of actions shown when creating a button or chip. Use a name that makes the purpose clear.
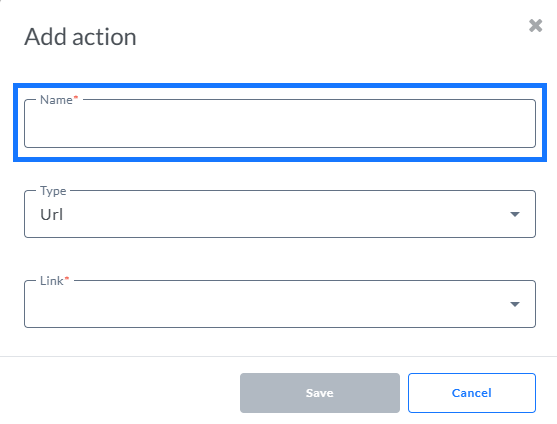
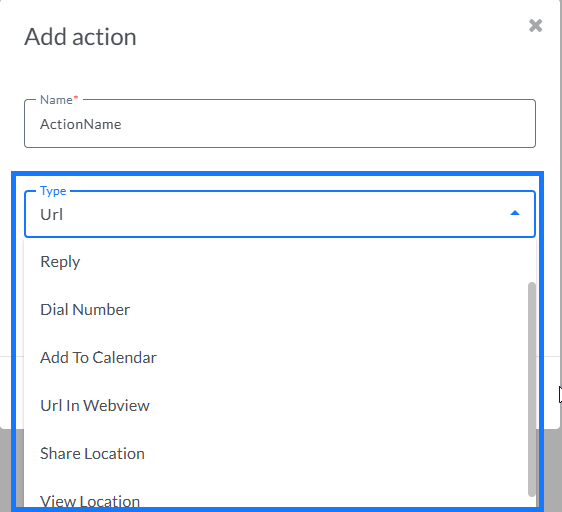
3. Next select the Type. You can choose from:
- URL
- Reply
- Dial number
- Add to calendar
- URL in webview
- Share location
- View location
4. Fill out the properties for the selected type.
Reply
When recipients tap a reply button in an RCS message, the suggested response is automatically inserted into the conversation and sent back. To make this work, each button must include a reply which is then used as postback data, telling the system what action to take when the reply is received.
This reply can then be used as a keyword for an inbound event in a journey, allowing you to trigger follow-up actions based on the recipient’s response.
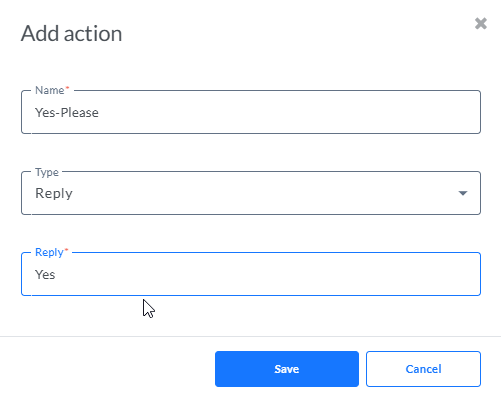
When defining a reply, keep these guidelines in mind:
- Use unique values for each response to prevent confusion with other inbound events
- Use hyphens for multi-word responses (for example: order-confirmed) so the system treats the entire phrase as a single keyword.
(A user guide explaining the conversational RCS using a Reply button is available here.)
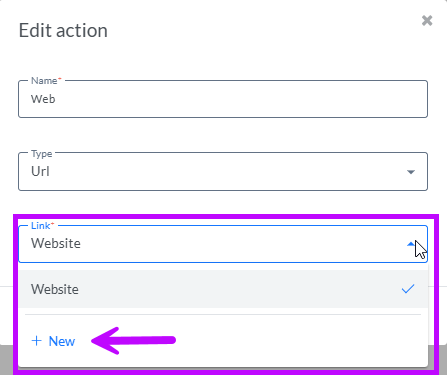
URL
A URL type button is used for selecting a link to an external URL, to an existing journey, or a link that you will define within a journey after an onclick event.
When defining an action of type URL, an existing link can be selected from the Link drop-down or a new one can be created.
More details on creating links in the previous section.
Dial a number
The Dial action guides the recipient to dial a phone number specified by your agent.
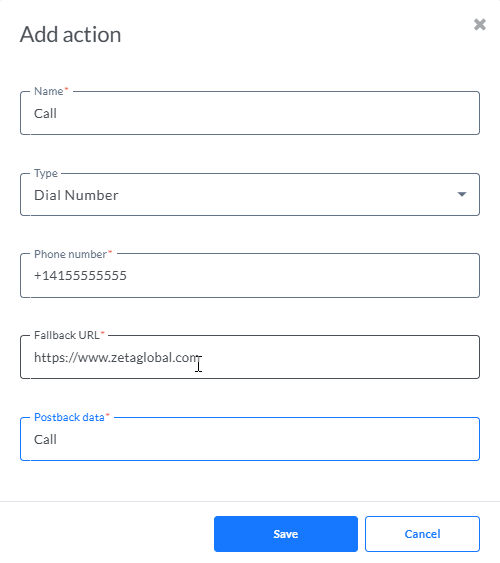
- Phone number — Phone numbers can only include digits (0-9), plus sign (+), asterisk (*), and number sign (#). The E.164 international format (for example, +14155555555) is supported but not required. That is, both +14155555555 and 1011 are valid entries.
- Fallback URL — The URL to fall back to when no call can be made.
- Postback data — The postback data that can be picked up by the Inbound Event as a result of a click.
Add to Calendar
The Create calendar event action opens the recipient's calendar app and begins to create a new event with the specified information.
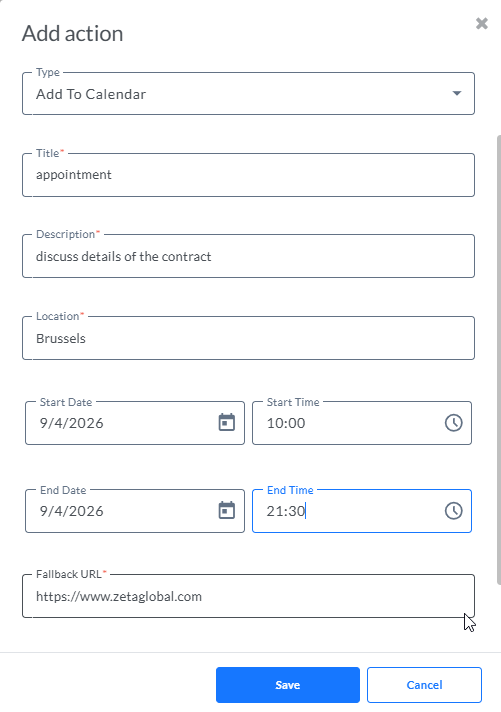
- Title — A calendar event title has a maximum of 100 characters.
- Description — The calendar event description has a maximum of 500 characters.
- Location
- Start date and time
- End date and time
- Fallback URL — The URL to fall back to when no call can be made.
- Postback data — The postback data that can be picked up by the Inbound Event as a result of a click.
Share location
The Share Location action lets the recipient share a location with your agent. The user can share either their current location or a manually selected location from the Maps app.
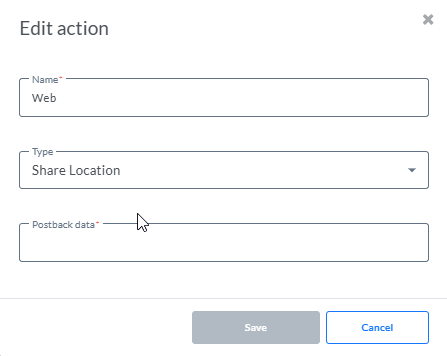
Postback data — The postback data that can be picked up by the Inbound Event as a result of a click.
View location
The View location action displays a location in the recipient's default map app. You can specify the location by latitude and longitude.
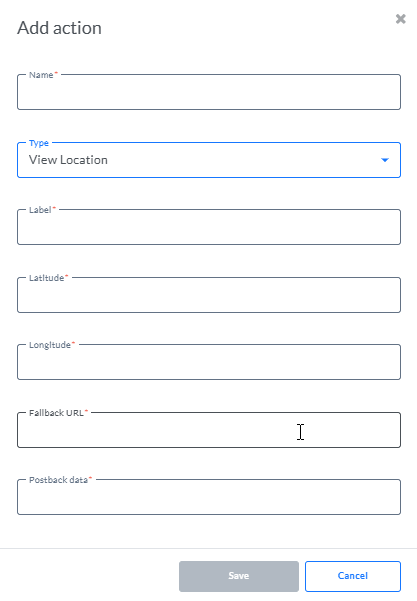
- Title
- Latitude (ex. 37.4220188)
- Longitude (ex. -122.0844786)
- Fallback URL — The URL to fall back to when no call can be made.
- Postback data — The postback data that can be picked up by the Inbound Event as a result of a click.
URL webview
The Open URL with webview action loads the specified web page inside the messaging app with the rendering engine of your default browser. This allows the user to interact with the web page without leaving the RCS conversation. If the user's device doesn't support webviews, the web page opens in the user's browser instead.
- Link — The URL of the page.
- Description — A description of what will be shown.
- Application — The application to use, in this case Webview.
- Web view mode — Web views have three display modes.
- Full: The web page takes up the full screen
- Half: The web page takes up half of the screen
- Tall: The web page takes up three quarters of the screen
5. Click Save to store the action.
Note: From the Actions overview, you can
- delete unused actions
- switch between list view and thumbnails view
Using actions or links
Adding links to an RCS Message
1. Click on the link icon that appears in the pop-up toolbar while typing in the RCS Content or title field. A drop-down of available link options is shown, together with the option to create a new one.
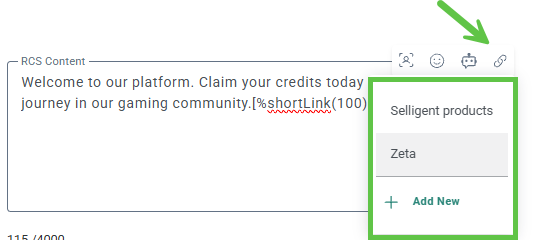
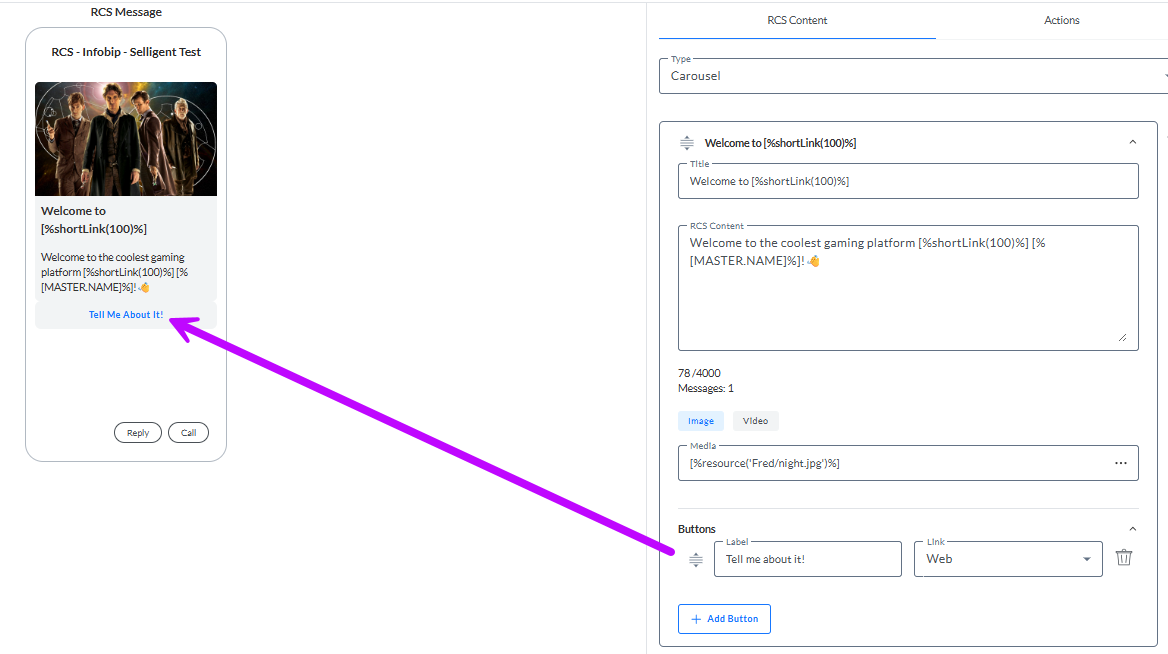
2. When the link is added, a shortLink expression (eg.[%shortLink(100)%]) is used. The message design on the left shows a dummy short URL (eg. https://short.slgnt.io/ABCDEF).
Note: A dummy URL is used, as the actual URL shortening only happens at Journey execution send time.
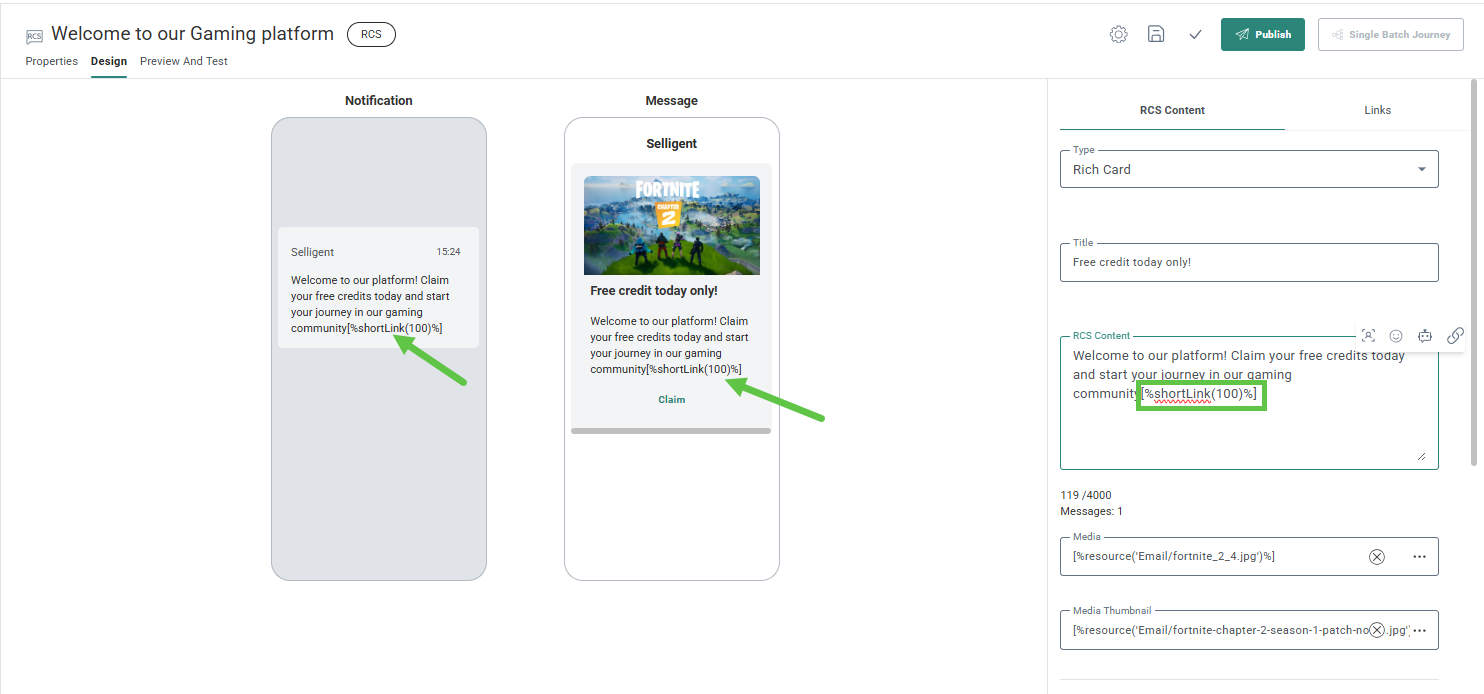
3. The preview of your RCS message, also shows this link as such.

Note: The Short URL expires after 90 days.
Adding actions to a button or chip
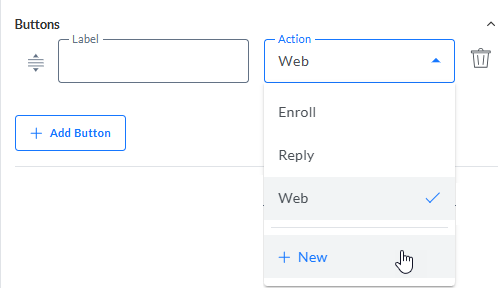
1. To add an action to a button or chip, open the Action drop-down.
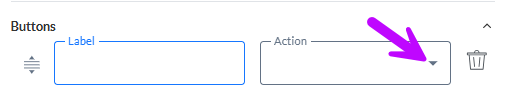
2. The drop-down lists all the actions you have already created (also visible from the Actions tabs) and the option to create a new one.
3. Once an action is selected and a label is given, it is displayed as a button in the message: