What Is Journey Authorization?
Journey authorization isn’t about your customers logging in. It is about protecting how your journey is accessed and displayed.
When you enable authorization on a Custom Journey (with an Input component), you ensure that the journey can only run through your approved web layer (called the renderer) — where your business rules, personalization logic, and compliance checks are applied.
Without authorization, someone could attempt to access the journey directly and bypass those rules. This could:
- Show incorrect content
- Skip legal or offer validation
- Break the intended customer experience
Journey Authorization prevents that.
Why this matters for marketers
Enabling Journey Authorization helps you:
-
Protect your brand and compliance: Legal checks, eligibility rules, and personalization logic are always applied.
-
Ensure a consistent experience: Customers cannot access incomplete or unintended versions of your journey.
-
Eliminate security gaps: Once enabled, the journey cannot be accessed in ways that bypass your configured rules.
In short: Your journey always runs the way you designed it.
What Happens Behind the Scenes
When authorization is enabled:
- The journey is “pinned” to a renderer (secure web layer).
- If someone tries to access the journey directly:
- They are automatically rerouted through the secure renderer, or
- Access is denied.
- Normal customer traffic is not affected.
- Unauthorized access attempts are blocked.
For the end user, nothing changes — they simply see the correct experience.
Configuring Journey Authorization
Follow the steps below to enable authorization on a Custom Journey.
1. In the properties of a Custom Journey with Input component, go to the left menu Advanced:
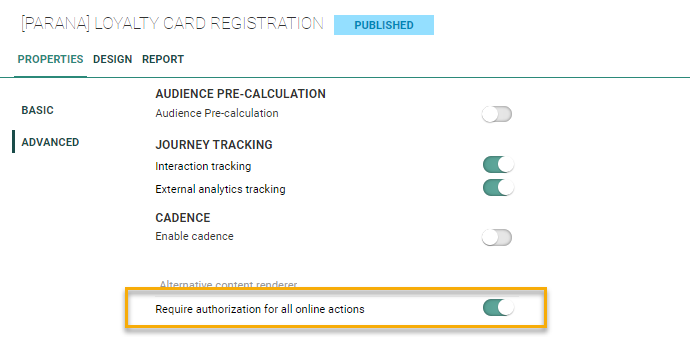
2. Enable the option Require authorization for all online actions.
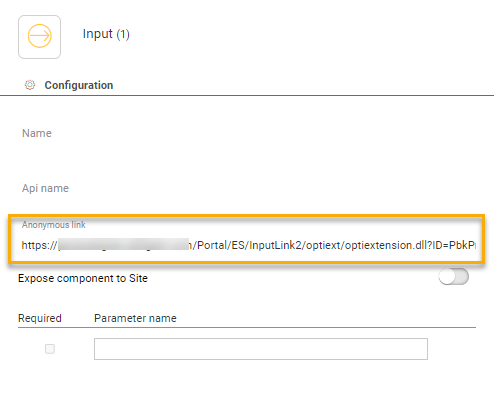
3. Next, click the Input Component in the Custom Journey to access the properties and back up the anonymous link that becomes available after publishing the journey. This anonymous link is your access point to this journey.
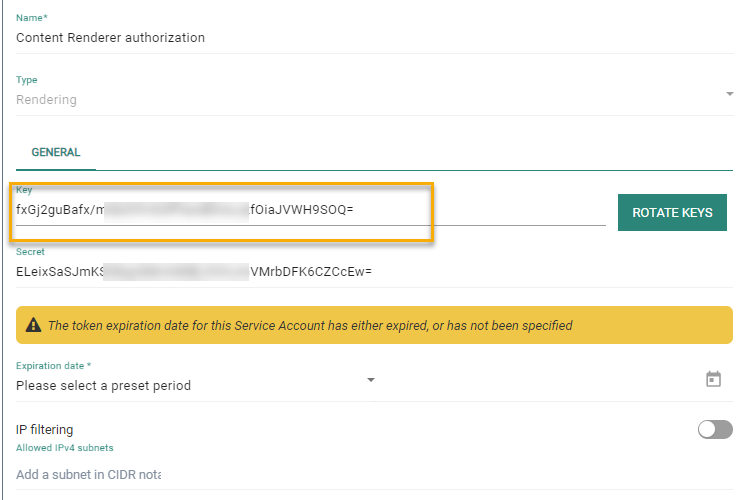
4. Once authorization is activated for a journey, you need to set up a service account of type Rendering.
5. Go to the Admin configuration/Access Mgmt section and activate the Service account entry.
Create a new service account of type rendering.
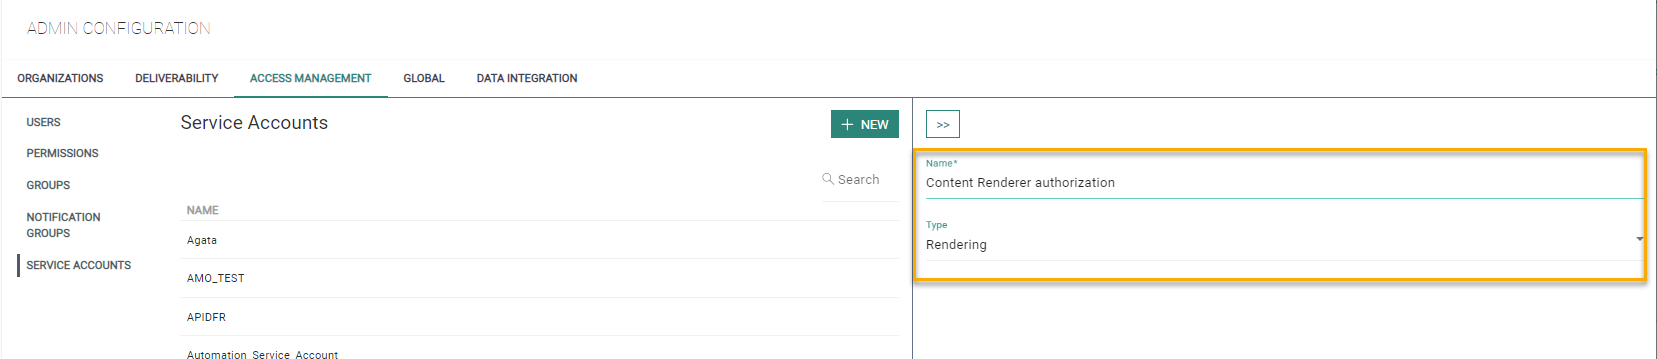
6. Once saved, copy the key and secret for later use.
Apply Journey authorization to secure your Journeys
There are two main scenarios when using journey authorization to secure journey access:
- using the generic Selligent content renderer
- using custom web apps or other Selligent applications
Scenario1: Secure Journeys using the generic Selligent content renderer
Journey-level authorization enforces the secure path
- With authorization on the journey level, those journeys can only be loaded through the secure path.
- Only users from allowed IPs can access the Journey content.
- Using the non-secure link returns an error instead of loading the content.
What this means for marketers
- Only approved environments can load your journey.
- Accidental use of incorrect links will not expose content.
- Security is enforced automatically.
Modify the secure content renderer configuration
Introduction
A journey that uses the generic Selligent content renderer with built in IP filtering (using the /secure/ url - cfr. Https://your_domain/renderers/swagger/ui/index#/Content) can be easily locked down further by applying journey authorization.
Since the journey makes use of the IP filtering content renderer, the CFG_CR_IPSEC table already contains the necessary IP filtering configuration for the given journey.
To pin the renderer to the journey via journey authorization, the only change required is to extend the current configuration record for the journey with a valid rendering service account.
Exactly how to do that is detailed in the steps below.
Updating the content renderer configuration table
The CFG_CR_IPSEC table has been used to include secure rendering for journeys. The configuration record contains:
- Journey ID(s)
- Approved IP addresses
- Service account key
The field ‘SERVICEACCOUNT_KEY’ is an optional field that can be used to choose which journey should use the service account credentials that have been created above. However, when you want to load content from a journey from where authenticate is enabled, you’ll need to add a configuration within this table:
| Field | Example | Description |
|---|---|---|
| ID | 1 | The record identifier which is auto-filled |
| NAME | Invoice | name of the configuration setting |
| JMS | 451,815 | list of journey IDs. Use a comma to separate multiple IDs. |
| IIPS | 10.0.5.8,172.0.5.7 | List of whitelisted IPs. Use a comma to separate multiple IPs |
| SERVICEACCOUNT_KEY | FIreOJ545fezvv87Qz4vez== | The key generated for the service account of type Rendering |
Note:
To retrieve the journey ID of the journey created in step1:
SELECT ID FROM CAMPAIGNS WITH(NOLOCK) WHERE NAME = '{YourJourneyName}' ORDER BY ID DESC
Use this ID to insert a record into the CFG_CR_IPSEC table.
INSERT INTO CFG_CR_IPSEC(NAME, IPS, JMS, SERVICEACCOUNT_KEY)
VALUES('{YourConfigurationName}','{OneOrMore_Ips}', '{OneOrMoreJourneys}' , '{YourServiceAccountKEY_From_Step_2}')
Test the secure content renderer configuration
Using journey authorization ensures that using the anonymous link from the Custom Journey without the /secure/ path will result into an error: 200 - no content . When using the anonymous link with the ‘secure’ path, you’ll receive the actual content (unless your IP doesn’t fall within the CFG_CR_IPSEC list. During this check, the log file will log the IP if the authentication fails).
Access the journey via the secure renderer (/secure/ path)
Follow the steps below to make sure the journey access settings are functioning as expected, meaning that when using the secure renderer, IP addresses will be checked against the list of approved IPs:
Open the secure journey link using the secure renderer link (for example via the API Explorer).
Expected result:
-
for requests made from an approved (Whitelisted) IP address => the content loads correctly and you should be able to view the journey content without any errors
-
for requests made from a non-approved IP address (for example, a personal network without VPN) => Access should be denied. You should see an error message or receive an “Access Denied”.
Attempt to access the journey directly
Follow the steps below to make sure that the renderer has made it impossible to access the journey without the renderer, meaning that access from non-whitelisted IP addresses is no longer possible:
Open the secure journey link using the /content/default api (or by using a direct optiextension link).
Expected result:
-
Previously, requests from non-whitelisted IP's accessing the content via any means other than the secure renderer would have succeeded.
-
After pinning the renderer to the journey, requests from non-whitelisted IP's accessing the content via any means other than the secure renderer will now be rejected (access denied)
Secure Journeys using custom web apps or other Selligent applications
Modify the application
An application that makes use of journey content currently typically performs the following operations:
-
Apply business logic
-
Make a server side call to the optiextension endpoint (directly or by means of a library) to retrieve content
-
Embed the retrieved content in the app and present it to the user
To prevent bypassing the business logic of these apps, we pin the application to the journey in step 2 by providing an additional basic authorization header.
Format of the authorization header:
'Authorization: basic base64(<serviceaccount_key + ':' + <serviceaccount_secret>)'.
Example: For a service account with key = 'mykey' and secret 'mysecret', the header becomes:
'Authorization: Basic bXlrZXk6bXlzZWNyZXQ='
IMPORTANT:
The authorization header must be added server-side ONLY between the application and the optiextension.
Never expose:
- Service account key
- Service account secret
If exposed, security is compromised.
Test the application
After setup:
-
Access the journey via the application . The expected content loads normally.
-
Access the journey directly, without authorization header. The request is rejected (access denied) as a normal direct request does not embed the correct authorization header.
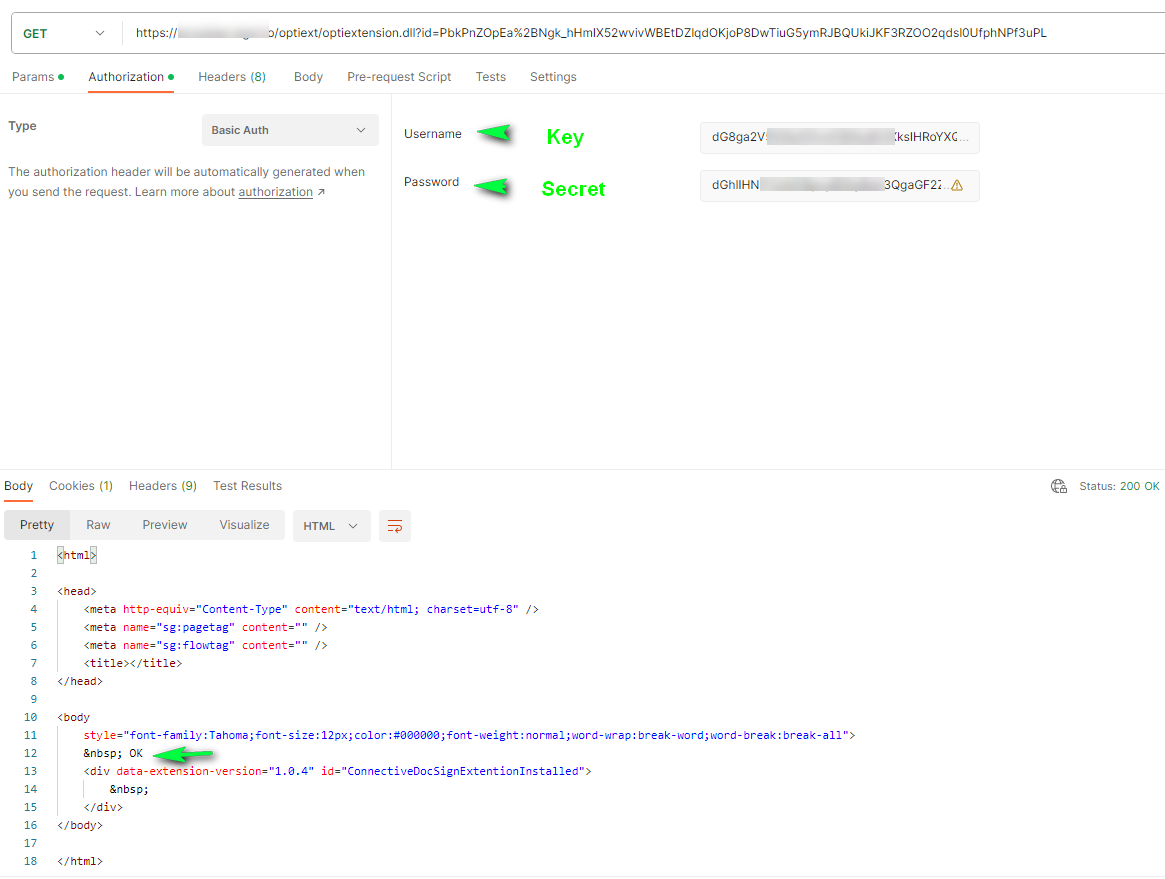
Note: For testing purposes you can use Postman, Bruno, Curl or any other http client tool to inject the Authorization header in a direct request towards optiextension to verify if the journey is locking down or not, depending on the presence or absence of a valid Authorization header.
Following is an example using Postman.
1. Using the anonymous link without authorization, results in the following error: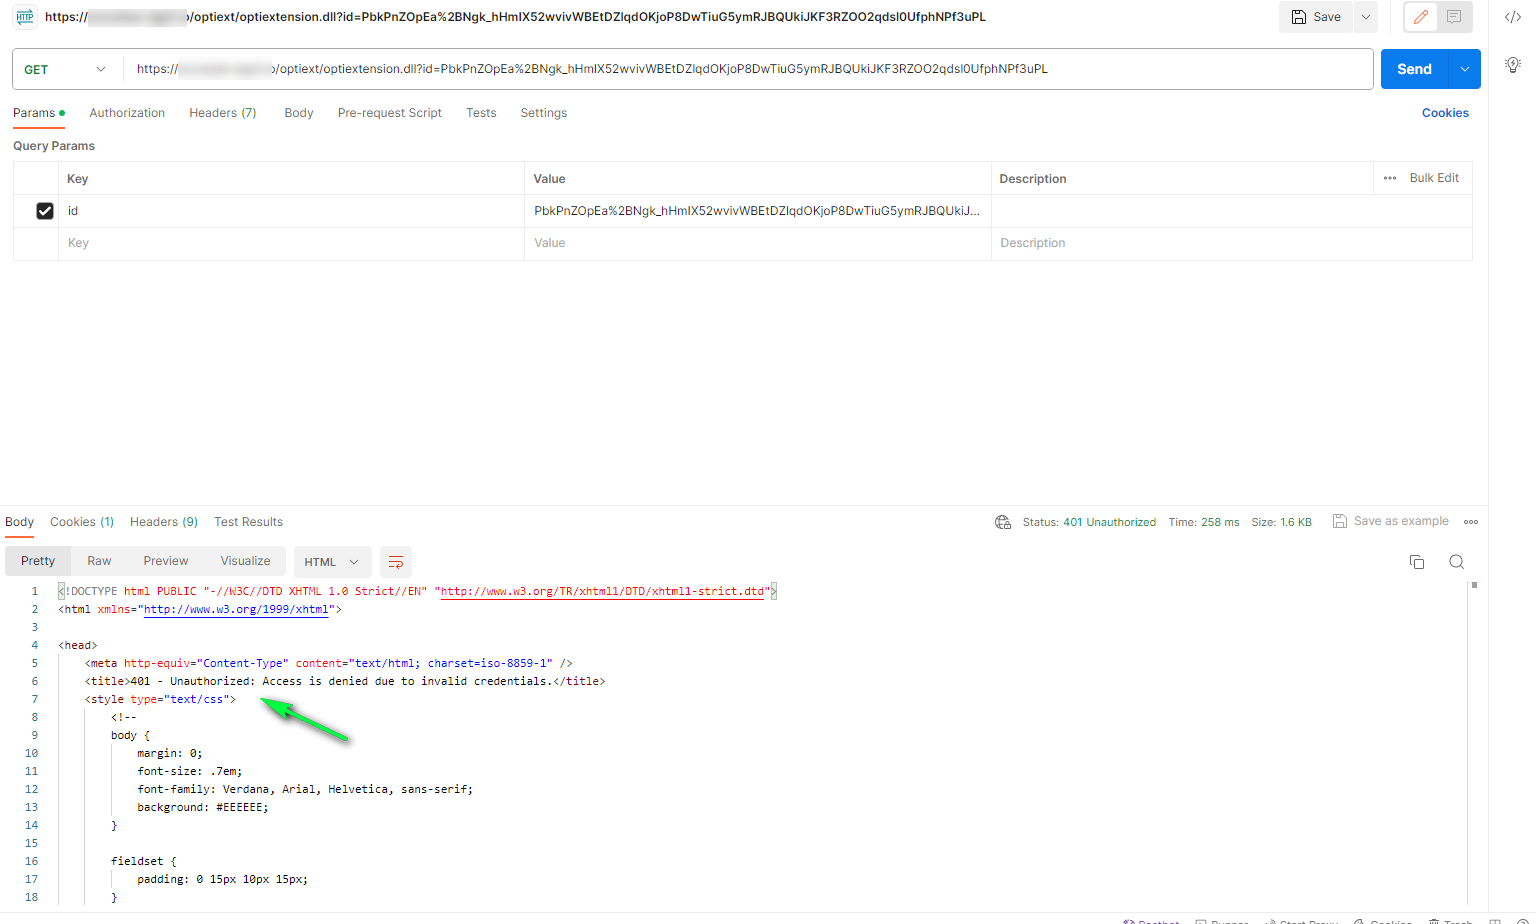
2. Using the same anonymous link but with basic authorization using the key and secret generated by the service account, returns the content correctly: