
Creating a plugin interface
To create a new Plugin based Interface, select the option 'New Plugin Interface' from the toolbar of the 'Interface' tab:

The following window is displayed:
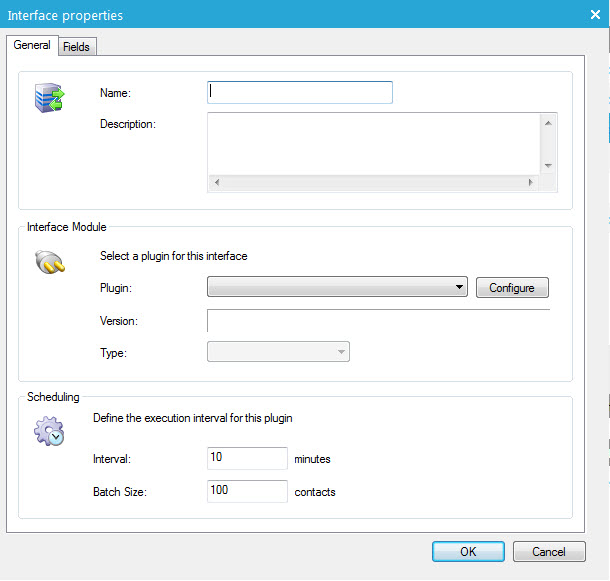
NOTE: Not all properties are configurable in here. Some properties are defined within the selected plugin and can only be viewed.
General
- Name
- Description:
- Interface Module: choose the module that will be used to execute this interface. The version and type are automatically filled out when a plugin is selected.
- Scheduling: set the time interval between 2 executions and the maximum batch size.
Technical note
The modules that are available for selection in this list, are all created
by Selligent. These modules are in fact dll’s that contain the necessary
information to enable an interaction between Selligent and the external
application.
When no module is selected, there is no direct interaction with the external
application but information is stored in special Interface tables which
can be interrogated by the external application after attributing access
rights to these tables.
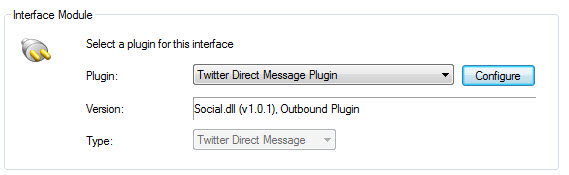
When creating a new Plugin interface, it’s possible to configure specific parameters within the Plugin by clicking the‘Configure’button:
Example for the 'X' (formerly Twitter) direct message plugin:
The content of the window displayed depends on the inner definition of the Plugin. Here is an example based on an 'X' (formerly Twitter) module:
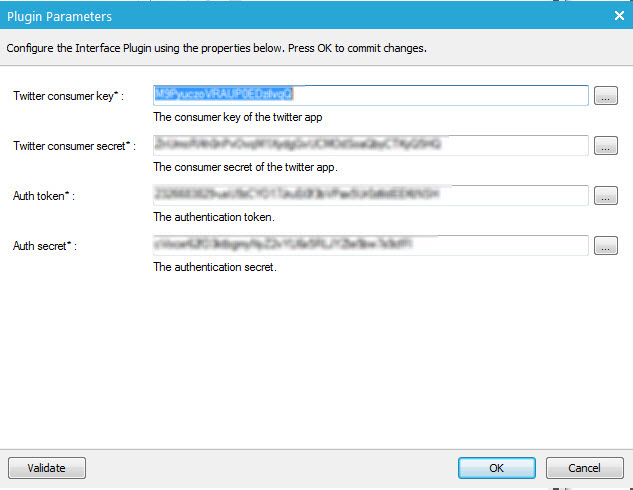
All data specified for the Plugin configuration are stored with the interface properties. This means that the same Plugin can be used in multiple interfaces with, for each, different parameter values.
The ‘Validate’ button triggers the validation of the defined configuration.
Technical note: the Validate button triggers the function ValidateConfig on the interface.
Technically, this validation creates a new record in the ‘INTERFACE_PLUGIN_REQUESTS’ table. Then, the CampaignAgent polls this table and executes requested operations. The validation is therefore an asynchronous process.
Fields
In the 'Fields' tab additional parameters can be specified. These parameters can be used to store information that is not stored directly on the contact's profile.
Most plugins fix the fields to be used in the interface table; in that case the interface definition is not dynamic and not configurable. The user is unable to change fields and the ‘Static definition’ indicator appears.
Following is an example of fields defined in the dll used by the SMS module. The fields cannot be edited.
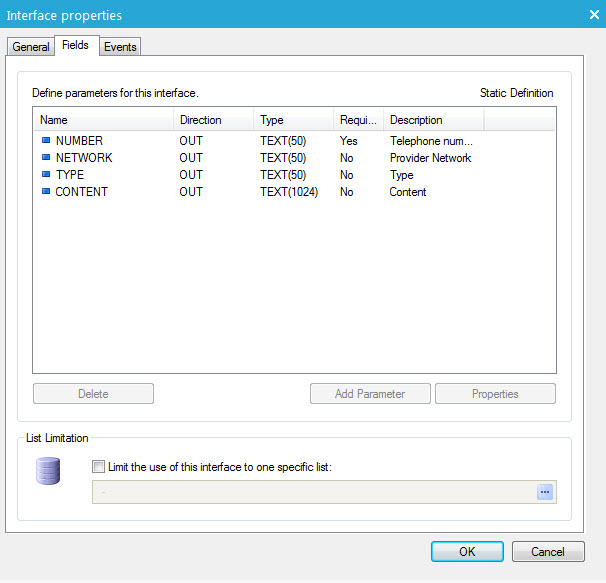
NOTE: parameters can only be defined in here when ‘No module’ has been selected on the‘General’tab. When a specific module is selected, the parameters are defined within the corresponding dll and are displayed automatically on the 'Fields' tab. They can not be edited.
When the field definition is not fixed in the DLL, two alternatives are available:
- Configurable: the user is free to add fields to the interface using the ‘Add Parameter’ button.
- Dynamic: all fields depend on the defined configuration. In this situation, an additional callback is performed after the configuration to retrieve the list of fields from the external system.
NOTE: Like file based interfaces, Plugin interfaces use the ‘CQID’ field to identify records. As this field is managed by Selligent system, it is not displayed in the interface configuration.
Following functionality is available in the 'Fields' tab:
- Delete
- Add parameter
- Properties: view/edit a selected parameter
An interface can also be limited to a specific Audience list. The drop down list at the bottom of the window allows the selection of the required list.
Creating or editing a parameter displays its ‘properties’ :
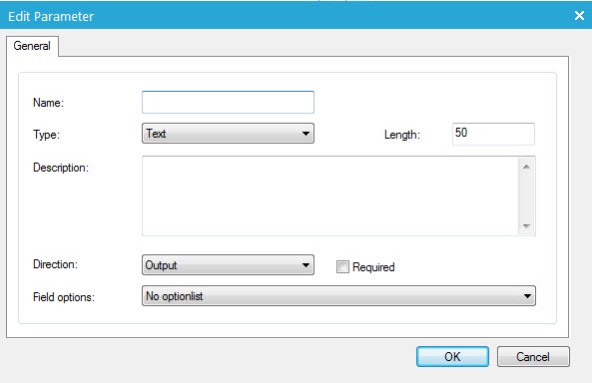
The following information can be defined:
- Name
- Type: type of the parameter (Text, Long Text, Numeric, Date Time)
- Length: length of the parameter-field
- Description: optional description of the parameter
- Direction: direction of the data (Output, Feedback, Both)
- Required: mandatory field or not
- Field options: select an existing Optionlist if required
Events
Before being able to create events, the interface must be created first!
Define feedback events and assign a flag. These events can be used in the journey after an interface component. Define constraints and specify the activation method.
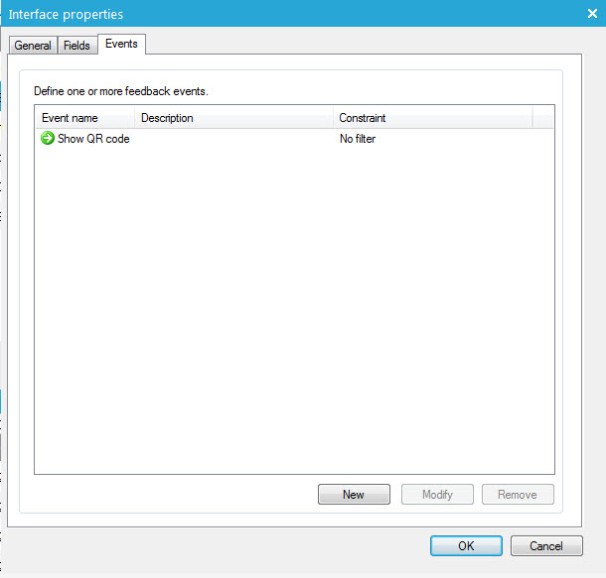
- To add a new feedback event, press the ‘New’
button:
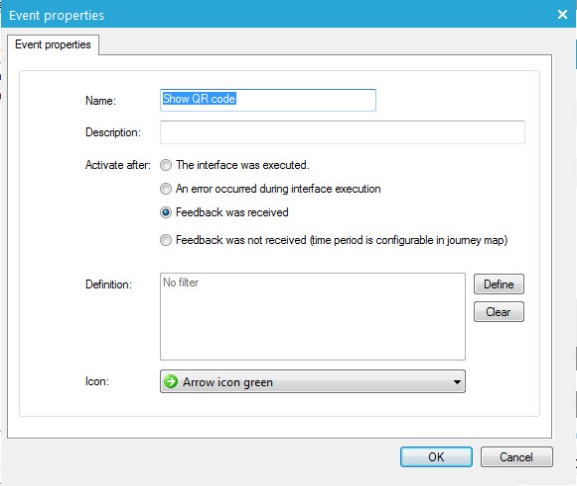
- Enter a name and description for the feedback event.
- Select the event that triggers the feedback. Following options
are available:
- The interface was executed.
- An error occurred during interface execution
- Feedback was received
- Feedback was not received
- Select the icon to be displayed in front of the feedback:
- Finally, validate the creation by clicking the ‘OK’ button. The new feedback is added to the list.
NOTE: feedback for an interface can be received via either a file that is imported (manually or automatically) of via the individual API.