Create an Advanced Tier Rule
The Advanced Rules tab of the Tier Scheme Details screen allows you to define more complex expressions than is possible through the Base Rules tab.
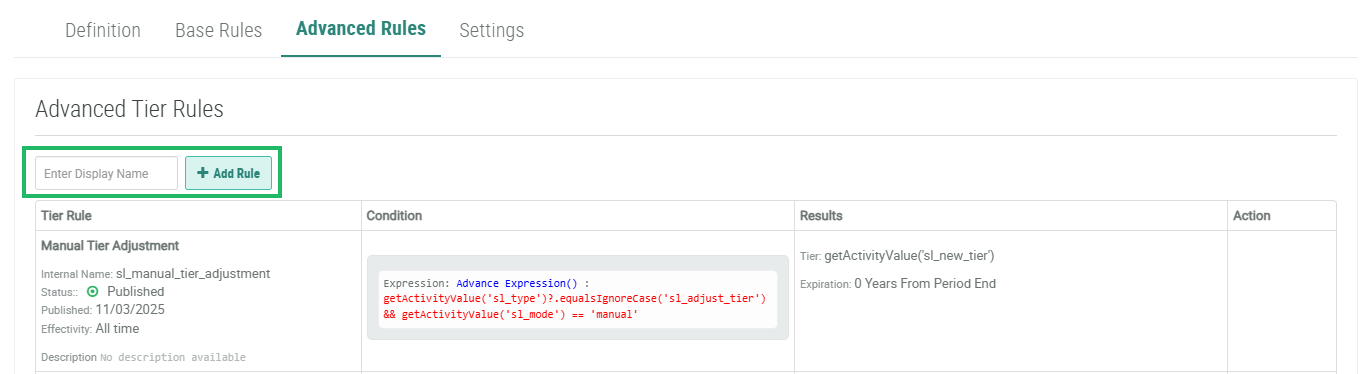
Note: The platform includes a default Advanced Tier Rule called Manual Tier Adjustment that is defined within every Loyalty instance. This default rule is needed to support manual Tier adjustments made by a Customer Service Representative (CSR). A CSR can manually assign a Member to a Tier, even if that Member doesn't meet the requirements for that Tier. This default Advanced Tier Rule ensures that this manual Tier adjustment works as intended. For more information on manual Tier adjustments, see Change Member Tier.
An Advanced Tier Rule comprises a condition and a result.
The condition for an Advanced Tier Rule is represented as a logical expression. The Advanced Tier Rule is invoked only if this condition is satisfied. The use of a condition is optional. If you don't define a condition, the Advanced Tier Rule will always apply.
The result of an Advanced Tier Rule defines what happens when the condition is satisfied (that is, what Tier the Member is awarded), and optionally also an expiration date.
Create an Advanced Tier Rule
To create an Advanced Tier Rule:
-
Select Rules from the top navigation bar, then select Tier Schemes from the side navigation menu. The Tier Schemes screen is displayed.
-
Search for and select the desired Tier Scheme (see
-
Select the Advanced Rules tab.
-
In the Display Name field, enter the name of the new Advanced Tier Rule.
-
Click Add Rule. The Edit Tier Rule pop-up window is displayed.
-
The Display Name field is populated with the value you entered above; optionally edit this value.
-
The Internal Name is automatically populated based on the Display Name value. This field is not editable by default. To edit the Internal Name, check Edit Internal Name. A confirmation dialog box is displayed; click Ok. Edit the Internal Name value.
-
Optionally, in the Description field, enter a description of this item.
-
The default status for a new Advanced Tier Rule is Draft. Optionally, from the Status drop-down menu, select either Published or Archived.
-
Next to Effectivity, select either:
-
Always: This Advanced Tier Rule doesn't expire.
-
Scheduled: Enter a start date and end date, and select a time zone. Optionally, check Recurring to use a recurring schedule. Select the desired schedule from the Recurring Schedule drop-down menu, or define a new recurring schedule (see below for details on that process).
-
-
Click Save.
Recurring Schedule
To define a new recurring schedule:
-
From the Recurring Schedule drop down menu, select Enter Schedule. The Repeat pop-up window is displayed.
-
From the Count drop-down menu, select a recurrence frequency of either Weekly or Monthly.
-
In the text field, enter the interval. Enter 1 if you want the schedule to run every week, or every month.
-
For a Weekly frequency, select one or more days of the week. For example, Tuesdays and Thursdays.
-
For a Monthly frequency, choose one of the following options:
-
Day of month: Select one or more days of the month. For example, the 15th and the 30th.
-
Day of week: Select one or more days of the week, for each of the four weeks within a month. For example, the second Wednesday of the month.
-
-
Click Confirm. The system adds the new schedule to the Recurring Schedule drop-down menu.
Define the Advanced Tier Rule Condition
The use of a condition in an Advanced Tier Rule is optional. If you don't define a condition, the Advanced Tier Rule is assumed to always apply.
To define the condition for an Advanced Tier Rule:
-
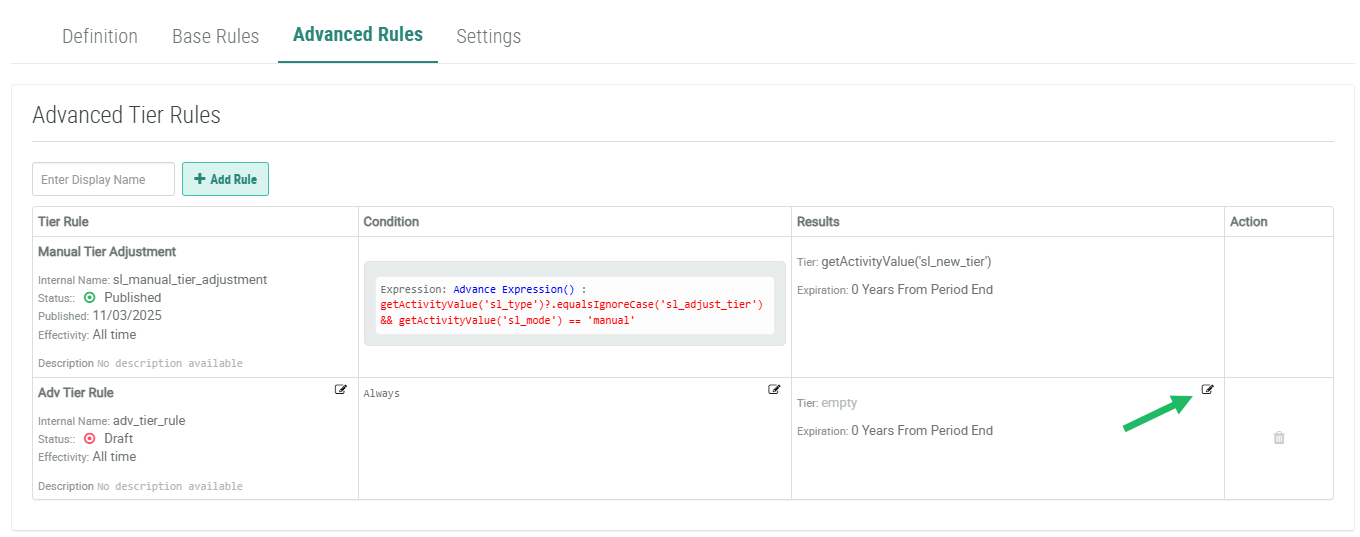
Find the desired Advanced Tier Rule on the Advanced Rules tab.
-
Click the Edit icon within the Condition column. The Conditions pop-up window is displayed.

-
Click the Add icon, then select Add Rule. The platform adds a new blank row.
-
The first drop-down menu is populated with all of the different object types in Loyalty that are available for use. From this drop-down menu, select one of the following object types to expand it and see the available options:
This option allows you to define a logical statement based on a value in a Member Preference.
-
From the menu, select the desired Member Preference.
-
Select a mathematical operator.
-
Enter or select a value.
This option allows you to define a logical statement by performing a mathematical calculation on a selected Activity Type.
-
From the menu, select the desired calculation method: Aggregate, Count, or Recency.
-
From the second drop-down menu, select the desired Activity Type.
-
Select a mathematical operator.
-
Enter or select a value.
-
Based on the selected calculation method, the platform provides the option to enter additional criteria:
-
Count: Define a time period, such as "Is In Last 3 Months." The use of a time period is optional, but recommended to improve system performance.
-
Aggregate: Select how to perform the aggregation: either by picking an Attribute on which to aggregate, or by entering a Groovy expression. Select the Aggregate Function: Sum, Minimum, or Maximum. Define a time period, such as "Is In Last 3 Months." The use of a time period is optional, but recommended to improve system performance.
-
This option allows you to define a logical statement using a Member's history of Metric usage.
-
From the menu, select the desired usage type: Balance, Earn, Expire, or Redeem.
-
From the second drop-down menu, select the desired Metric.
-
Select a mathematical operator.
-
Enter or select a value.
-
For the Earn, Expire, and Redeem Metric usage types, define a time period, such as "Is In Last 3 Months." The use of a time period is optional, but recommended to improve system performance.
This option allows you to define a logical statement by referencing either a Lookup table or a Member Function.
-
From the menu, select either Lookup or Function.
-
From the second drop-down menu, select the desired Lookup table or Member Function.
-
Select a mathematical operator.
-
Enter or select a value.
-
If you selected a Lookup table and it has Parameters defined, select the Attribute on which to match.
-
If you selected a Member Function and it has Arguments defined, select the Attribute on which to match.
This option allows you to define a logical statement using a Groovy expression.
-
From the menu, select Advanced Expression.
-
In the code editor field, enter the desired Groovy expression.
This option allows you to define a logical statement by referencing a Custom Object.
-
From the menu, select either the desired Custom Object.
-
Select a mathematical operator.
-
Enter or select a value.
-
Optionally, define a Condition that limits what records from the Custom Object are included.
-
Repeat the above steps as needed to define more Rules. Optionally, to delete a Rule, click the Delete icon next to it.
-
Once you define more than one Rule, select the logical operator from the Include customers that meet drop-down menu:
-
All of the following: Use an 'AND' operator such that all Rules must be true for a record to be selected.
-
Some of the following: Use an 'OR' operator such that at least one of the Rules must be true for a record to be selected.
-
-
Optionally, you can also organize Rules into Rule Groups. A Rule Group allows you to build more complex selection criteria. To create a Rule Group, click the Add icon, then select Add Rule Group. The platform creates a Group, which is represented visually as a nested box with its own operator and Add icon. Within this Group box, click the Add icon to define the Rule (or Rules) using the same process as described above. Use the toggle within the Group box to define the logical operator for the Rules within the Group. To delete an entire Rule Group, click the Delete icon just above the nested box representing the Group.
Note: By clicking the Group button inside the Group box, you can create "nested" groups.
-
As you define Rules through the user interface, the platform builds a Groovy expression. To see this Groovy Expression, click Show Expression. The Show Expression pop-up window is displayed. When finished, click Close.
-
Optionally, to delete a condition, click Remove Condition.
-
Optionally, to define another condition, click Add Condition and repeat the above steps. Multiple conditions are always joined with an AND operator.
-
Click Save.
Define the Advanced Tier Rule Result
The result of an Advanced Tier Rule defines what happens when the condition is satisfied (that is, what Tier the Member is awarded), and optionally also an expiration date.
-
Find the desired Advanced Tier Rule on the Advanced Rules tab.
-
Click the Edit icon within the Results column. The Edit Tier Rule pop-up window is displayed.
-
The Tier option controls the Tier to which a Member is assigned when the condition for this Advanced Tier Rule is satisfied. Next to Tier, select either:
-
Simple: From the drop-down menu, select the desired Tier.
-
Advanced: For more sophisticated logic, enter a Groovy expression in the text field.
-
-
The Expiration option controls how long the new Tier assignment applies to the Member. The expiration should not be confused with the Effectivity Period, which controls the overall lifespan of the Advanced Tier Rule. Next to Expiration, select one of the following:
-
Default: Use the program's default Tier expiration setting (see Configure Tier Scheme Settings for details on how to define this value).
-
On Date: Enter the date (in MM/DD or MM/DD/YYYY format) when this Advanced Tier Rule expires.
-
From Tier Change: Define a relative time period in days, months, or years, for how long the new Tier assignment applies, starting with the date the Member's Tier assignment changed.
-
-
Click Save.