Select the Offers in an Offer Campaign
An Offer Campaign comprises one or more Offers arranged into a prioritized sequence. This sequence controls which Offers are displayed first, second, third, and so forth when a Member views the Offers on your website or mobile app. The Offers tab of the Offer Campaign Details is used to select the Offers to include in the Campaign, and also to define their priority sequence.
Note: An Offer can be included in only one Offer Campaign.
Select Offers
The Loyalty platform provides several ways of selecting the Offers to included within an Offer Campaign: select manually, define a matching condition, or include all available Offers.
Note: In addition to the selection methods described below, you can also add an Offer to an Offer Campaign from the Definition tab oft the Offer Details screen. See View an Offer for more information.
Manually Select Offers
To manually select the Offers to include in an Offer Campaign:
-
Select Campaigns from the top navigation bar, then select Campaigns > Campaigns from the side navigation menu. The Offer Campaigns screen is displayed.
-
Search for and select the desired Offer Campaign (see Search for an Offer Campaign for more information on the available search options). The Offer Campaign Details screen is displayed, with the Objective tab selected by default.
-
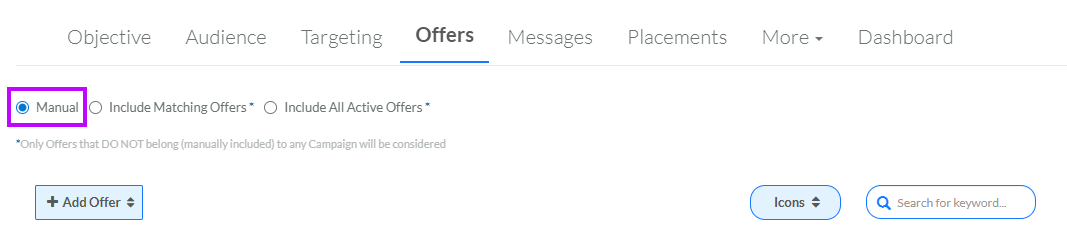
Select the Offers tab.
-
Select Manual. If you had previously selected Offers for this Offer Campaign, the platform displays a dialog box warning you that changing options will remove any previously selected Offers; click OK.
-
Click Add Offer, then select one of the following options:
This option lets you create an Offer from scratch from within the Offer Campaign.
-
Select Create Offer. The Create Offer pop-up window is displayed.
-
In the text field, enter a name for the new Offer.
-
Click Create Offer. The platform creates a new "empty" Offer of type No Action and displays it within the Offers tab.
-
Repeat the above steps as needed to create additional Offers. By default, the Offers are displayed in Icon View mode. See Change View Options below for details on the different ways of viewing the selected Offers.
Note: You will need to navigate to the Offer Details screen to configure the full details of a new Offer (see View an Offer for more details).
This option lets you browse from a menu of all available Offers.
-
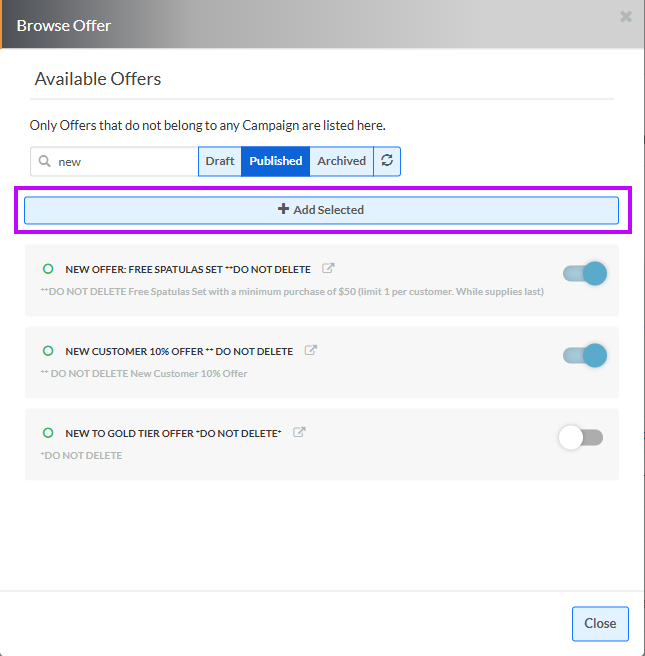
Select Browse Offer. The Browse Offer pop-up window is displayed and populated with a list of all Offers that have not manually been added to another Offer Campaign.
-
Optionally, filter the list by name by entering all or part of the Offer name in the Label Filter text field.
-
Optionally, filter the list by Offer status by selecting one of the Status options: Draft, Published, or Archived.
-
Next to the desired Offer, click the toggle switch to On. Repeat this step as needed for each Offer you want to add to the Offer Campaign.
-
Click Add Selected.
-
Repeat the above steps as needed to search for and select additional Offers.
-
When finished, click Close.
-
The platform displays all the selected Offers within the Offers tab. By default, the Offers are displayed in Icon View mode. See Change View Options below for details on the different ways of viewing the selected Offers.
Define Offer Matching Conditions
For Offer Campaigns with many Offers, adding each Offer manually can be a time-consuming process. The best practice in this scenario is to assign consistent Tags or Offer Categories to the desired Offers, then add the Offers to the Campaign based on the Tag and / or Offer Category.
Note: Offers that have manually been assigned to another Offer Campaign will not be added to this Offer Campaign, even if they otherwise meet the defined Offer matching conditions.
-
Select Campaigns from the top navigation bar, then select Campaigns > Campaigns from the side navigation menu. The Offer Campaigns screen is displayed.
-
Search for and select the desired Offer Campaign (see Search for an Offer Campaign for more information on the available search options). The Offer Campaign Details screen is displayed, with the Objective tab selected by default.
-
Select the Offers tab.
-
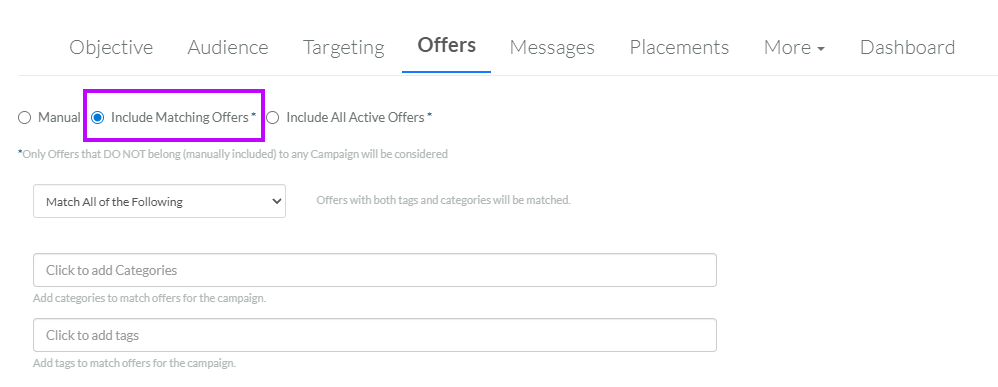
Select Include Matching Offers. If you had previously selected Offers for this Offer Campaign, the platform displays a dialog box warning you that changing options will remove any previously selected Offers; click OK.
-
From the drop-down menu, select the logical operator to apply if you define multiple Offer matching conditions:
-
Match All of the Following: An Offer must match both the Tag and the Category conditions (that is, an AND operator).
-
Match Any of the Following: An Offer must match either the Tag or the Category conditions (that is, an OR operator).
-
Match all Except the Following: An Offer must match neither the Tag nor the Category conditions (that is, a NOT operator).
-
-
Optionally, you can select Offers based on their inclusion in an Offer Category. From the drop-down menu, select one or more Offer Categories.
-
Optionally, you can select Offers based on their assigned Tag value. In the text field, select one or more Tag values.
-
The platform displays all the selected Offers within the Offers tab. By default, the Offers are displayed in Icon View mode. See Change View Options below for details on the different ways of viewing the selected Offers.
Include All Offers
The platform allows you to automatically include all available Offers in the Offer Campaign. For an Offer to be considered available, it must not be manually assigned to another Offer Campaign, it must have a status of Published, and it must be within its Effectivity Period.
To automatically include all available Offers in this Offer Campaign
-
Select Campaigns from the top navigation bar, then select Campaigns > Campaigns from the side navigation menu. The Offer Campaigns screen is displayed.
-
Search for and select the desired Offer Campaign (see Search for an Offer Campaign for more information on the available search options). The Offer Campaign Details screen is displayed, with the Objective tab selected by default.
-
Select the Offers tab.
-
Select Include All Active Offers. If you had previously selected Offers for this Offer Campaign, the platform displays a dialog box warning you that changing options will remove any previously selected Offers; click OK.

-
The platform displays all the available Offers within the Offers tab. By default, the Offers are displayed in Icon View mode. See Change View Options below for details on the different ways of viewing the selected Offers.
Change View Options
The platform provides several options for how selected Offers are displayed on the Offers tab. You can toggle between Icon View and List View, or you can view the Offer content defined in the Content Editor for a specified Layout.
In addition, you can filter the selected Offers by entering a text string in the Search for Keyword field. The platform displays only the Offers that contain this text string within the Offer's display name.
To select a view mode, click the View Mode button, then select one of the following:
-
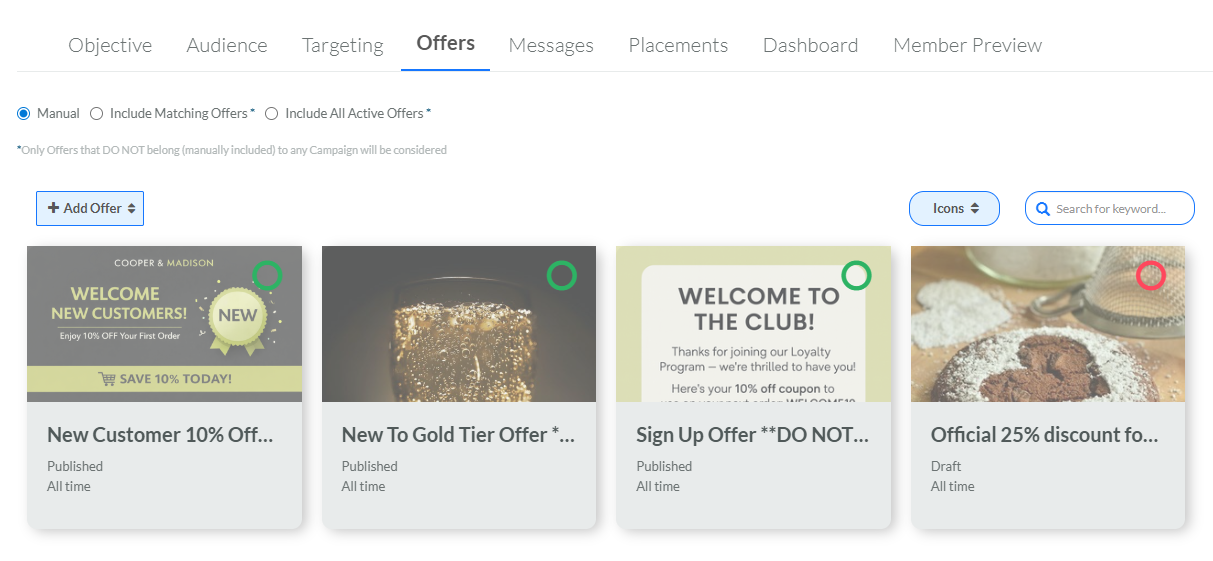
Icons: Selected Offers are displayed as "cards," with the Offer's thumbnail image at the top, and the Offer name, status, and effectivity period displayed beneath the image. In addition, the platform displays a colored circle over the thumbnail image that indicates the Offer status: green for Published, orange for Archived, and red for Draft. Icon View also lets you manually rearrange the Offers into the desired sequence (see Rearrange the Offers in an Offer Campaign for more information on that process). If you click an Offer card, the platform displays the Offer Details panel; see View or Edit Offer Properties below for more information on this panel.
-
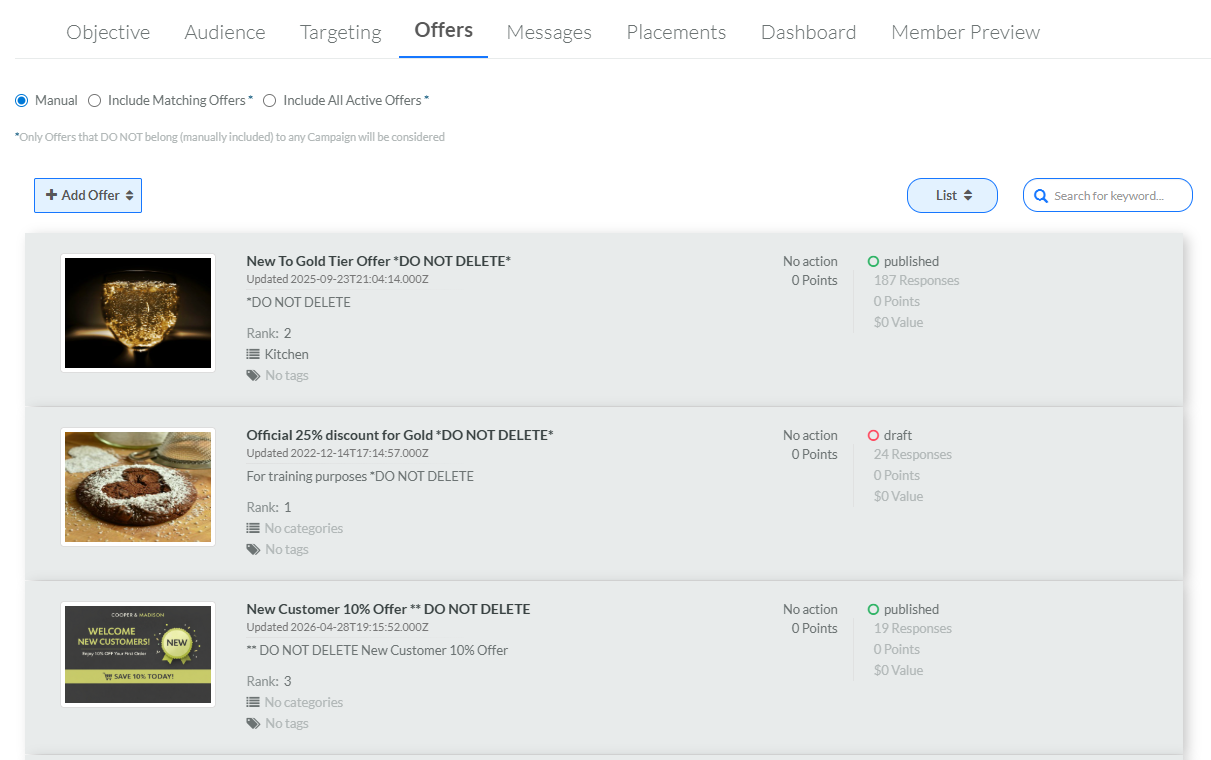
List: Selected Offers are displayed in a list, similar to the Offers screen. List Mode displays more information about each Offer than Icon Mode does, including each Offer's type, rank, Offer Categories, Tags, number of Offer Responses, and so forth. If you click an Offer in the list, the platform displays the Offer Details panel; see View or Edit Offer Properties below for more information on this panel.
-
Layout: Selected Offers are displayed using the content defined in the Content Editor for a specific Layout (see Working with Layouts for more information on Layouts). If you click an Offer, the platform displays the Offer Details panel; see View or Edit Offer Properties below for more information on this panel.

View or Edit Offer Properties
The Loyalty platform allows you to edit the basic properties of an Offer directly from the Offers tab of the Offer Campaign Details screen, rather than having to navigate to the Offer Details screen.
To view or edit the properties of an Offer:
-
Select Campaigns from the top navigation bar, then select Campaigns > Campaigns from the side navigation menu. The Offer Campaigns screen is displayed.
-
Search for and select the desired Offer Campaign (see Search for an Offer Campaign for more information on the available search options). The Offer Campaign Details screen is displayed, with the Objective tab selected by default.
-
Select the Offers tab.
-
By default, the selected Offers are displayed in Icon Mode. Optionally, select a different View Mode as described above.
-
Click the desired Offer. The Offer Details panel is displayed along the right-hand side of the Offers tab.
-
Many of the fields in the Offer Details panel can be edited. To change a value in a field, click into the field. The field becomes editable. Make the desired changes, then click the Save icon. Optionally, to discard the changes without saving, click the Close icon.
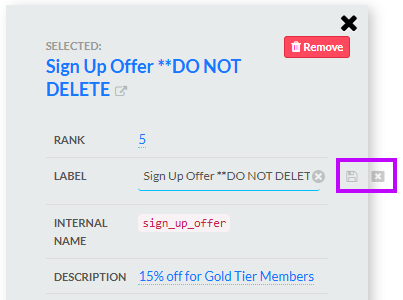
Note: Not all Offer properties can be edited directly from the Offer Campaign Details screen. For some properties, you will need to edit the Offer from the Offer Details screen. To navigate directly to the Offer Details screen for the selected Offer, click its name within the panel.
-
To close the Offer Details panel, click the Close icon in the top-right corner of the panel.
Remove an Offer from an Offer Campaign
To remove an Offer from an Offer Campaign:
-
Select Campaigns from the top navigation bar, then select Campaigns > Campaigns from the side navigation menu. The Offer Campaigns screen is displayed.
-
Search for and select the desired Offer Campaign (see Search for an Offer Campaign for more information on the available search options). The Offer Campaign Details screen is displayed, with the Objective tab selected by default.
-
Select the Offers tab.
-
Click the desired Offer. The Offer Details panel is displayed along the right-hand side of the Offers tab.
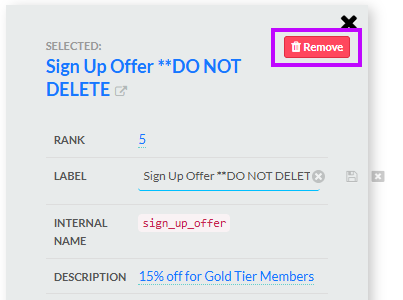
-
Within the Offer Details panel, click Remove.