Setting Up a Custom Domain
Sending a consistent message is important for establishing familiarity with your audience and consistent branding across all digital touch points helps you build brand equity over time. Custom domains that allow you to publish experiences to one or more of your brand's domains instead of using our standard system URLs like https://xd.wayin.com or https://x.wayin.com.
This guide is for technical users; it provides detailed technical instructions to help you and your IT team take advantage of this feature.
Set up
In this section, we’ll walk you through the steps that your IT team will need to follow in order to set up a subdomain that can be used by Grow. In summary, we will:
-
Choose a subdomain of a primary domain that your company owns
-
Make a support request to receive certain configuration details your IT team will need
-
Help your IT team configure the subdomain in your company’s DNS records
-
Test everything is working
Choosing your custom domain
In order to publish experiences to a custom domain, you will need to make sure that you own the primary (root) domain that you wish to configure for the purpose of serving Grow. You probably will already have one or more root domains registered for your brand (e.g. myCompany.com) which your IT Team will be managing for you. You can use one or more of these or choose to register a new one should you want to.
Please speak to your IT team for further details as you have a lot of options when it comes to purchasing and registering a new root domain. Once you have identified the domain you wish to use and confirmed ownership, please follow the instructions in below.
Setting up a custom domain
Follow the steps below to assign a custom domain to your Grow account:
-
Decide on the subdomain you'd like to use with Grow. e.g. promos.mycompany.com or competitions.mycompany.com
Note:
-
We don’t support Apex domains, but only subdomains that can be configured as a CNAME record (e.g. https://promos.mycompany.com not https://mycompany.com)
-
When setting up a custom domain, there is a 64 character limit for the subdomain name.
-
-
Contact Support and initiate a support request to register a custom domain for your chosen Grow account. Specify the full domain, including any subdomain you wish to use, and the Grow account you wish to add it to
-
We will provide you with details to send to your IT team or the technical team managing your DNS. This information will include a request to create a CNAME DNS record that points to the Experiences platform CDN, e.g. “j.mycompany.global.fastly.net”
-
Once your IT team updates your DNS, it can take 24-48 hours for these changes to take effect
-
Grow will generate and manage a TLS certificate for the custom domain automatically, your IT team does not need to provide one. This will ensure a secure icon or lock is displayed in the browser to consumers when visiting your custom domain.
-
-
Once your IT team has completed configuration of DNS please inform the Grow Support Team so they can validate that everything has been configured successfully.
Once setup is complete, the custom domain will be available within your Grow Experiences account to use. To find out how to publish a new experience to a custom domain, please refer to this article.
Important: You or your IT Team will be responsible for maintaining the ownership of the subdomain for the length of the time that you’d like to use it as a custom domain with Grow.
How to view custom domains associated with your account
Follow the steps below to view all the custom domains associated with your account:
-
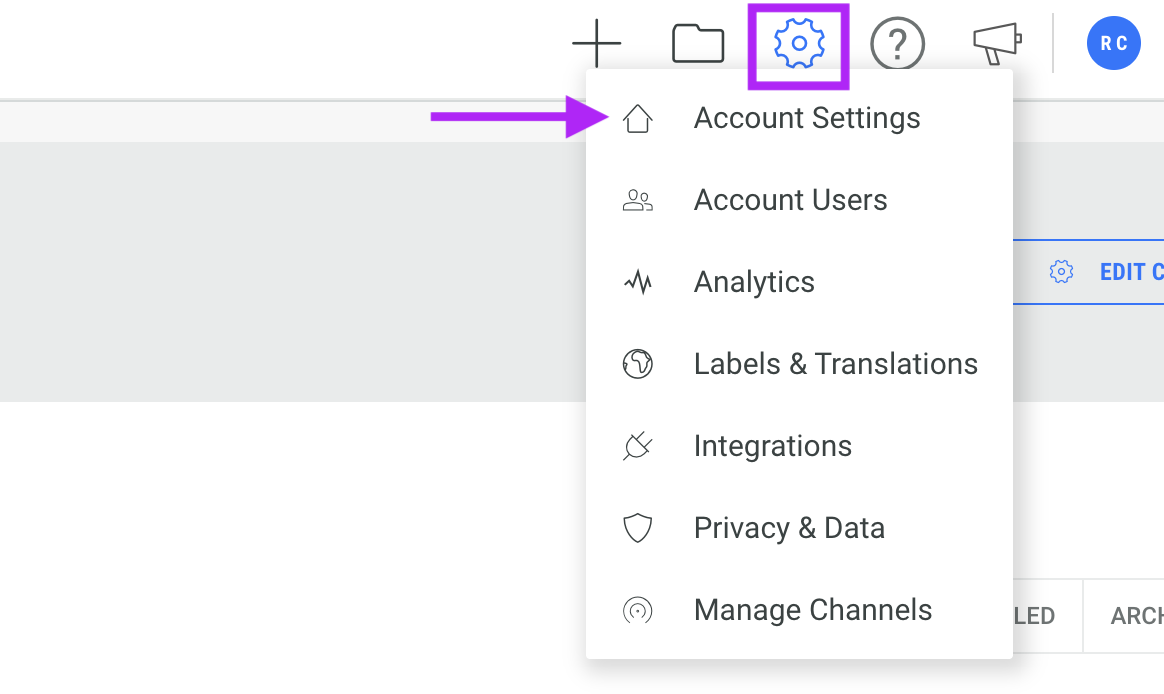
Hover over the cog icon in the top right-hand corner of Grow.
-
Select Account Settings (this option is only visible if you are a Publisher or Admin).
-
Scroll down to the bottom of the page to view the custom domains registered with your account.
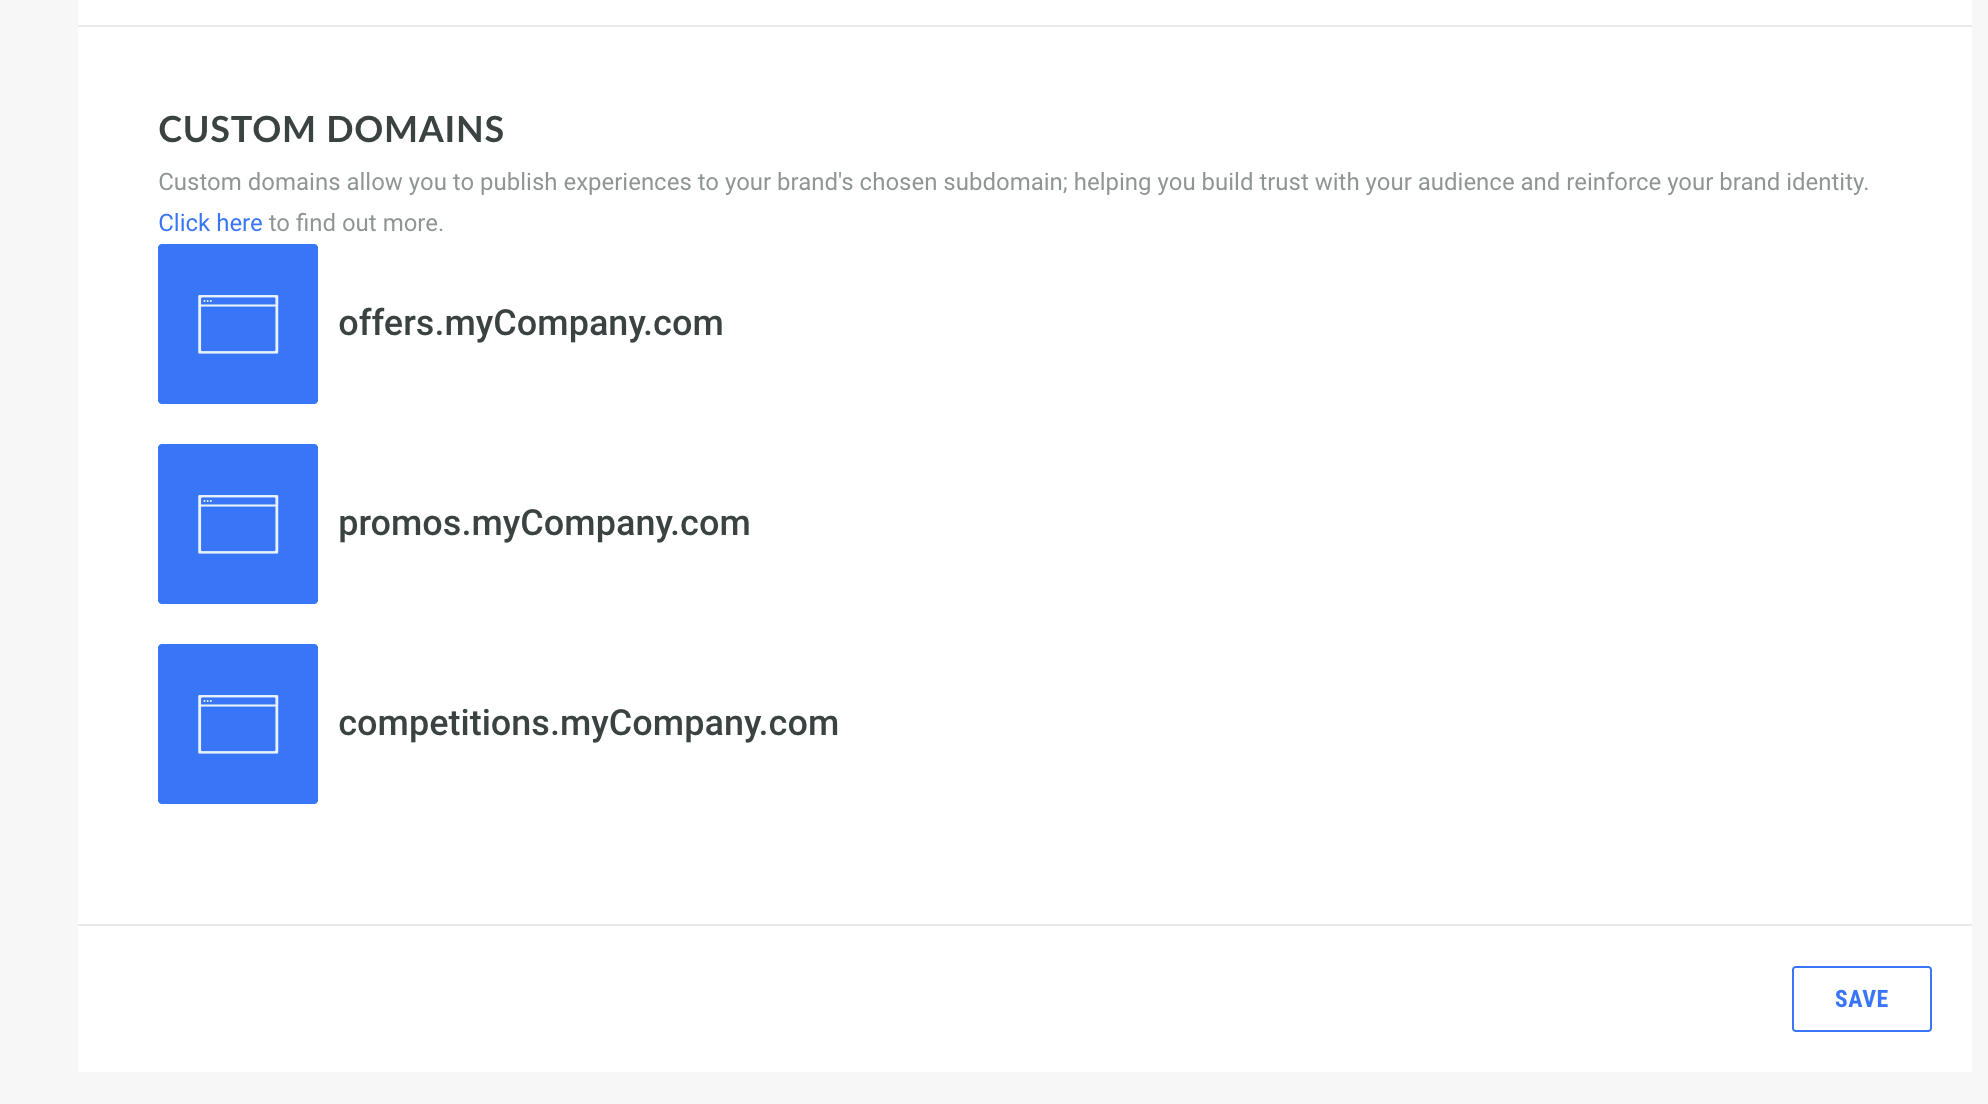
If you would like to add new custom domains to your account, you will need to consult your IT team and follow this guide.